XM6

 Installation
Now that you have determined where to place the antenna, you have three different mounting options. Each option is described below.
Wall Mount
Please determine where to mount the antenna. Once the mounting location has been determined, take a pencil and mark through the bracket, onto the house wall, the four screw locations. Then set the mounting bracket down and
Roof Mount
|
| Installation |
|
|
|
XM6 | We recommend mounting the antenna on a roof as high | |
up as possible as shown on page 4. The antenna should | ||
not be blocked by an obstruction like trees or a chimney. | ||
| Once you have determined your mounting location, place | |
| the mounting bracket on that location on the roof. Take | |
| your drill and | |
| the top two holes on the mounting bracket. Screw in two | |
| of the #10 screws included with this package, through the | |
| mounting bracket into the | |
| Repeat this step for the bottom two holes. At this point, | |
| move onto the Adjustment section of the owner’s manual | |
| on page 6. | |
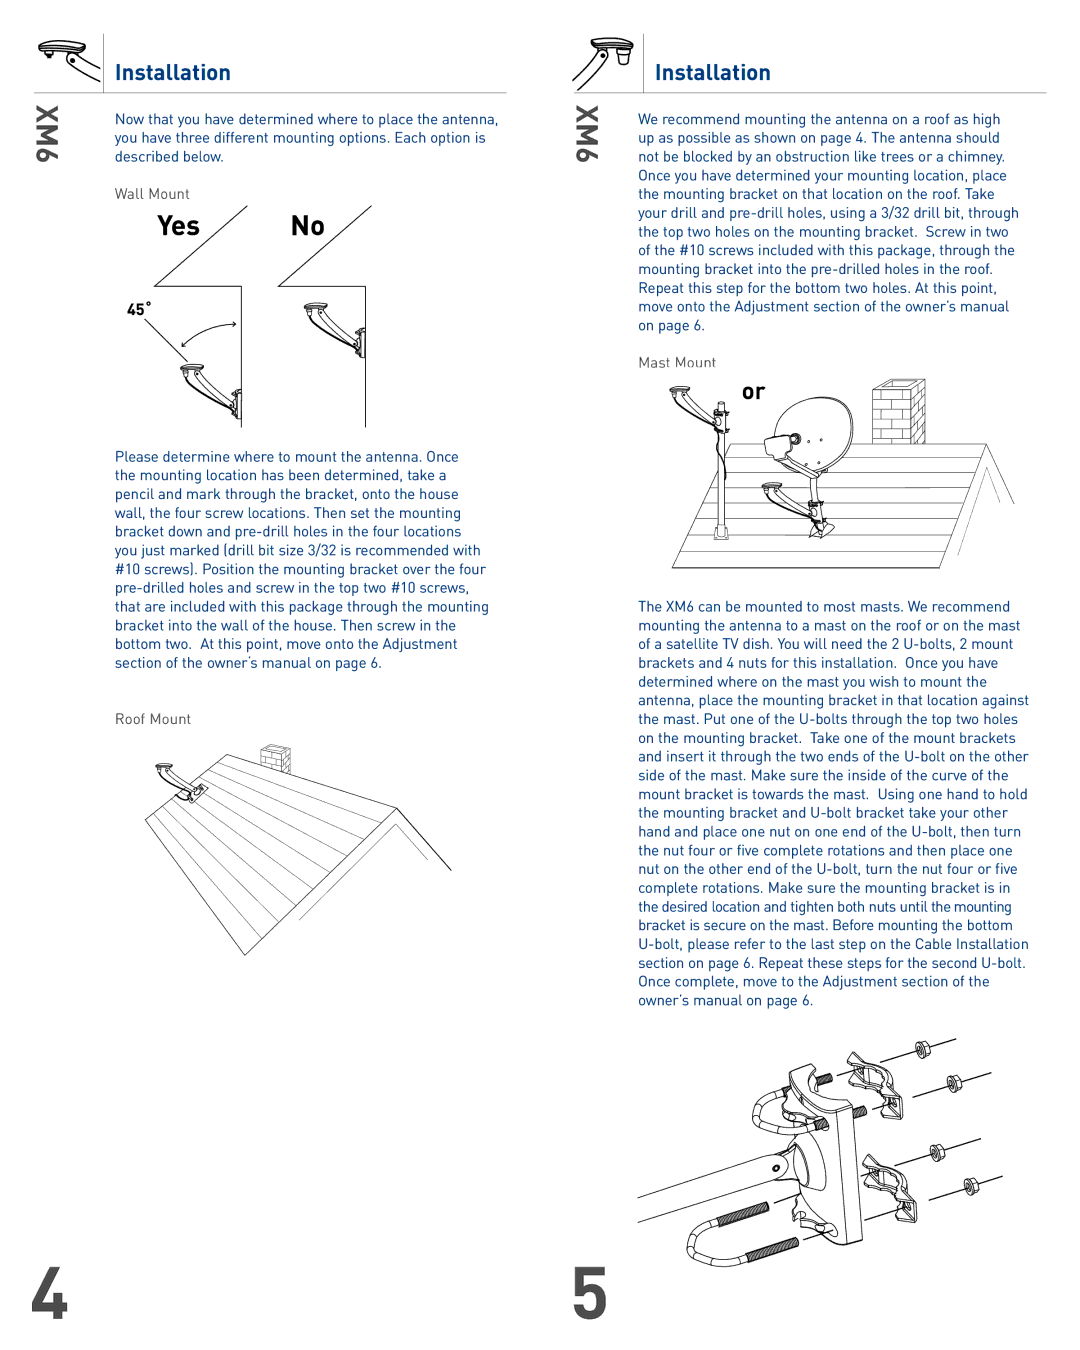
Mast Mount
or |
The XM6 can be mounted to most masts. We recommend mounting the antenna to a mast on the roof or on the mast of a satellite TV dish. You will need the 2
4 | 5 There are two areas of adjustments on the antenna, the To |