1.Strip the insulating jacket of the cable back about .75 inch (18 mm) to reveal the individual hot and ground wires within.
2.Remove a small amount of each individual wire’s insulation (approximately .25 inch, 6 mm).
3.On the Euroblock plug, use a small screw driver to loosen and open the sockets that will receive the individual wires.
4.Insert the audio cable’s hot (+) wire into the matching socket on the Euroblock plug.
5.Insert the audio cable’s cold
6.Insert the audio cable’s ground wire into the matching socket on the Euroblock plug.
7.Tighten the screws on the wire sockets to secure the individual wires.
8.Plug the completed Euroblock plug into the desired output channel on the
9.At the other end of the cable, connect the hot (+) wire to the unbalanced device’s hot connector.
10.Connect the cold
11.Connect the completed cable to your audio device.
Plug the completed Euroblock connectors into the
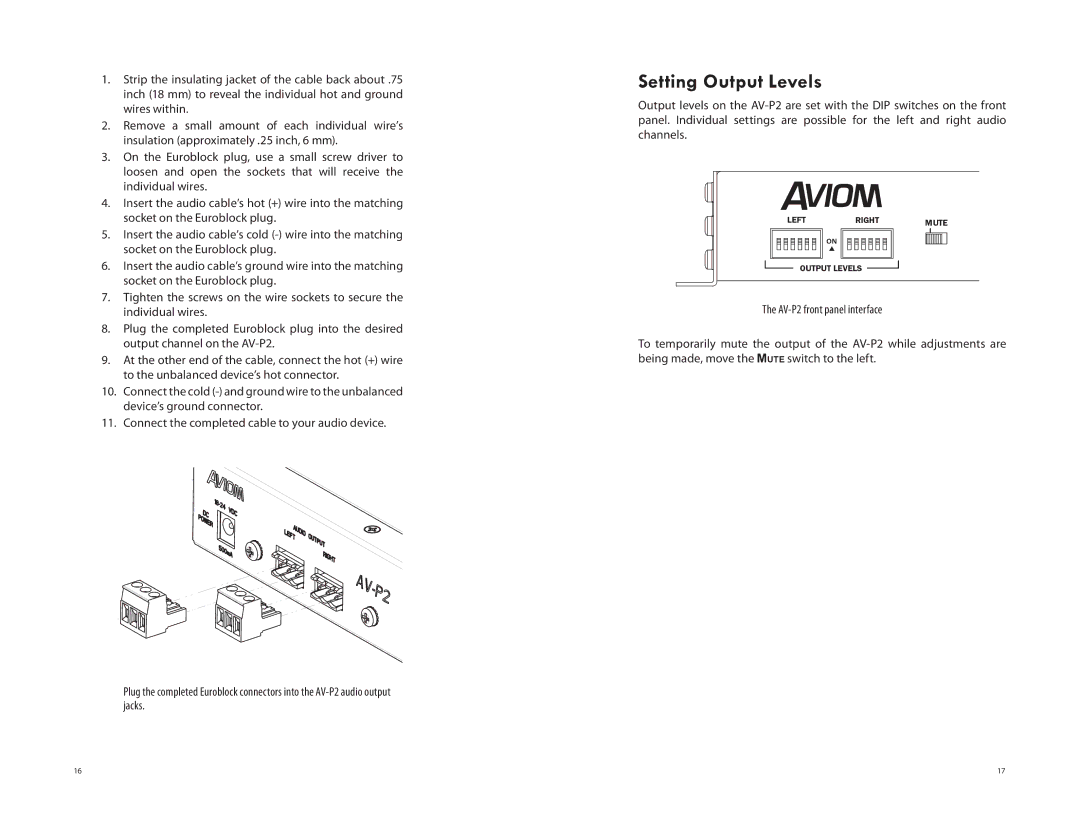
Setting Output Levels
Output levels on the
LEFT RIGHT MUTE
ON
OUTPUT LEVELS ![]()
The
To temporarily mute the output of the
16 | 17 |