Quick Installation Guide
This guide covers the installation and basic setup procedures for the AXIS PrintPoint 140 BJC. If you need more detailed instructions, please refer to the AXIS PrintPoint 140 BJC User’s Manual.
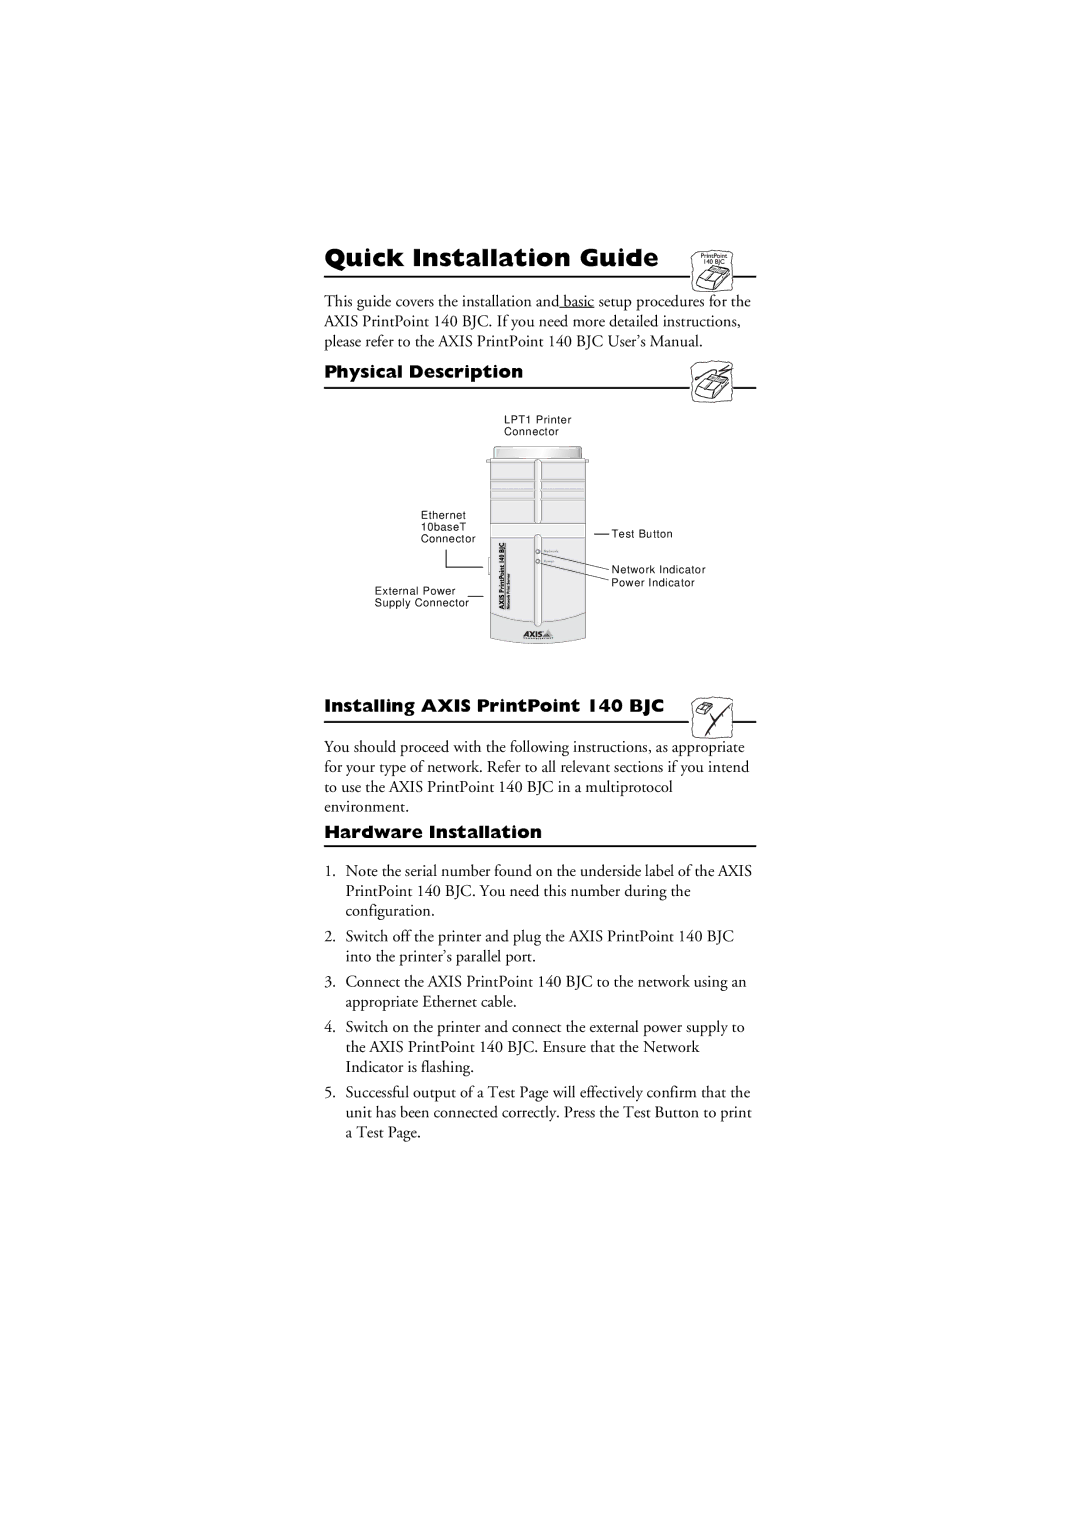
Physical Description
LPT1 Printer
Connector
Ethernet 10baseT Connector
External Power Supply Connector
Test Button
![]() Network Indicator Power Indicator
Network Indicator Power Indicator
Installing AXIS PrintPoint 140 BJC
You should proceed with the following instructions, as appropriate for your type of network. Refer to all relevant sections if you intend to use the AXIS PrintPoint 140 BJC in a multiprotocol environment.
Hardware Installation
1.Note the serial number found on the underside label of the AXIS PrintPoint 140 BJC. You need this number during the configuration.
2.Switch off the printer and plug the AXIS PrintPoint 140 BJC into the printer’s parallel port.
3.Connect the AXIS PrintPoint 140 BJC to the network using an appropriate Ethernet cable.
4.Switch on the printer and connect the external power supply to the AXIS PrintPoint 140 BJC. Ensure that the Network Indicator is flashing.
5.Successful output of a Test Page will effectively confirm that the unit has been connected correctly. Press the Test Button to print a Test Page.