AXIS | Page 11 |
 Adjust the image and focus
Open the Live View page in the web interface and make the following adjustments to the camera:
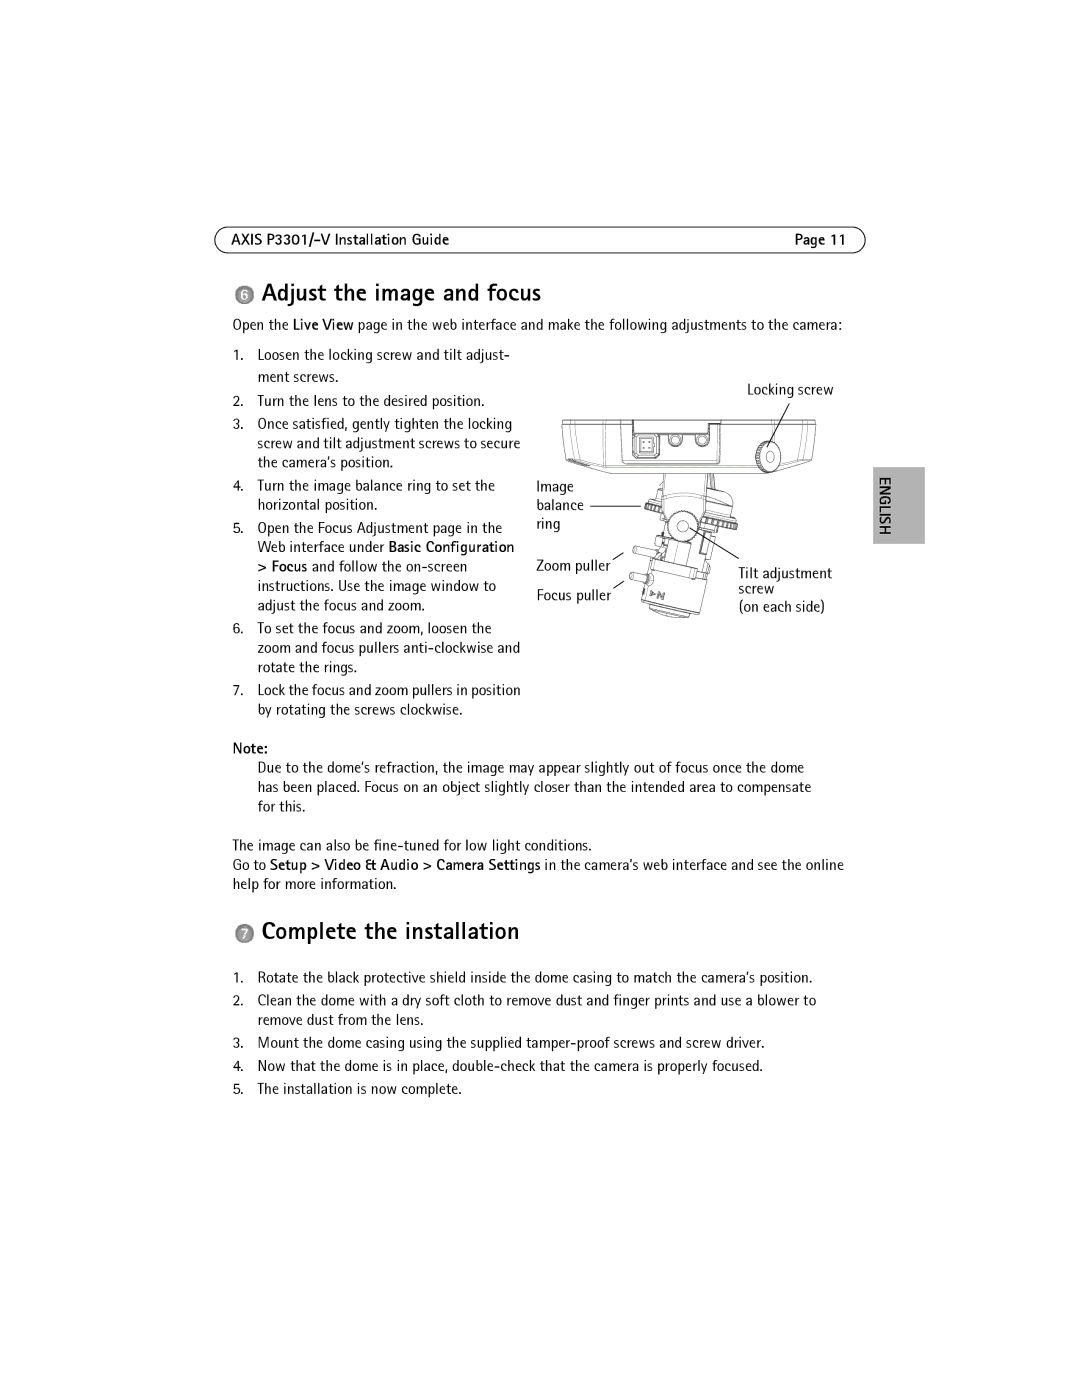
1.Loosen the locking screw and tilt adjust- ment screws.
2.Turn the lens to the desired position.
3.Once satisfied, gently tighten the locking screw and tilt adjustment screws to secure the camera’s position.
4.Turn the image balance ring to set the horizontal position.
5.Open the Focus Adjustment page in the Web interface under Basic Configuration > Focus and follow the
6.To set the focus and zoom, loosen the zoom and focus pullers
7.Lock the focus and zoom pullers in position by rotating the screws clockwise.
Locking screw
Image balance ring
Zoom puller | Tilt adjustment | |
| ||
Focus puller | screw | |
(on each side) | ||
|
ENGLISH
Note:
Due to the dome’s refraction, the image may appear slightly out of focus once the dome has been placed. Focus on an object slightly closer than the intended area to compensate for this.
The image can also be
Go to Setup > Video & Audio > Camera Settings in the camera’s web interface and see the online help for more information.
 Complete the installation
1.Rotate the black protective shield inside the dome casing to match the camera’s position.
2.Clean the dome with a dry soft cloth to remove dust and finger prints and use a blower to remove dust from the lens.
3.Mount the dome casing using the supplied
4.Now that the dome is in place,
5.The installation is now complete.