Page 8 | AXIS |
Install the hardware
Before you begin
There are a few considerations before installing the AXIS
•The AXIS
•The operating temperature range is dependent on the Hard Disk
•Install in an open area allowing for 10mm of space on all sides for cooling and ventilation
•Ensure there is proper fuse protection: 12V DC (10A) or 24V DC (5 A)
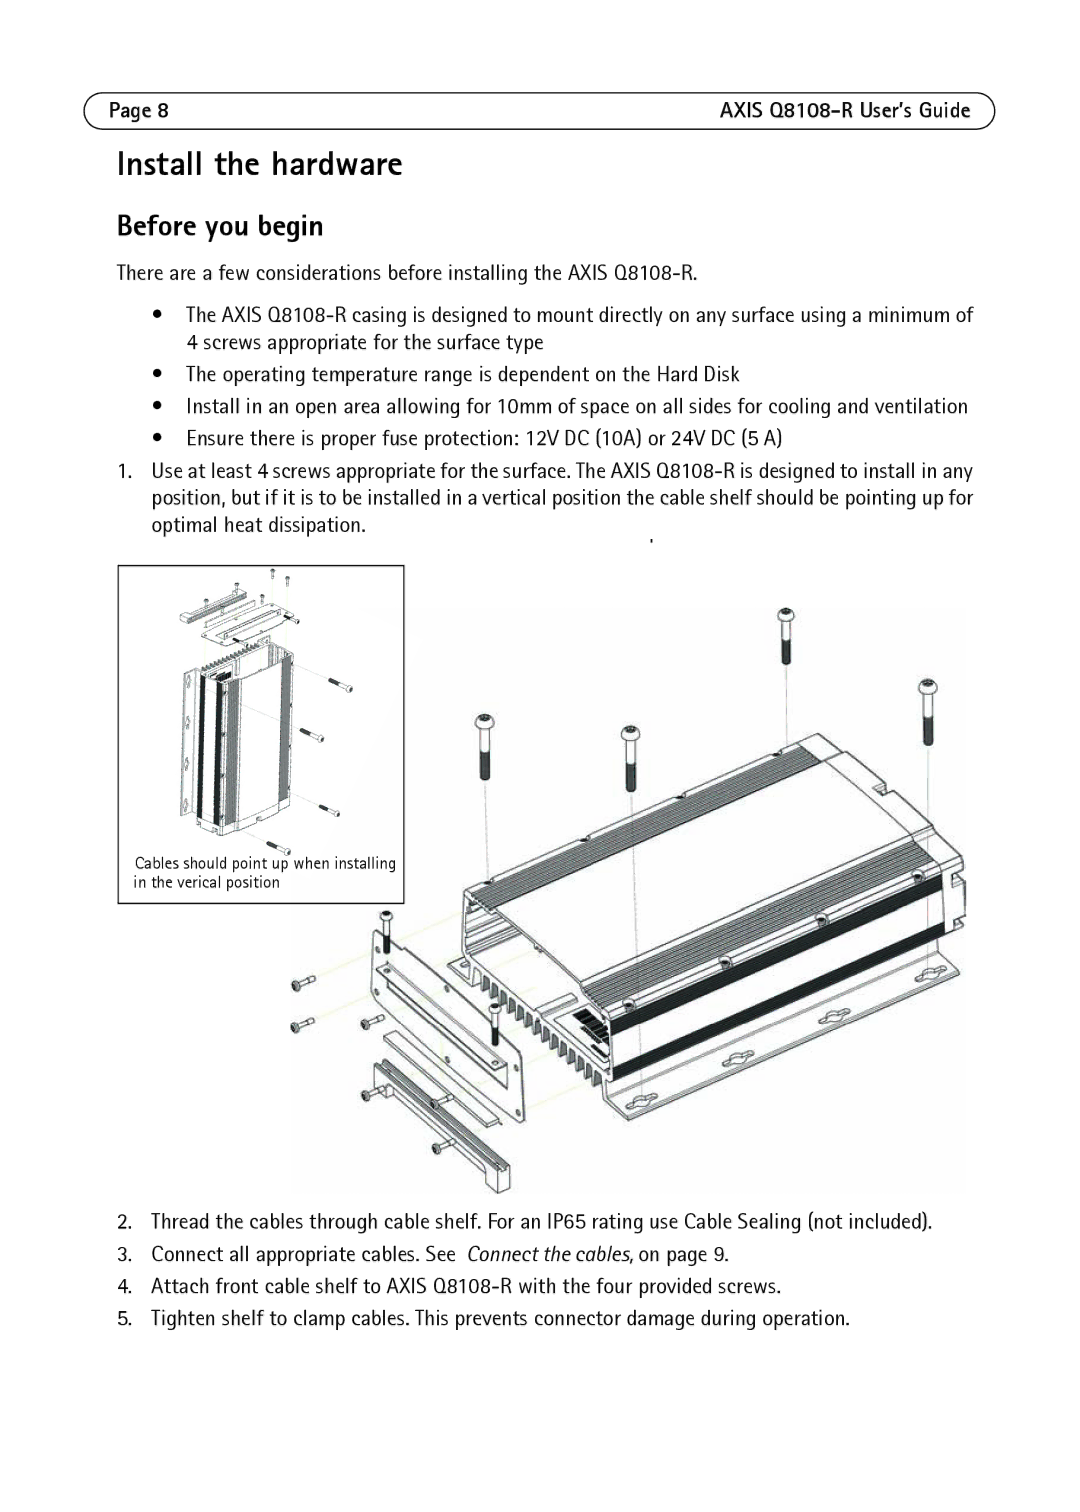
1.Use at least 4 screws appropriate for the surface. The AXIS
Cables should point up when installing in the verical position
2.Thread the cables through cable shelf. For an IP65 rating use Cable Sealing (not included).
3.Connect all appropriate cables. See Connect the cables, on page 9.
4.Attach front cable shelf to AXIS
5.Tighten shelf to clamp cables. This prevents connector damage during operation.
