Installation Instructions for Cosco® Designer/Opus 35
The Double
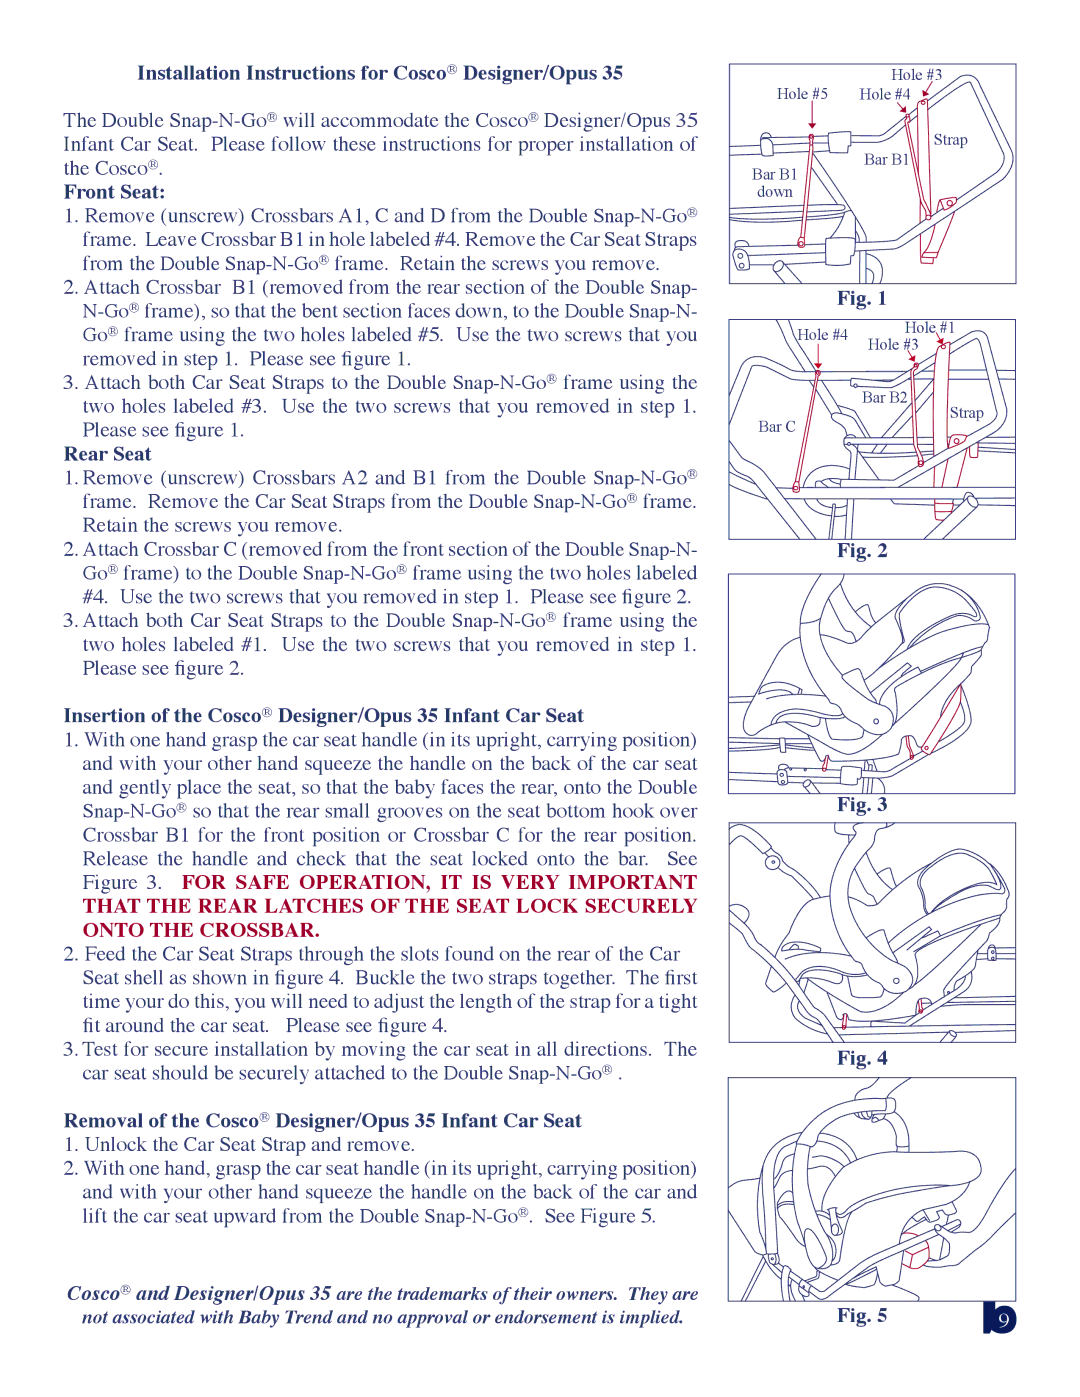
Front Seat:
1. Remove (unscrew) Crossbars A1, C and D from the Double |
frame. Leave Crossbar B1 in hole labeled #4. Remove the Car Seat Straps |
from the Double |
2. Attach Crossbar B1 (removed from the rear section of the Double Snap- |
Go® frame using the two holes labeled #5. Use the two screws that you |
removed in step 1. Please see figure 1. |
3. Attach both Car Seat Straps to the Double |
two holes labeled #3. Use the two screws that you removed in step 1. |
|
| Hole #3 | |
Hole #5 |
| Hole #4 | |
|
| Strap | |
Bar B1 |
| Bar B1 | |
|
| ||
down |
|
| |
| Fig. 1 | ||
Hole #4 | Hole #1 | ||
Hole #3 | |||
|
| ||
Bar B2 ![]()
Please see figure 1. |
Rear Seat
Bar C
Strap
1.Remove (unscrew) Crossbars A2 and B1 from the Double
2.Attach Crossbar C (removed from the front section of the Double
3.Attach both Car Seat Straps to the Double
Insertion of the Cosco® Designer/Opus 35 Infant Car Seat
1.With one hand grasp the car seat handle (in its upright, carrying position) and with your other hand squeeze the handle on the back of the car seat and gently place the seat, so that the baby faces the rear, onto the Double
THAT THE REAR LATCHES OF THE SEAT LOCK SECURELY ONTO THE CROSSBAR.
2.Feed the Car Seat Straps through the slots found on the rear of the Car Seat shell as shown in figure 4. Buckle the two straps together. The first time your do this, you will need to adjust the length of the strap for a tight fit around the car seat. Please see figure 4.
3.Test for secure installation by moving the car seat in all directions. The car seat should be securely attached to the Double
Removal of the Cosco® Designer/Opus 35 Infant Car Seat
1.Unlock the Car Seat Strap and remove.
2.With one hand, grasp the car seat handle (in its upright, carrying position) and with your other hand squeeze the handle on the back of the car and lift the car seat upward from the Double
Cosco® and Designer/Opus 35 are the trademarks of their owners. They are not associated with Baby Trend and no approval or endorsement is implied.
Fig. 2
Fig. 3
Fig. 4
|
|
Fig. 5 | 9 |