| Figure 20. |
Collection Bags |
|
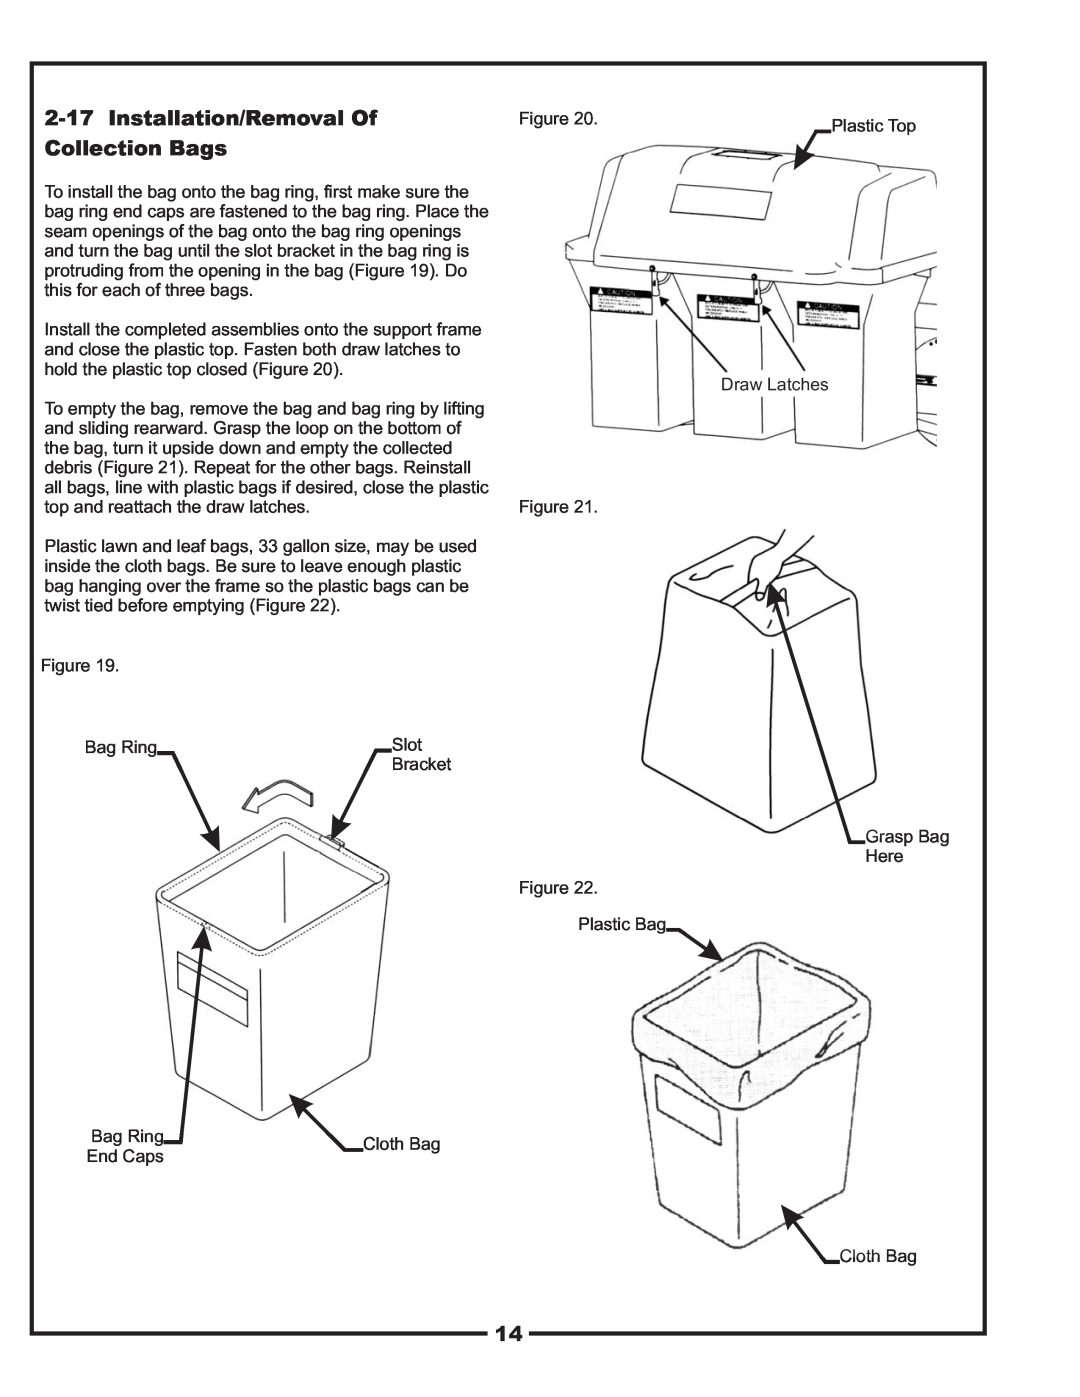
To install the bag onto the bag ring, first make sure the |
|
bag ring end caps are fastened to the bag ring. Place the |
|
seam openings of the bag onto the bag ring openings |
|
and turn the bag until the slot bracket in the bag ring is |
|
protruding from the opening in the bag (Figure 19). Do |
|
this for each of three bags. |
|
Install the completed assemblies onto the support frame |
|
and close the plastic top. Fasten both draw latches to |
|
hold the plastic top closed (Figure 20). |
|
To empty the bag, remove the bag and bag ring by lifting |
|
and sliding rearward. Grasp the loop on the bottom of |
|
the bag, turn it upside down and empty the collected |
|
debris (Figure 21). Repeat for the other bags. Reinstall |
|
all bags, line with plastic bags if desired, close the plastic |
|
top and reattach the draw latches. | Figure 21. |
Plastic lawn and leaf bags, 33 gallon size, may be used |
|
inside the cloth bags. Be sure to leave enough plastic |
|
bag hanging over the frame so the plastic bags can be |
|
twist tied before emptying (Figure 22). |
|
Figure 19. |
|
Plastic Top
Draw Latches
Bag Ring | Slot |
| Bracket |
Grasp Bag
Here
Figure 22.
Plastic Bag
Bag Ring | Cloth Bag | |
End Caps | ||
|
Cloth Bag
14 |