
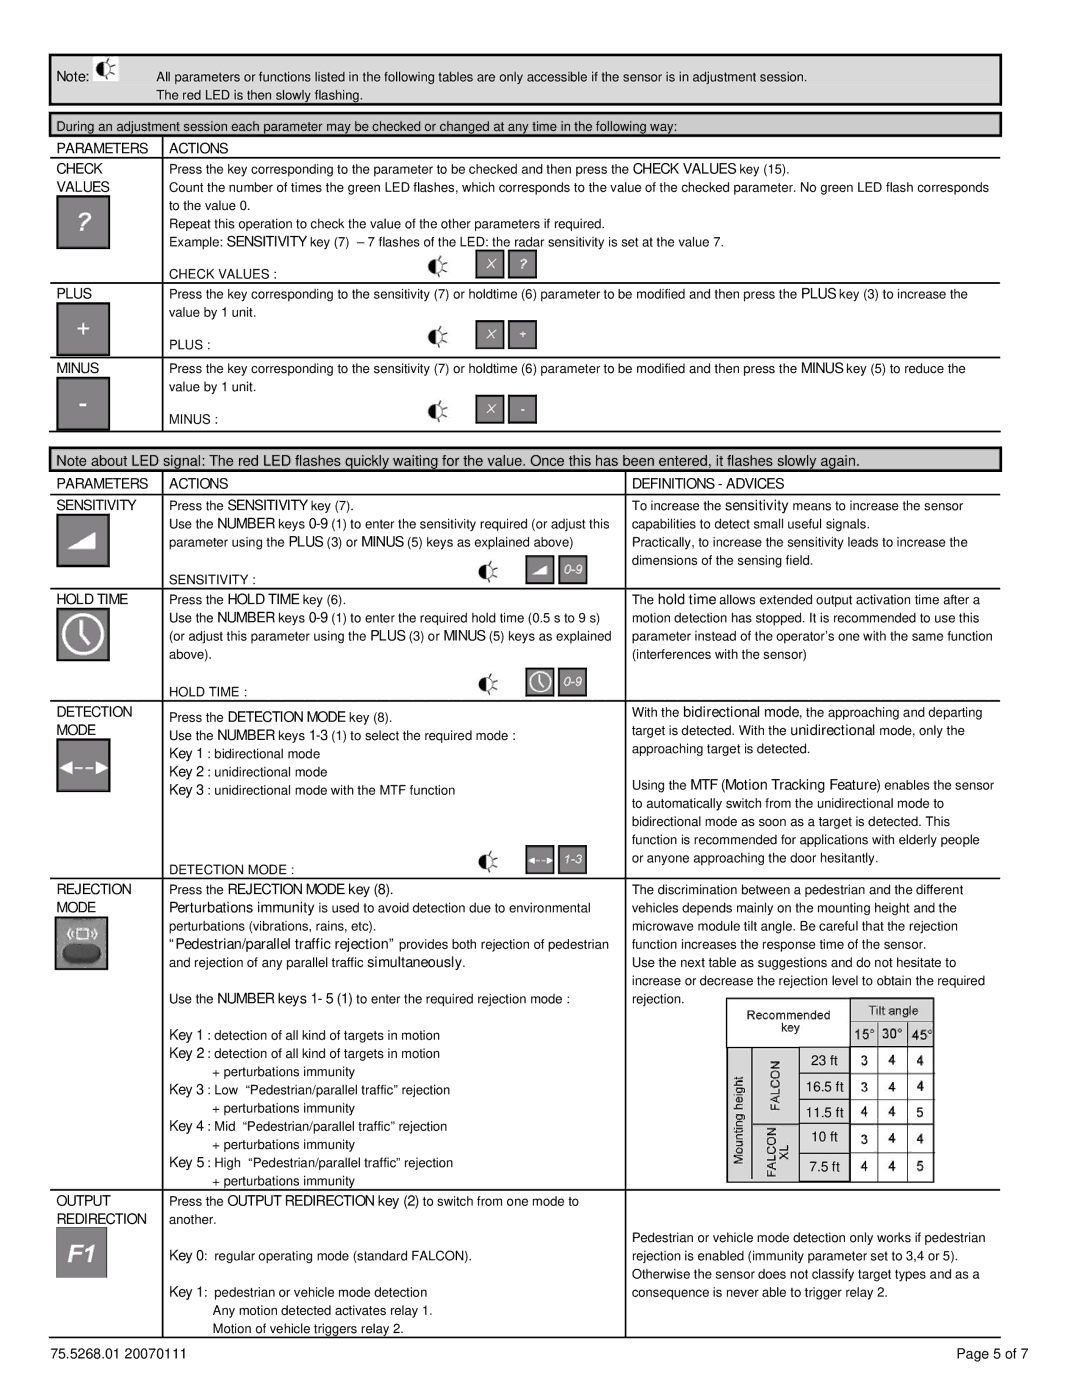
XL-DR, DR specifications
The BEA DR (Disaster Recovery) and XL-DR (Extended Disaster Recovery) systems are crucial components in modern data management and enterprise resilience strategies. These systems are designed to ensure that organizations can effectively safeguard their data, maintain operations during unforeseen events, and recover swiftly from potential threats or disasters.One of the main features of BEA DR and XL-DR is their robust data protection mechanisms. These systems utilize advanced data replication technologies that ensure real-time or near-real-time replication of critical data across multiple locations. By continuously mirroring data, organizations minimize the risk of data loss and enhance their recovery capabilities. This feature is particularly vital for businesses that cannot afford downtime, as it enables them to maintain access to their data even during a disaster.
Another significant characteristic of these systems is their scalability. BEA DR and XL-DR can be tailored to fit various organizational sizes and needs, allowing businesses to expand their disaster recovery solutions as they grow. This level of customization enables enterprises to protect their data investment effectively and adapt to changing requirements without significant overhauls in their system infrastructure.
The technology behind BEA DR and XL-DR includes sophisticated algorithms that optimize data transfer and storage. These systems employ incremental backup processes, which capture only the changes made since the last backup, reducing bandwidth usage and accelerating recovery times. Additionally, they support various storage mediums, including cloud-based solutions, facilitating flexible deployment options that align with an organization's infrastructure.
Security is also a vital aspect of these systems. BEA DR and XL-DR come equipped with encryption and access controls to protect sensitive data during transmission and storage. This is particularly important in sectors that deal with regulated data, ensuring compliance with legal and operational standards.
Furthermore, the user interface of BEA DR and XL-DR is designed for ease of use, enabling IT teams to manage disaster recovery processes without extensive training. Dashboards provide real-time monitoring and reporting features, empowering organizations to proactively address potential issues and refine their recovery strategies.
In summary, BEA DR and XL-DR systems are comprehensive solutions that provide essential features such as real-time data replication, scalability, advanced data management technologies, stringent security measures, and user-friendly interfaces. These characteristics position them as critical assets for any organization aiming to enhance its resilience against disasters and maintain uninterrupted operations.