DUAL A/B SWITCH AB200
Thank you for showing your confidence in us by purchasing the BEHRINGER AB200. This
1. CONTROLS AND CONNECTIONS
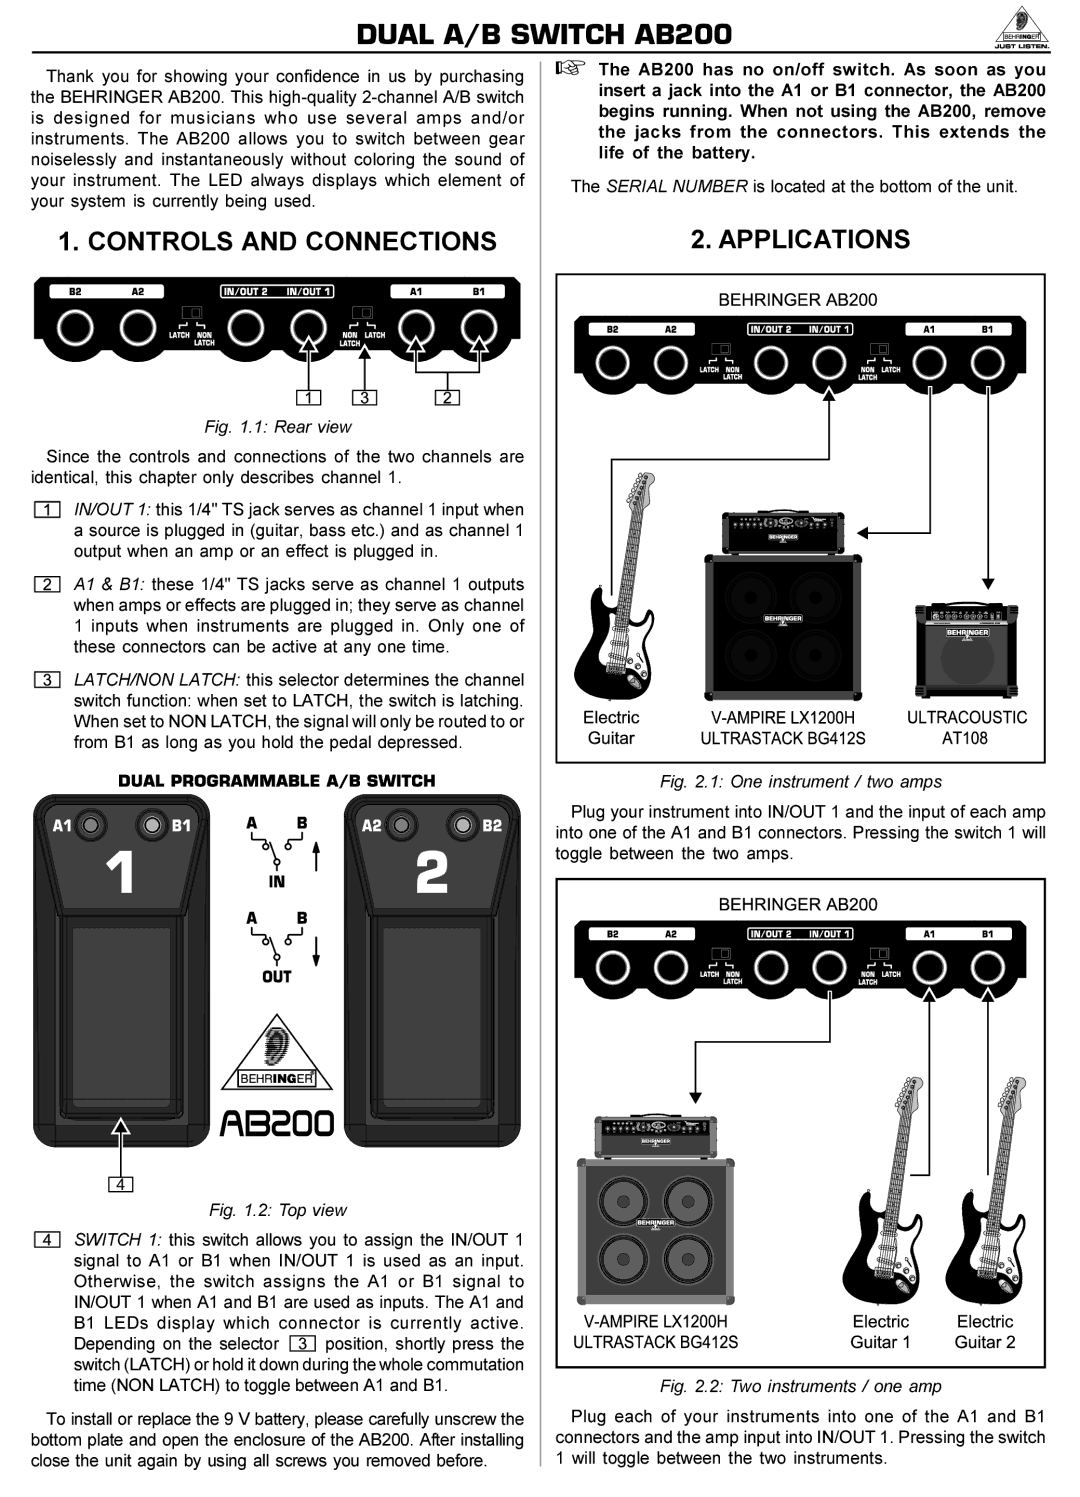
Fig. 1.1: Rear view
Since the controls and connections of the two channels are identical, this chapter only describes channel 1.
IN/OUT 1: this 1/4" TS jack serves as channel 1 input when a source is plugged in (guitar, bass etc.) and as channel 1 output when an amp or an effect is plugged in.
A1 & B1: these 1/4" TS jacks serve as channel 1 outputs when amps or effects are plugged in; they serve as channel 1 inputs when instruments are plugged in. Only one of these connectors can be active at any one time.
LATCH/NON LATCH: this selector determines the channel
switch function: when set to LATCH, the switch is latching. When set to NON LATCH, the signal will only be routed to or from B1 as long as you hold the pedal depressed.
4
Fig. 1.2: Top view
SWITCH 1: this switch allows you to assign the IN/OUT 1 signal to A1 or B1 when IN/OUT 1 is used as an input. Otherwise, the switch assigns the A1 or B1 signal to IN/OUT 1 when A1 and B1 are used as inputs. The A1 and B1 LEDs display which connector is currently active.
Depending on the selector ![]() position, shortly press the switch (LATCH) or hold it down during the whole commutation time (NON LATCH) to toggle between A1 and B1.
position, shortly press the switch (LATCH) or hold it down during the whole commutation time (NON LATCH) to toggle between A1 and B1.
To install or replace the 9 V battery, please carefully unscrew the bottom plate and open the enclosure of the AB200. After installing close the unit again by using all screws you removed before.
+The AB200 has no on/off switch. As soon as you insert a jack into the A1 or B1 connector, the AB200 begins running. When not using the AB200, remove the jacks from the connectors. This extends the life of the battery.
The SERIAL NUMBER is located at the bottom of the unit.
2. APPLICATIONS
Fig. 2.1: One instrument / two amps
Plug your instrument into IN/OUT 1 and the input of each amp into one of the A1 and B1 connectors. Pressing the switch 1 will toggle between the two amps.
Fig. 2.2: Two instruments / one amp
Plug each of your instruments into one of the A1 and B1 connectors and the amp input into IN/OUT 1. Pressing the switch 1 will toggle between the two instruments.