CX3400 specifications
The Behringer CX3400 is a versatile and highly regarded crossover that has become a staple in professional audio setups. This unit is designed to ensure optimal sound quality by efficiently distributing frequencies to appropriate loudspeakers, making it an essential component in sound reinforcement systems, PA setups, and live performances.One of the standout features of the CX3400 is its three-way or four-way crossover topology, which allows the user to manage sound frequencies with precision. It’s equipped with independent adjustable output controls for each of its outputs, enabling users to tailor the audio experience to fit the specific requirements of any venue or application. The ability to adjust the crossover frequency range from 50 Hz to 6 kHz makes it suitable for various configurations, whether for subwoofers or high-frequency drivers.
Another significant aspect of the CX3400 is its built-in low-pass and high-pass filters. This functionality ensures that low frequencies are directed to subwoofers while high frequencies are sent to tweeters, thus maximizing the efficiency and clarity of each speaker in the system. The filters operate at a steep 24 dB per octave slope, which aids in maintaining the integrity of sound reproduction and minimizes overlap that can lead to distortion.
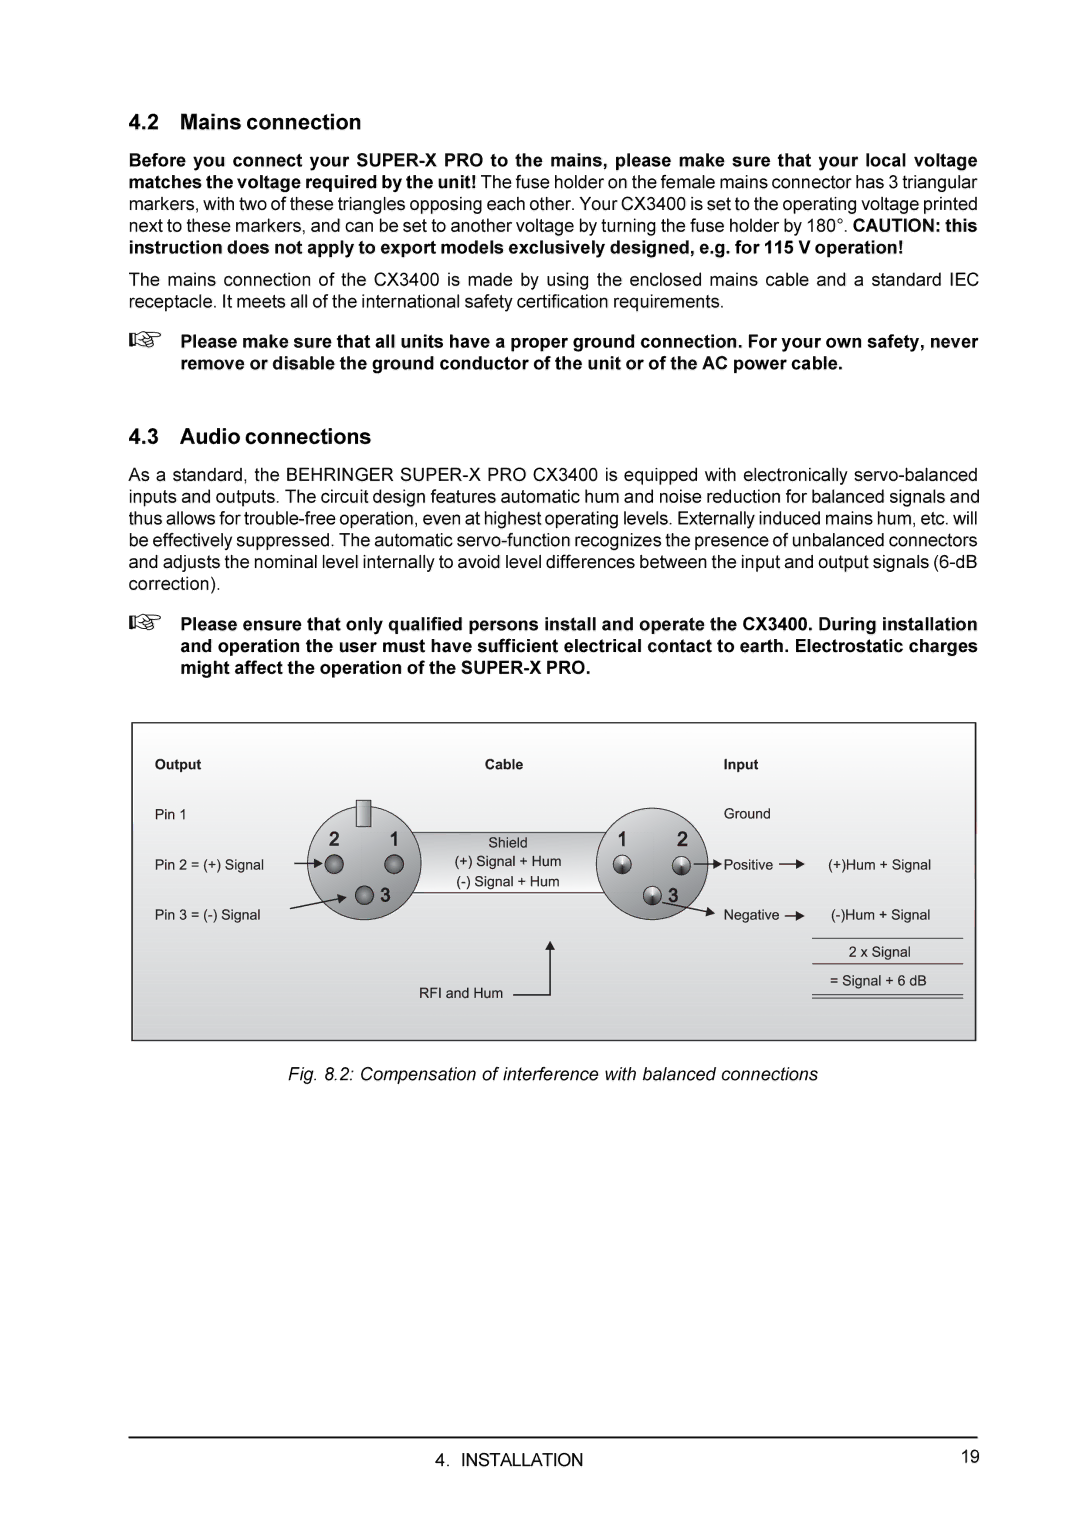
In terms of technology, the CX3400 features independent audio signal processing capabilities, allowing for more refined control over the audio output. The unit includes a high-quality 24-bit A/D converter and a 24-bit D/A converter, which significantly contribute to the overall audio fidelity and dynamic range. The CX3400 also features balanced XLR inputs and outputs, ensuring that the audio signal is transmitted with minimal interference and noise.
The build quality of the Behringer CX3400 is also noteworthy. It’s designed to withstand the rigors of live performance environments, with a durable chassis that ensures reliability. The user interface is straightforward, with clear, intuitive controls that make it easy to set the desired parameters quickly.
In summary, the Behringer CX3400 crossover is a powerful tool for audio professionals, offering precise frequency distribution, advanced filtering technologies, and solid construction. Its combination of versatility, performance, and user-friendly design makes it an excellent choice for those looking to enhance their sound systems, whether in live settings or recorded applications. The CX3400 continues to be a trusted device for audio engineers, ensuring that every musical element reaches its full potential.

