V-AMPIRE LX110
2.2 Rear panel
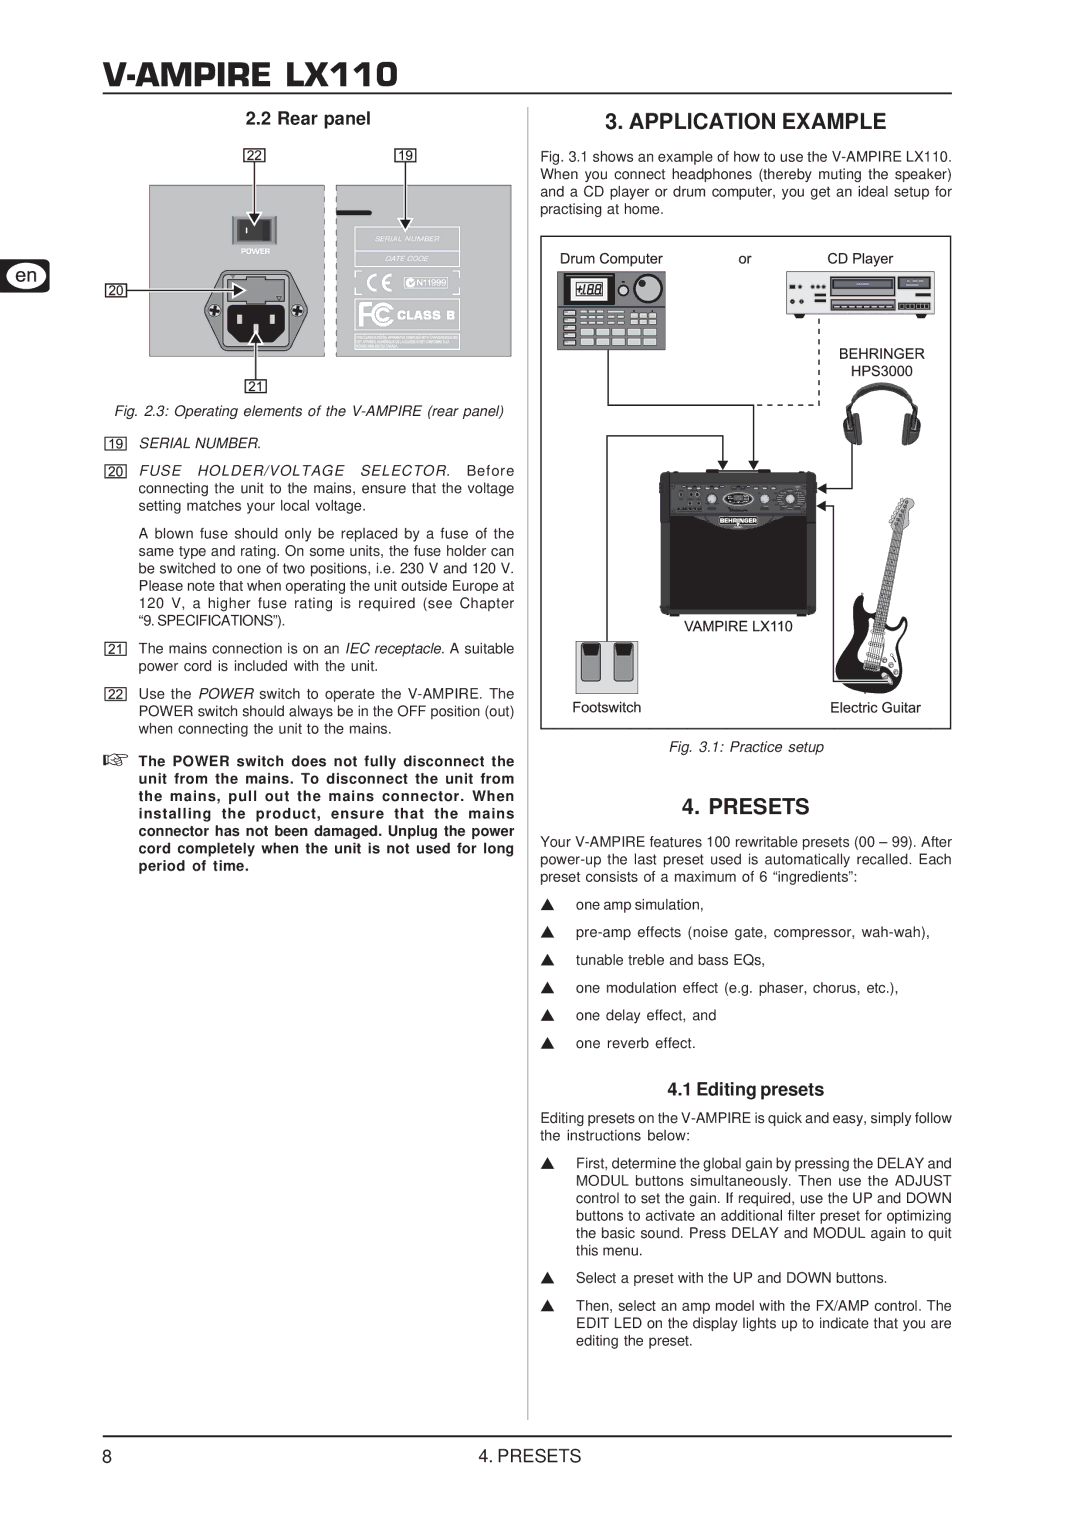
Fig. 2.3: Operating elements of the V-AMPIRE (rear panel)
SERIAL NUMBER.
FUSE HOLDER/VOLTAGE SELECTOR. Before connecting the unit to the mains, ensure that the voltage setting matches your local voltage.
A blown fuse should only be replaced by a fuse of the same type and rating. On some units, the fuse holder can be switched to one of two positions, i.e. 230 V and 120 V. Please note that when operating the unit outside Europe at 120 V, a higher fuse rating is required (see Chapter “9. SPECIFICATIONS”).
The mains connection is on an IEC receptacle. A suitable power cord is included with the unit.
Use the POWER switch to operate the
The POWER switch does not fully disconnect the unit from the mains. To disconnect the unit from the mains, pull out the mains connector. When installing the product, ensure that the mains connector has not been damaged. Unplug the power cord completely when the unit is not used for long period of time.
3. APPLICATION EXAMPLE
Fig. 3.1 shows an example of how to use the V-AMPIRE LX110. When you connect headphones (thereby muting the speaker) and a CD player or drum computer, you get an ideal setup for practising at home.
Fig. 3.1: Practice setup
4. PRESETS
Your
one amp simulation,
tunable treble and bass EQs,
one modulation effect (e.g. phaser, chorus, etc.),
one delay effect, and
one reverb effect.
4.1 Editing presets
Editing presets on the
First, determine the global gain by pressing the DELAY and MODUL buttons simultaneously. Then use the ADJUST control to set the gain. If required, use the UP and DOWN buttons to activate an additional filter preset for optimizing the basic sound. Press DELAY and MODUL again to quit this menu.
Select a preset with the UP and DOWN buttons.
Then, select an amp model with the FX/AMP control. The EDIT LED on the display lights up to indicate that you are editing the preset.
8 | 4. PRESETS |