V-AMPIRE/V-AMP PRO/V-AMP 2
pressing the two arrow keys simultaneously. The display will show “40”, which means 440 Hz. Use the arrow keys to raise or lower the reference pitch by up to 15 Hz. The display always shows the last two digits as the first digit is always 4. For example, if you start with a reference pitch of 440 Hz and press the
8.INSTALLATION
8.1Mains voltage
Before you connect the unit to the mains, please make sure that the voltage setting on the unit matches the local voltage! The fuse holder at the AC power connector has 3 triangular markings
+If you set the unit to a different mains voltage, be sure to use a fuse of the correct type and rating. Please refer to chapter 10 “SPECIFICATIONS” for details.
+Blown fuses must be replaced by fuses of the same type and rating! Please refer to chapter 10 “SPECIFICATIONS” for details.
+Please make sure that all units have a proper ground connection. For your own safety, never remove or disable the ground conductor from the unit or of the AC power cord.
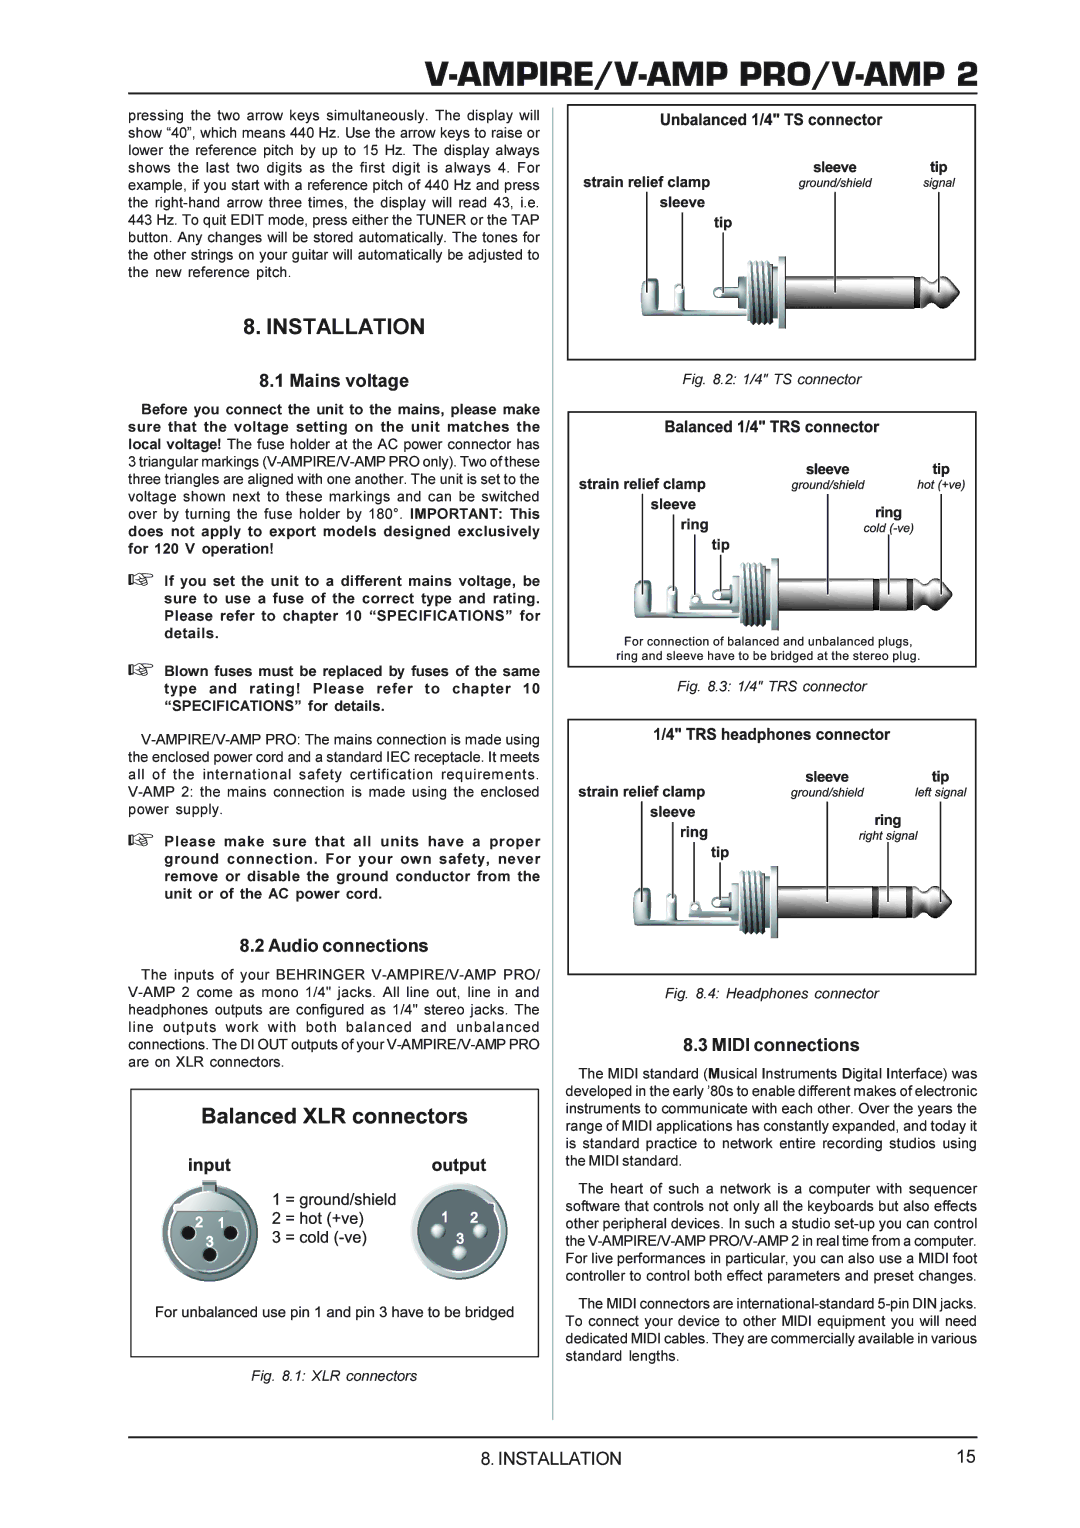
8.2 Audio connections
The inputs of your BEHRINGER
Fig. 8.1: XLR connectors
Fig. 8.2: 1/4" TS connector
Fig. 8.3: 1/4" TRS connector
Fig. 8.4: Headphones connector
8.3 MIDI connections
The MIDI standard (Musical Instruments Digital Interface) was developed in the early ’80s to enable different makes of electronic instruments to communicate with each other. Over the years the range of MIDI applications has constantly expanded, and today it is standard practice to network entire recording studios using the MIDI standard.
The heart of such a network is a computer with sequencer software that controls not only all the keyboards but also effects other peripheral devices. In such a studio
The MIDI connectors are
8. INSTALLATION | 15 |
