Beko CWB6403X, CWB9403X manual 3Installation Instructions, Electric Connection, Fixing to the wall

Models: CWB6403X CWB9403X

1 16
Download 16 pages 286 b
Page 7
Image 7
3Installation Instructions

3Installation Instructions

•• Assembly and electrical connections must be carried out by specialised personnel.

•• Wear protective gloves before proceeding with the installation.

3.1 Electric Connection:

-The appliance has been manufactured as a class II, therefore no earth cable is necessary. The plug must be easily accessible after the installation of the appliance. If the appliance is equipped with power cord without plug, a suitably dimensioned omnipolar switch with 3 mm minimum opening between con- tacts must be fitted between the appliance and the electricity supply in compliance with the load and current regulations.

-The connection to the mains is carried out as fol- lows:

BROWN = L line BLUE = N neutral.

•• The minimum distance between the support sur- faces of the cooking pots on the cooker top and the lowest part of the cooker hood must be at least 65 cm. If a connection tube composed of two parts is used, the upper part must be placed outside the lower part. Do not connect the cooker hood exhaust to the same conductor used to cir- culate hot air or for evacuating fumes from other appliances generated by other than an electrical source. Before proceeding with the assembly operations, remove the anti-grease filter(s) (Fig.5) so that the unit is easier to handle.

Fig.5

-In the case of assembly of the appliance in the suction version prepare the hole for evacuation of the air.

•• We recommend the use of an air exhaust tube which has the same diameter as the air exhaust outlet hole. If a pipe with a smaller diameter is used, the efficiency of the product may be redu- ced and its operation may become noisier.

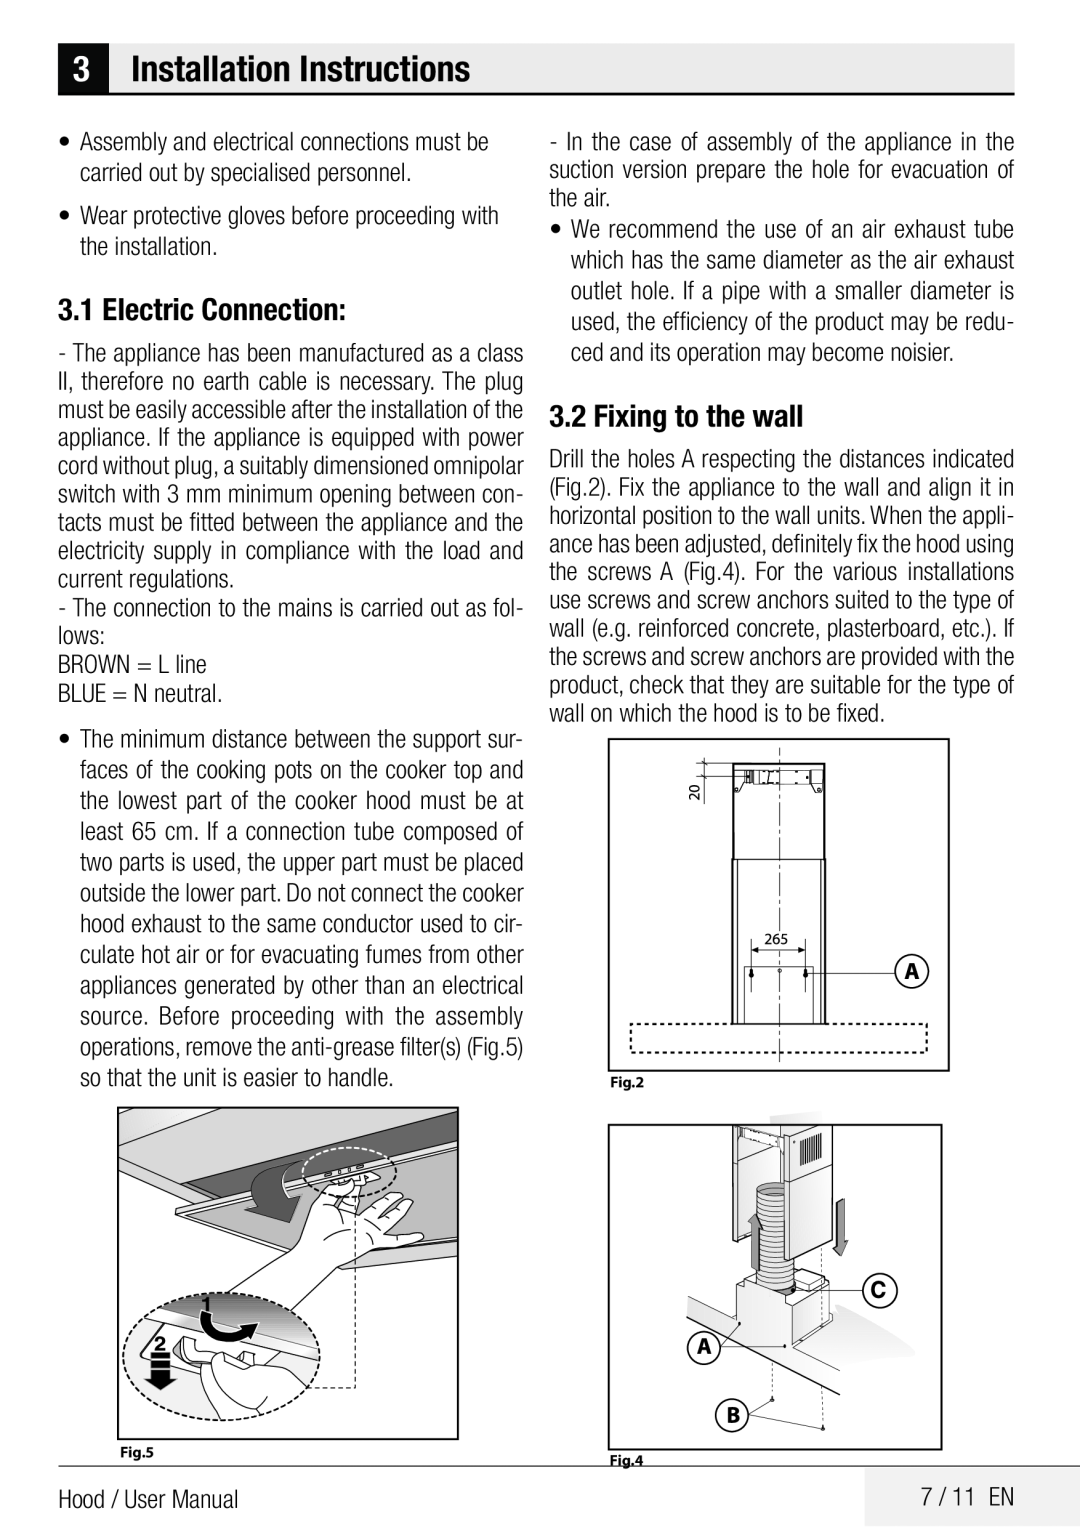
3.2 Fixing to the wall

Drill the holes A respecting the distances indicated (Fig.2). Fix the appliance to the wall and align it in horizontal position to the wall units. When the appli- ance has been adjusted, definitely fix the hood using the screws A (Fig.4). For the various installations use screws and screw anchors suited to the type of wall (e.g. reinforced concrete, plasterboard, etc.). If the screws and screw anchors are provided with the product, check that they are suitable for the type of wall on which the hood is to be fixed.

Fig.2

Fig.4

Hood / User Manual

7 / 11 EN


Page 7
Image 7
Beko CWB6403X, CWB9403X manual 3Installation Instructions, Electric Connection, Fixing to the wall