Setup Overview
It’s as easy as 1-2-3
1Hardware Connections:
Use the instructions in this Guide to connect your Modem to your computer.
2Configuring your Modem:
Configure your Belkin Modem with the
3Connecting to the Internet
High Speed ADSL2+ | Quick Installation Guide | |
Modem | ||
|
Thankyou for purchasing a Belkin Modem, you will need to run through the following steps once to set up your Modem.
| �� | 1 Hardware Connections |
|
| |
|
| Step A |
|
| Place the modem next to the computer. Connect the Modem’s power cord into the |
����� |
| back of the Modem. Connect a telephone cable from the wall into the back of the |
| Modem. | |
|
| |
|
| If your computer has an Ethernet (network) connection, continue with section B1. |
|
| Alternatively you can install the Modem with a USB connection, continue with section B2. |
| �� | Ethernet Setup |
|
| |
|
| Step B1 |
|
| Find your new networking cable (it came in the box with your Modem) and connect it to |
����� |
| the LAN port on the back of the modem. |
|
| Connect the other end to your computers LAN port. |
|
| Please continue to Step 2 |
| �� | USB Setup |
|
| |
|
| Step B2 |
|
| Insert the CD into your computer. |
����� |
| Windows ME (or later) users: Connect the Modem to your computer with a USB cable. |
|
| |
|
| Windows 98SE users: Please refer to the user manual located on the CD for further |
|
| instructions. |
|
| Please continue to Step 2 |
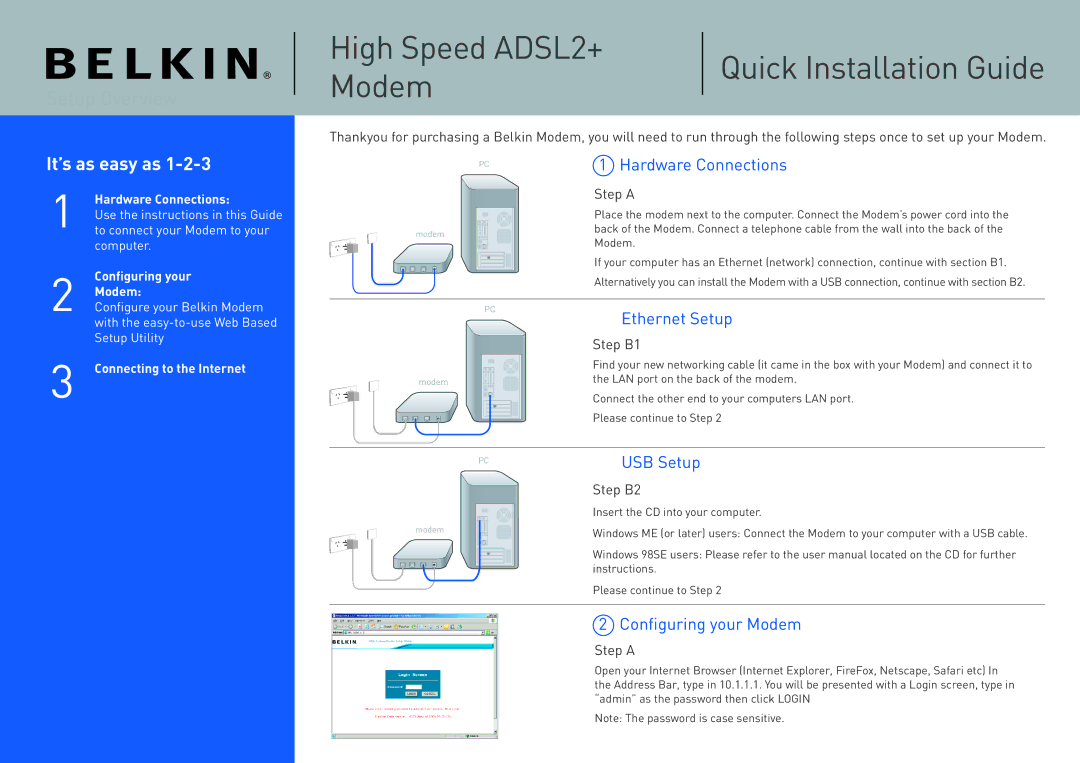
2 Configuring your Modem
Step A
Open your Internet Browser (Internet Explorer, FireFox, Netscape, Safari etc) In the Address Bar, type in 10.1.1.1. You will be presented with a Login screen, type in “admin” as the password then click LOGIN
Note: The password is case sensitive.