Assembly Instructions
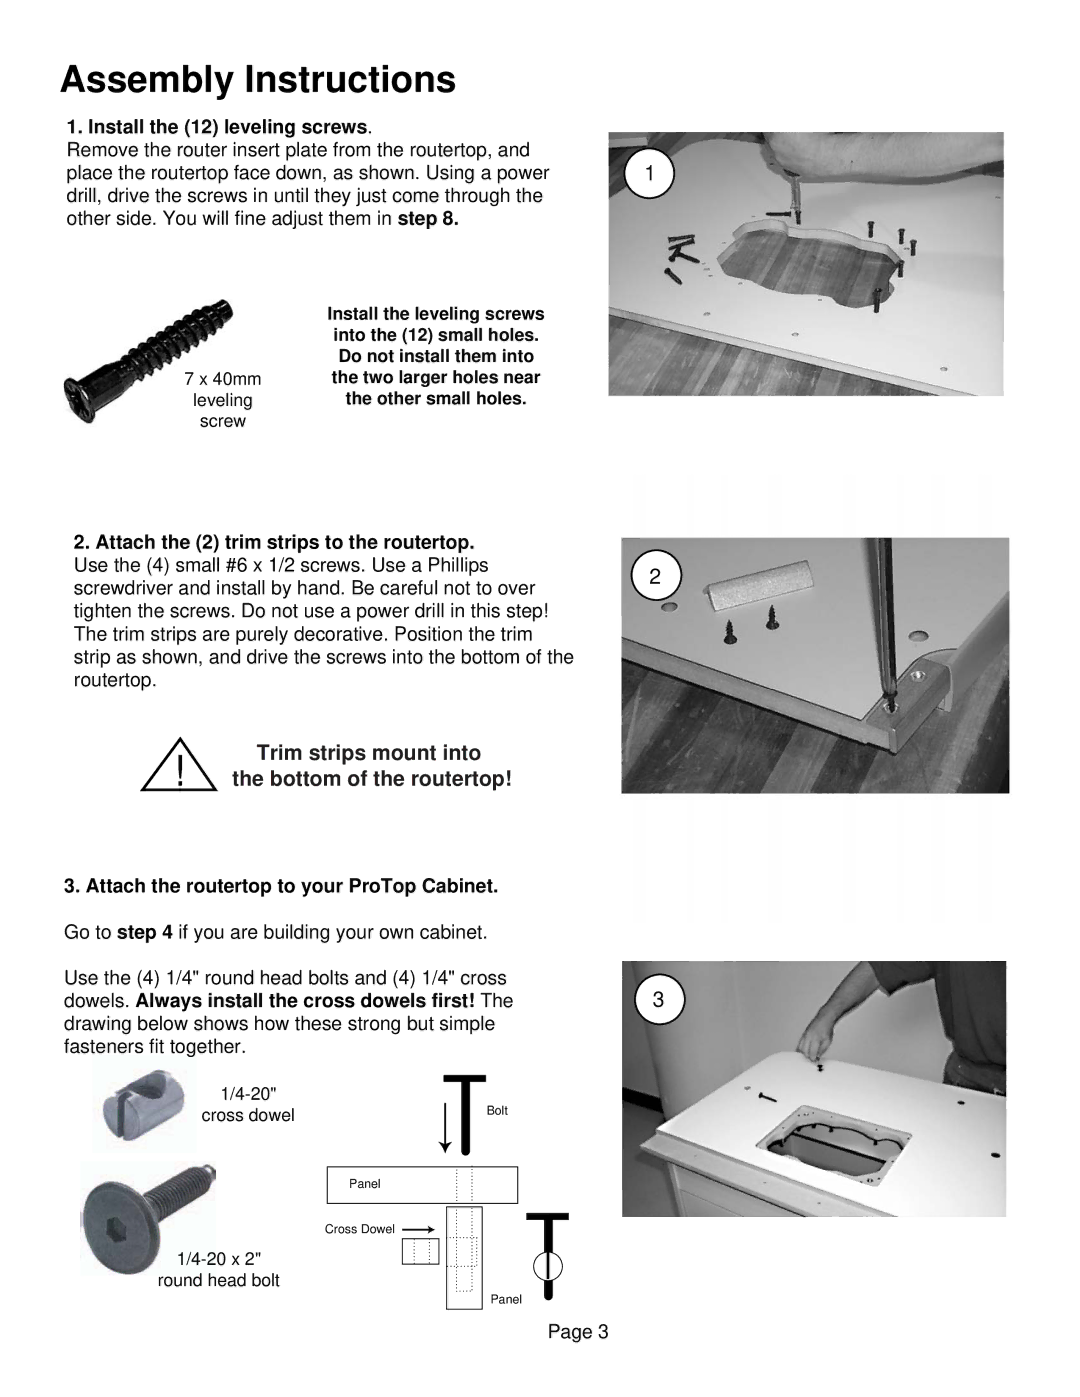
1. Install the (12) leveling screws.
Remove the router insert plate from the routertop, and
place the routertop face down, as shown. Using a power 1 drill, drive the screws in until they just come through the
other side. You will fine adjust them in step 8.
| Install the leveling screws |
| into the (12) small holes. |
| Do not install them into |
7 x 40mm | the two larger holes near |
leveling | the other small holes. |
screw |
|
2.Attach the (2) trim strips to the routertop. Use the (4) small #6 x 1/2 screws. Use a Phillips screwdriver and install by hand. Be careful not to over tighten the screws. Do not use a power drill in this step! The trim strips are purely decorative. Position the trim strip as shown, and drive the screws into the bottom of the routertop.
Trim strips mount into
! the bottom of the routertop!
3. Attach the routertop to your ProTop Cabinet.
Go to step 4 if you are building your own cabinet.
Use the (4) 1/4" round head bolts and (4) 1/4" cross dowels. Always install the cross dowels first! The drawing below shows how these strong but simple fasteners fit together.
cross dowel | Bolt |
| |
|
|
Panel
Cross Dowel
round head bolt
Panel
2
3
Page 3