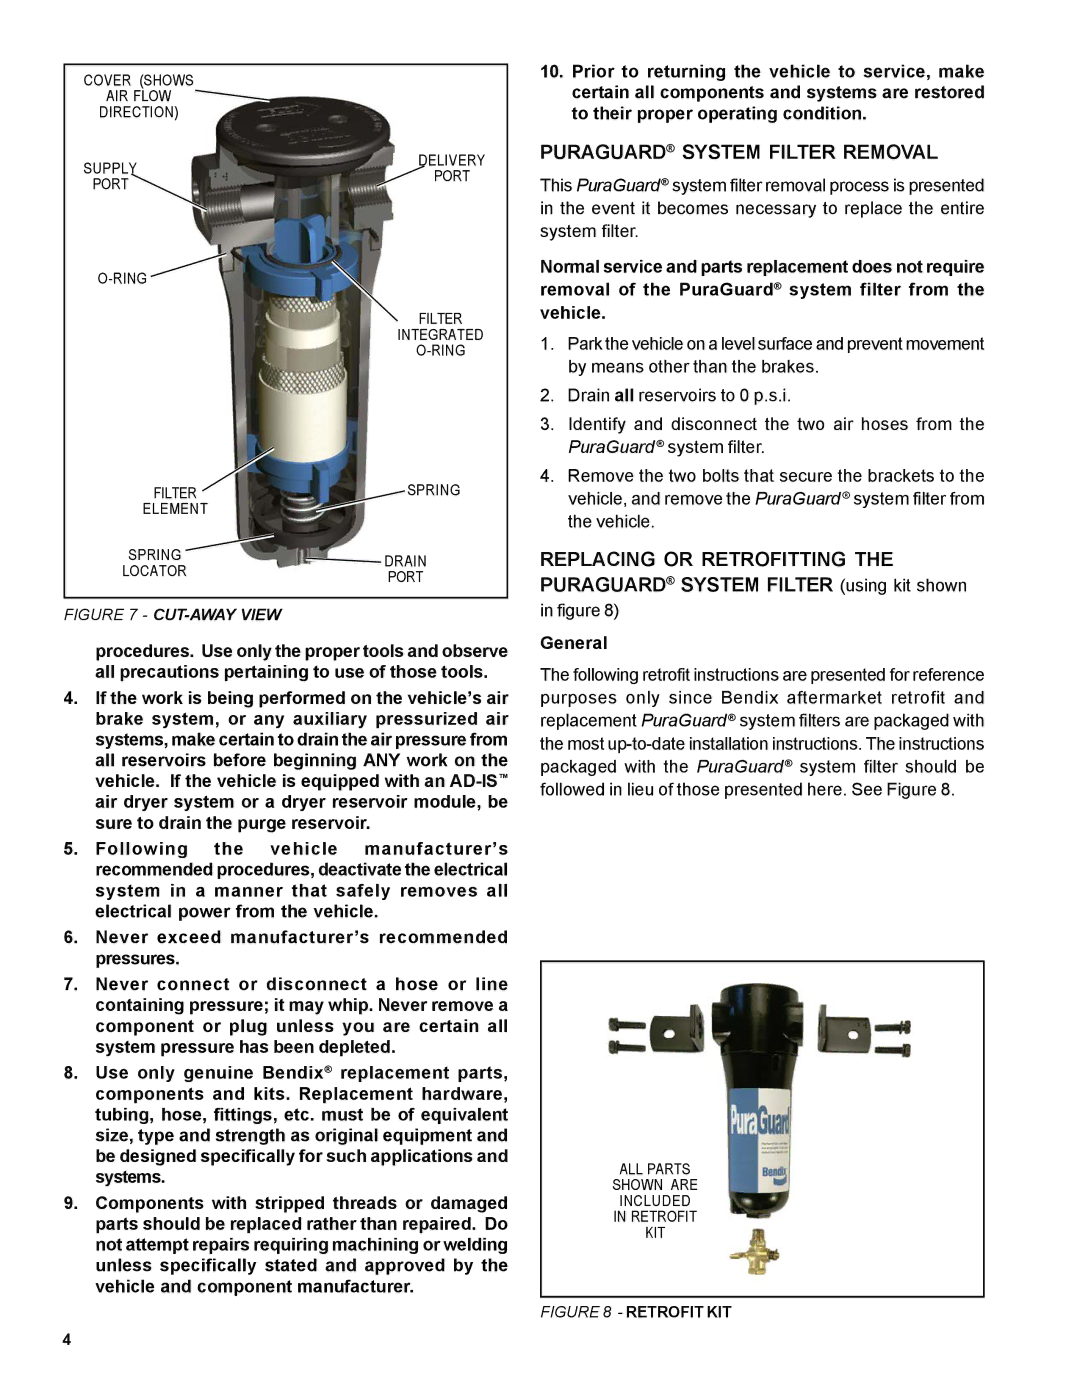
COVER (SHOWS
AIR FLOW
DIRECTION)
SUPPLY | DELIVERY | |
PORT | ||
PORT | ||
|
![]()
FILTER
INTEGRATED
FILTER | SPRING | |
ELEMENT |
| |
SPRING | DRAIN | |
LOCATOR | ||
PORT | ||
|
FIGURE 7 - CUT-AWAY VIEW
procedures. Use only the proper tools and observe all precautions pertaining to use of those tools.
4.If the work is being performed on the vehicle’s air brake system, or any auxiliary pressurized air systems, make certain to drain the air pressure from all reservoirs before beginning ANY work on the vehicle. If the vehicle is equipped with an
5.Following the vehicle manufacturer’s recommended procedures, deactivate the electrical system in a manner that safely removes all electrical power from the vehicle.
6.Never exceed manufacturer’s recommended pressures.
7.Never connect or disconnect a hose or line containing pressure; it may whip. Never remove a component or plug unless you are certain all system pressure has been depleted.
8.Use only genuine Bendix® replacement parts, components and kits. Replacement hardware, tubing, hose, fittings, etc. must be of equivalent size, type and strength as original equipment and be designed specifically for such applications and systems.
9.Components with stripped threads or damaged parts should be replaced rather than repaired. Do not attempt repairs requiring machining or welding unless specifically stated and approved by the vehicle and component manufacturer.
10.Prior to returning the vehicle to service, make certain all components and systems are restored to their proper operating condition.
PURAGUARD® SYSTEM FILTER REMOVAL
This PuraGuard® system filter removal process is presented in the event it becomes necessary to replace the entire system filter.
Normal service and parts replacement does not require removal of the PuraGuard® system filter from the vehicle.
1.Park the vehicle on a level surface and prevent movement by means other than the brakes.
2.Drain all reservoirs to 0 p.s.i.
3.Identify and disconnect the two air hoses from the PuraGuard® system filter.
4.Remove the two bolts that secure the brackets to the vehicle, and remove the PuraGuard® system filter from the vehicle.
REPLACING OR RETROFITTING THE PURAGUARD® SYSTEM FILTER (using kit shown
in figure 8)
General
The following retrofit instructions are presented for reference purposes only since Bendix aftermarket retrofit and replacement PuraGuard® system filters are packaged with the most
ALL PARTS
SHOWN ARE
INCLUDED
IN RETROFIT
KIT
FIGURE 8 - RETROFIT KIT
4