Controls and Functions
External Control Panel
13
12
10
9
4
5
1
2
3
11
6
7
8
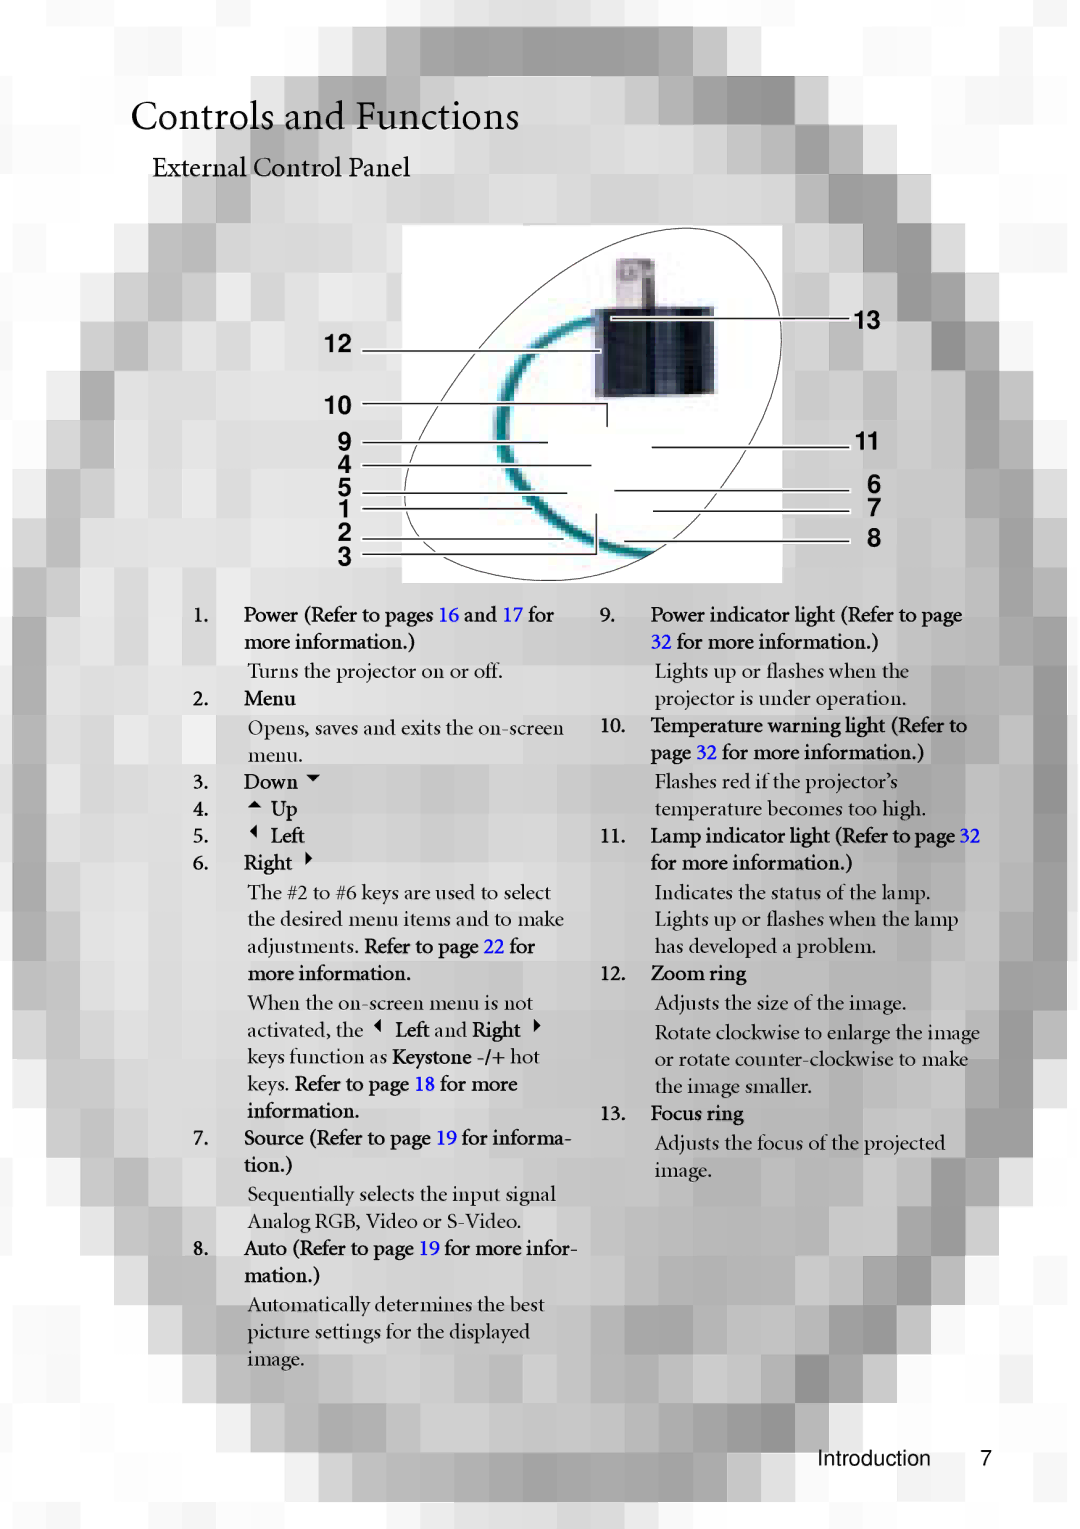
1.Power (Refer to pages 16 and 17 for more information.)
Turns the projector on or off.
2.Menu
Opens, saves and exits the on-screen menu.
3.Down 6
4.5 Up
5.3 Left
6.Right 4
The #2 to #6 keys are used to select the desired menu items and to make adjustments. Refer to page 22 for more information.
When the
7.Source (Refer to page 19 for informa- tion.)
Sequentially selects the input signal Analog RGB, Video or
8.Auto (Refer to page 19 for more infor- mation.)
Automatically determines the best picture settings for the displayed image.
9.Power indicator light (Refer to page 32 for more information.)
Lights up or flashes when the projector is under operation.
10.Temperature warning light (Refer to page 32 for more information.) Flashes red if the projector’s temperature becomes too high.
11.Lamp indicator light (Refer to page 32 for more information.)
Indicates the status of the lamp. Lights up or flashes when the lamp has developed a problem.
12.Zoom ring
Adjusts the size of the image.
Rotate clockwise to enlarge the image or rotate
13.Focus ring