Controls and functions
English
Control panel
1
2
3
4
5 | 6 |
7 9
8 ![]()
![]()
![]() 10
10
11 ![]()
![]()
![]()
![]()
![]() 13
13
12
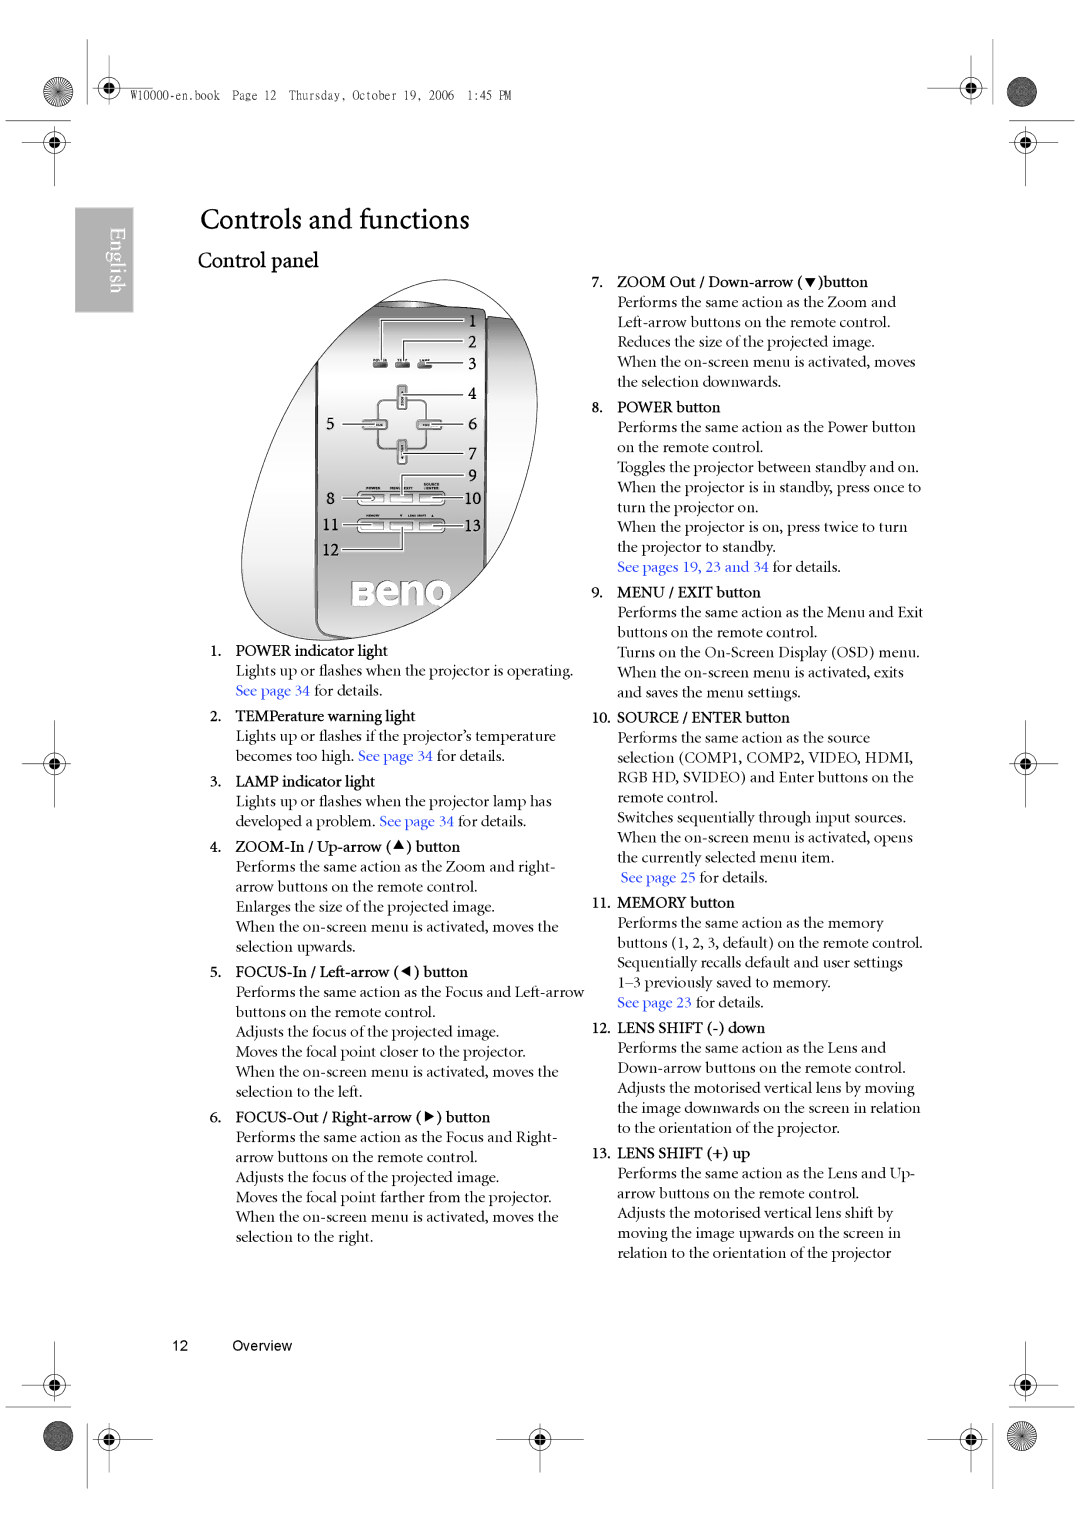
1.POWER indicator light
Lights up or flashes when the projector is operating. See page 34 for details.
2.TEMPerature warning light
Lights up or flashes if the projector’s temperature becomes too high. See page 34 for details.
3.LAMP indicator light
Lights up or flashes when the projector lamp has developed a problem. See page 34 for details.
4.ZOOM-In / Up-arrow (c) button
Performs the same action as the Zoom and right- arrow buttons on the remote control.
Enlarges the size of the projected image.
When the
5.FOCUS-In / Left-arrow (e) button
Performs the same action as the Focus and
Adjusts the focus of the projected image. Moves the focal point closer to the projector. When the
6.
Adjusts the focus of the projected image.
Moves the focal point farther from the projector. When the
7.ZOOM Out /
8.POWER button
Performs the same action as the Power button on the remote control.
Toggles the projector between standby and on. When the projector is in standby, press once to turn the projector on.
When the projector is on, press twice to turn the projector to standby.
See pages 19, 23 and 34 for details.
9.MENU / EXIT button
Performs the same action as the Menu and Exit buttons on the remote control.
Turns on the
10.SOURCE / ENTER button
Performs the same action as the source selection (COMP1, COMP2, VIDEO, HDMI, RGB HD, SVIDEO) and Enter buttons on the remote control.
Switches sequentially through input sources. When the
See page 25 for details.
11.MEMORY button
Performs the same action as the memory buttons (1, 2, 3, default) on the remote control. Sequentially recalls default and user settings
See page 23 for details.
12.LENS SHIFT (-) down
Performs the same action as the Lens and
13.LENS SHIFT (+) up
Performs the same action as the Lens and Up- arrow buttons on the remote control. Adjusts the motorised vertical lens shift by moving the image upwards on the screen in relation to the orientation of the projector
12 Overview
