INSTALL RANGE HOOD
1.Raise the hood up into position under the range hood. Control switches must be lo- cated on the support frame side marked “FRONT”.
2.Attach the hood using (4) washers and (4) hex nuts.
NUT WASHERS 6.4 MM
BOLT
INSTALL ELECTRICAL WIRING
NOTE: ELECTRICAL WIRING MUST BE DONE BY A QUALIFIED PERSON(S) IN ACCORDANCE WITH ALL APPLICABLE CODES AND STAN- DARDS, INCLUDING
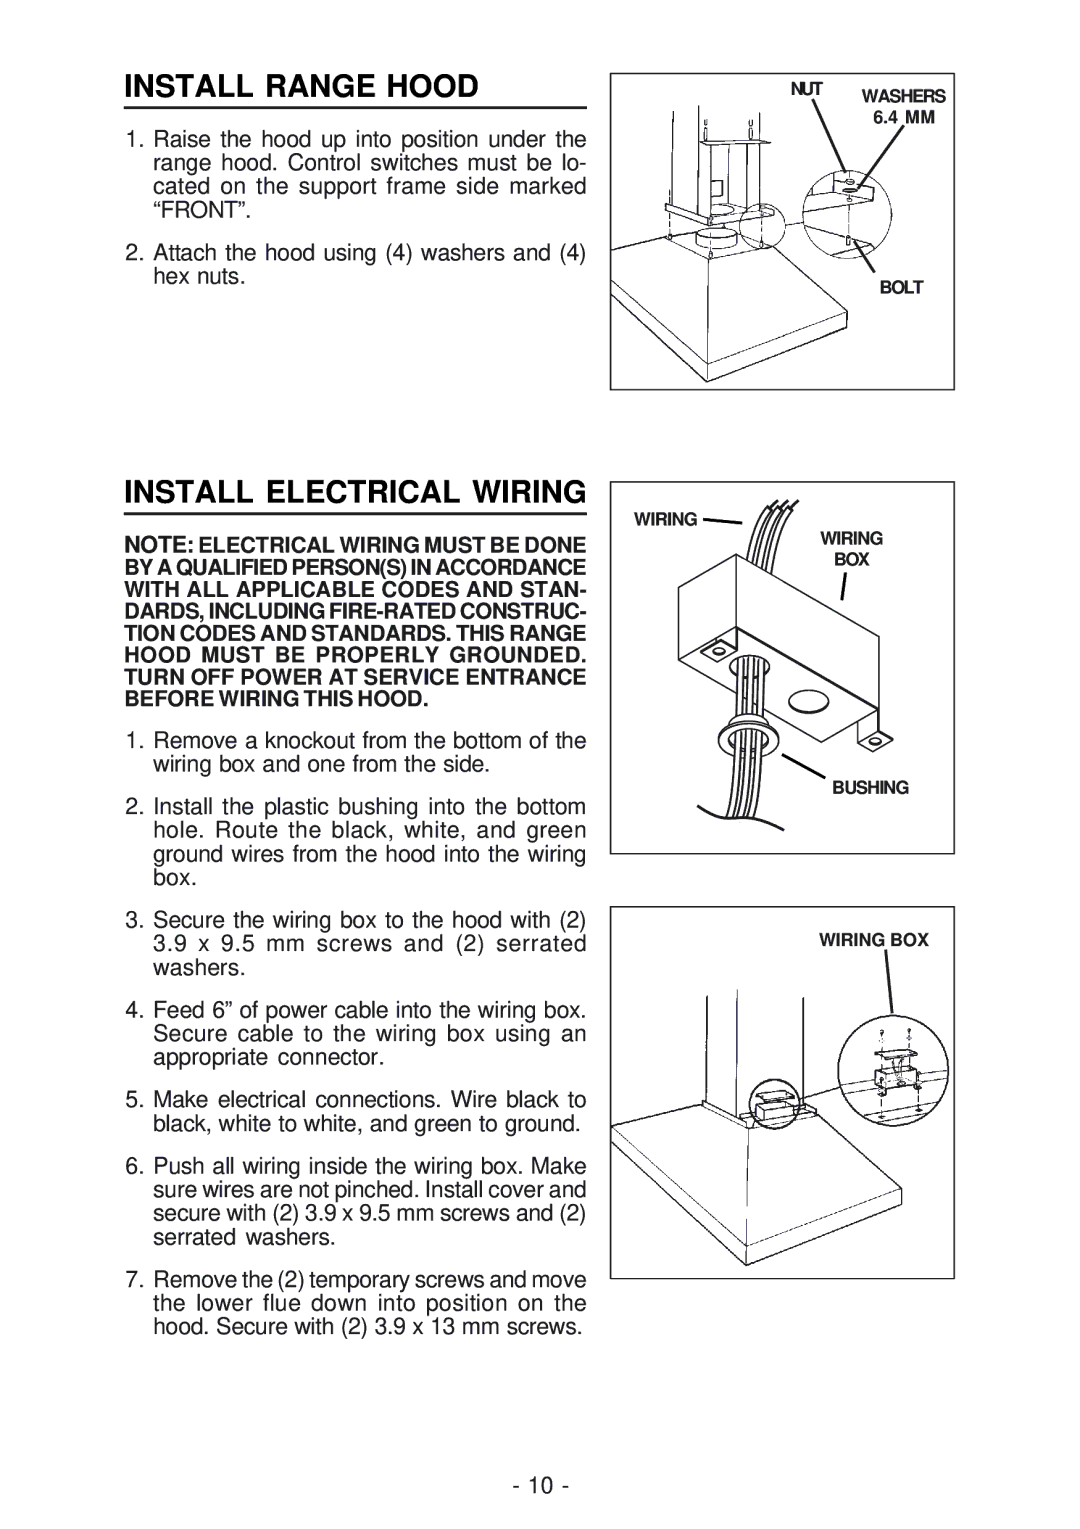
1.Remove a knockout from the bottom of the wiring box and one from the side.
2.Install the plastic bushing into the bottom hole. Route the black, white, and green ground wires from the hood into the wiring box.
3.Secure the wiring box to the hood with (2) 3.9 x 9.5 mm screws and (2) serrated washers.
4.Feed 6” of power cable into the wiring box. Secure cable to the wiring box using an appropriate connector.
5.Make electrical connections. Wire black to black, white to white, and green to ground.
6.Push all wiring inside the wiring box. Make sure wires are not pinched. Install cover and secure with (2) 3.9 x 9.5 mm screws and (2) serrated washers.
7.Remove the (2) temporary screws and move the lower flue down into position on the hood. Secure with (2) 3.9 x 13 mm screws.
WIRING ![]()
WIRING
BOX
BUSHING
WIRING BOX
- 10 -