
16981 specifications
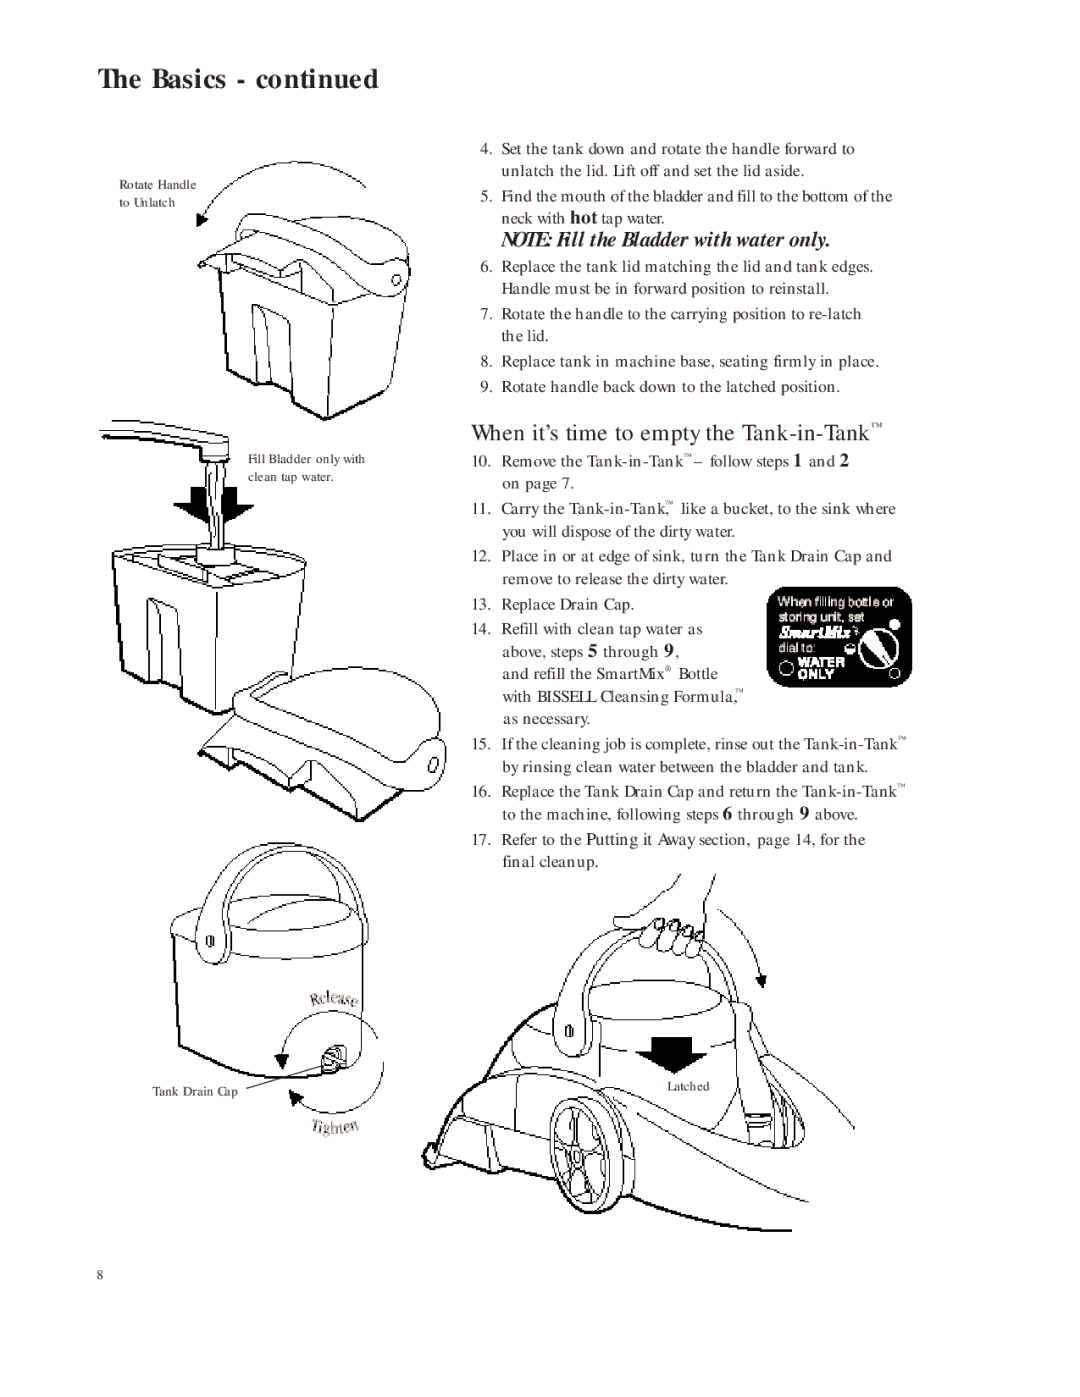
The Bissell 16981 is a powerful, versatile carpet cleaner designed to tackle tough stains and ensure your carpets look their best. Featuring advanced technology and convenient design elements, this machine is an excellent choice for individuals and families seeking a reliable deep cleaning solution for their home.One of the standout features of the Bissell 16981 is its powerful suction capability, which helps to remove dirt and grime embedded deep within carpet fibers. This high-performance suction works in combination with a dual tank system that separates clean and dirty water, ensuring that your clean solution is always fresh while effectively dirtying water is contained in a separate tank. This design allows for longer cleaning sessions without the need for constant refilling and emptying.
The Bissell 16981 is equipped with a large cleaning path of 12 inches, enabling it to cover more ground quickly, making the task of deep cleaning carpets more efficient. The machine comes with a variety of specialized tools, including a tough stain tool and a crevice tool, which are perfect for reaching into corners, upholstery, and other hard-to-reach areas that require attention. These attachments enhance the versatility of the cleaner, extending its use beyond carpets to include stairs, furniture, and other soft surfaces.
Another key feature of the Bissell 16981 is its Heatwave Technology, which helps to maintain consistent water temperature throughout the cleaning process. This ensures that the cleaning solution remains effective, working optimally to combat stubborn stains and odors. Additionally, the machine uses Bissell’s proprietary cleaning formula, designed to break down tough stains while being safe for pets and children.
The Bissell 16981 is designed with user convenience in mind. It features a lightweight and compact design, making it easy to maneuver around your home. Furthermore, the cord length and the capability to rewind easily contribute to a hassle-free cleaning experience.
In summary, the Bissell 16981 offers powerful suction, a dual tank system, a variety of specialized tools, Heatwave Technology, and user-friendly features, making it an outstanding option for anyone looking to maintain the cleanliness and appearance of their carpets and upholstery. This carpet cleaner reflects Bissell's commitment to quality, performance, and convenience, ensuring a thorough clean that you can rely on.