Replace the 3 screws.
Note: It may be easier to begin with the center screw.
Replacement Belt: BISSELL® Replacement Belt Style 6 (#32053, package of 2).
10.
11.
Turn vacuum cleaner back face down.
8. Make sure the Furniture Protection Guard is still intact.
Align the 3 tabs on the top cover with the 3 slots in the
9. Powerfoot. Press into place, making sure the Furniture Protection Guard is on the outside.
NOTE: The brush can most often be cleaned without removal from the vacuum. If there is an excessive amount of hair and debris, however, it is best to remove the brush.
Unplug the vacuum. Tip unit over, face down, on a flat surface.
Remove all 3 screws from the bottom of the Powerfoot.
Checking the Rotating Brush and Drive Belt
The brush and drive belt should both regularly be checked for wear or damage. You should also keep the brush and brush ends free of string, hair, and carpet fibers as these can become entangled in the brush and reduce its cleaning effectiveness.
Cleaning the Brush/Replacing the Drive Belt
1
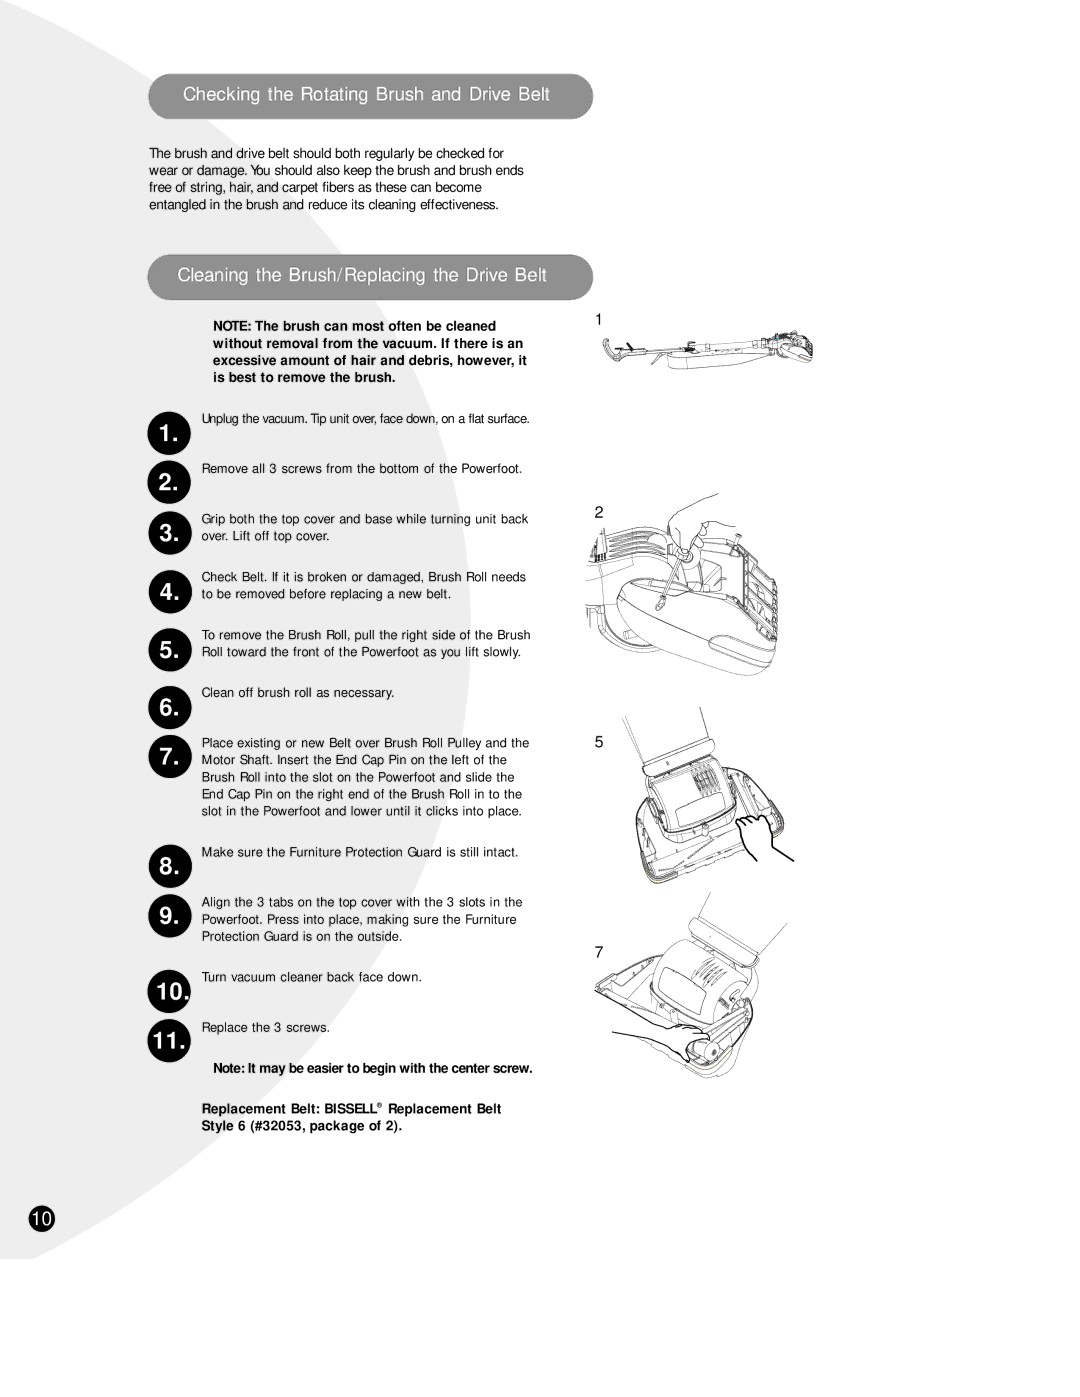
1.
2.
3. | Grip both the top cover and base while turning unit back | 2 |
over. Lift off top cover. |
| |
4. | Check Belt. If it is broken or damaged, Brush Roll needs |
|
to be removed before replacing a new belt. |
| |
5. | To remove the Brush Roll, pull the right side of the Brush |
|
Roll toward the front of the Powerfoot as you lift slowly. |
| |
6. | Clean off brush roll as necessary. |
|
7. | Place existing or new Belt over Brush Roll Pulley and the | 5 |
Motor Shaft. Insert the End Cap Pin on the left of the |
|
Brush Roll into the slot on the Powerfoot and slide the End Cap Pin on the right end of the Brush Roll in to the slot in the Powerfoot and lower until it clicks into place.
7
10