Installing/Removing Accessories
BD200TMT Oscillating Tool is specifically designed to work with Black & Decker accessories, but is also compatible with many manufacturers’ accessories. If unsure, confirm with the specific manufacturer that their accessory is compatible.
![]() CAUTION: To avoid injury, do not use any accessory for an application where the bolt and clamp washer may fail to hold the accessory.
CAUTION: To avoid injury, do not use any accessory for an application where the bolt and clamp washer may fail to hold the accessory.
![]() CAUTION: Read and follow all manufacturers’ safety warnings for any accessories used with this tool.
CAUTION: Read and follow all manufacturers’ safety warnings for any accessories used with this tool.
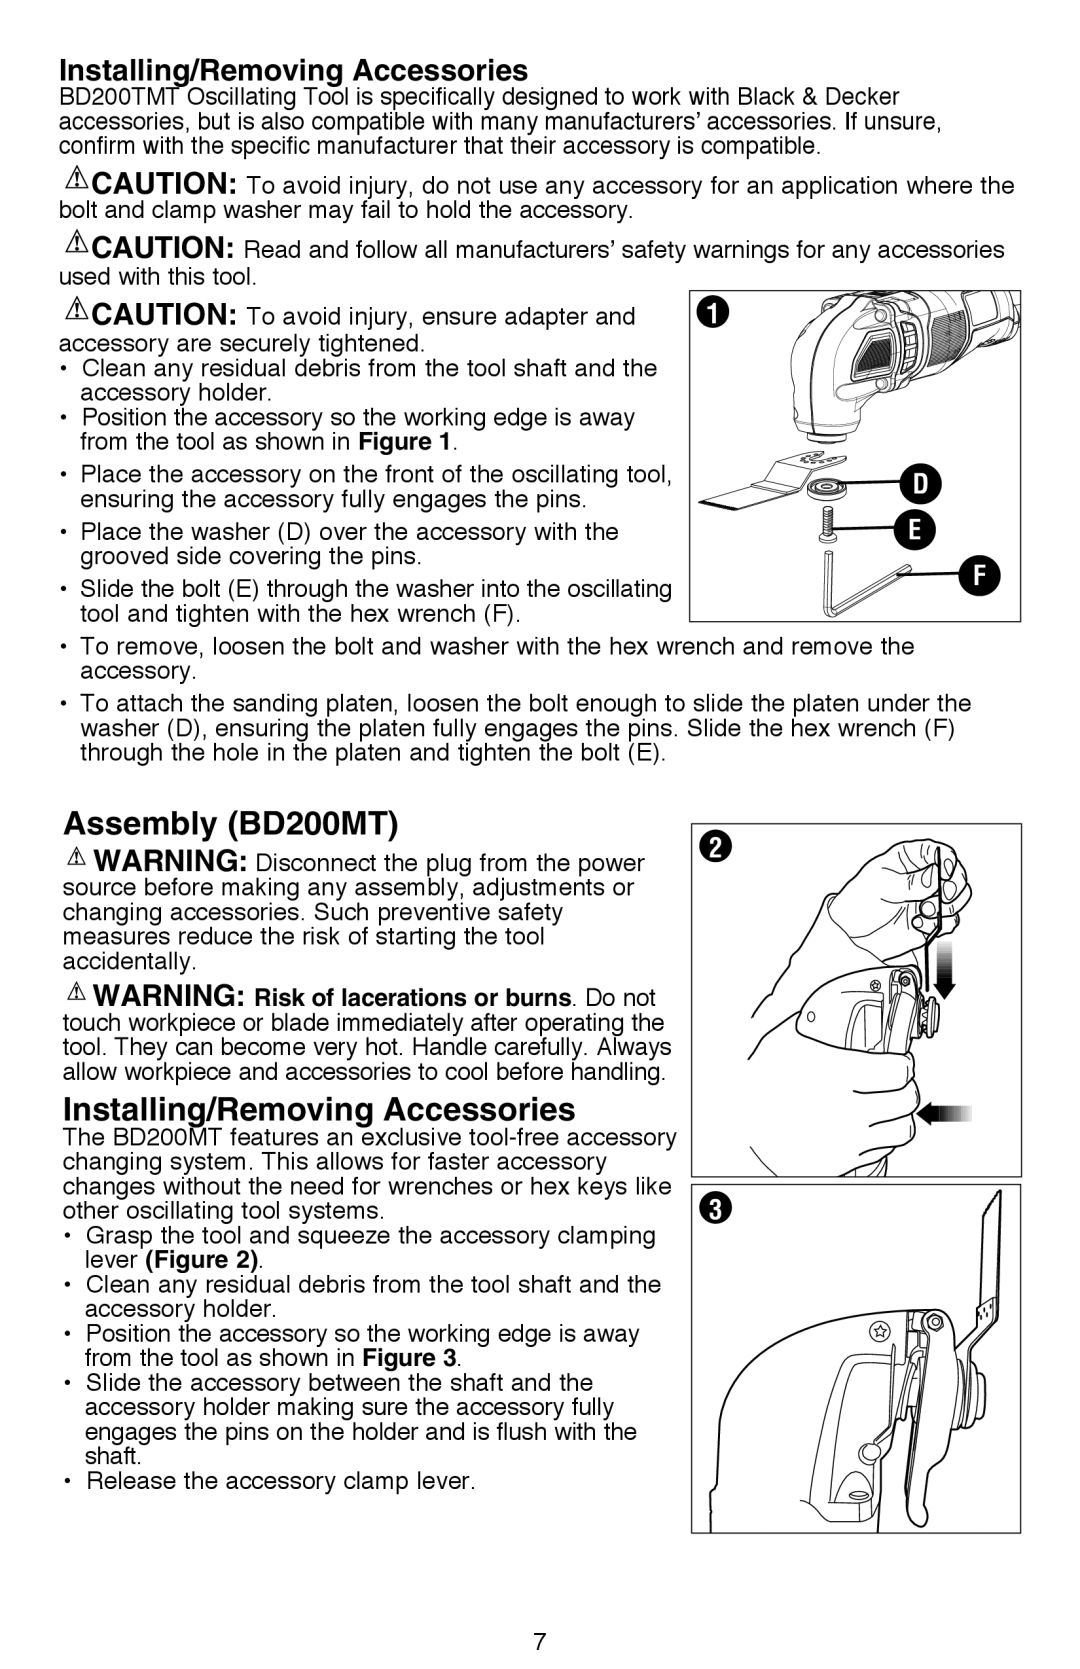
| CAUTION: To avoid injury, ensure adapter and | 1 | |
accessory are securely tightened. |
| ||
• | Clean any residual debris from the tool shaft and the |
| |
• | accessory holder. |
| |
Position the accessory so the working edge is away |
| ||
| from the tool as shown in Figure 1. |
| |
• | Place the accessory on the front of the oscillating tool, | D | |
| ensuring the accessory fully engages the pins. |
| |
• | Place the washer (D) over the accessory with the | E | |
| grooved side covering the pins. | F | |
• | Slide the bolt (E) through the washer into the oscillating | ||
| |||
| tool and tighten with the hex wrench (F). |
| |
•To remove, loosen the bolt and washer with the hex wrench and remove the accessory.
•To attach the sanding platen, loosen the bolt enough to slide the platen under the washer (D), ensuring the platen fully engages the pins. Slide the hex wrench (F) through the hole in the platen and tighten the bolt (E).
Assembly (BD200MT)
![]() WARNING: Disconnect the plug from the power source before making any assembly, adjustments or changing accessories. Such preventive safety measures reduce the risk of starting the tool accidentally.
WARNING: Disconnect the plug from the power source before making any assembly, adjustments or changing accessories. Such preventive safety measures reduce the risk of starting the tool accidentally.
![]() WARNING: Risk of lacerations or burns. Do not touch workpiece or blade immediately after operating the tool. They can become very hot. Handle carefully. Always allow workpiece and accessories to cool before handling.
WARNING: Risk of lacerations or burns. Do not touch workpiece or blade immediately after operating the tool. They can become very hot. Handle carefully. Always allow workpiece and accessories to cool before handling.
Installing/Removing Accessories
The BD200MT features an exclusive
• Grasp the tool and squeeze the accessory clamping lever (Figure 2).
• Clean any residual debris from the tool shaft and the accessory holder.
• Position the accessory so the working edge is away from the tool as shown in Figure 3.
• Slide the accessory between the shaft and the accessory holder making sure the accessory fully engages the pins on the holder and is flush with the shaft.
• Release the accessory clamp lever.
2
3
7