
CTO100 Series specifications
The Black & Decker CTO100 Series combines form and function to offer an exceptional user experience in the world of countertop cooking appliances. This versatile toaster oven is designed to meet the cooking needs of modern households, delivering efficiency and convenience in one sleek package.One of the standout features of the CTO100 Series is its generous cooking capacity. With ample space, it can easily accommodate a variety of dishes, from toasting bread and baking cookies to roasting vegetables and reheating leftovers. The design ensures that even larger items, such as whole pizzas or casseroles, can fit comfortably inside.
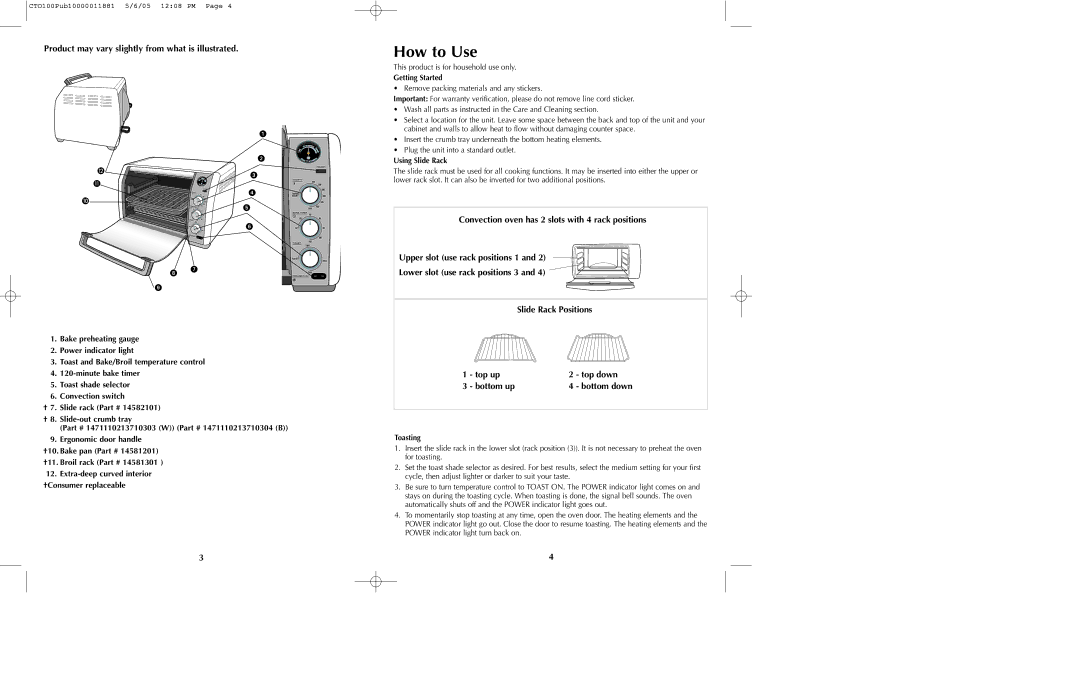
Equipped with multiple cooking functions, the CTO100 Series offers a wide range of options including baking, broiling, toasting, and reheating. This versatility allows users to switch between different cooking methods seamlessly, catering to a multitude of culinary preferences. The intuitive control panel features easy-to-read dials and buttons, making it user-friendly and accessible for individuals of all skill levels.
One of the key technologies featured in the CTO100 Series is its advanced heating element design. This technology ensures even heat distribution for consistent cooking results, minimizing the chances of hot or cold spots commonly found in traditional ovens. Additionally, the built-in adjustable temperature control allows for precision when selecting the right cooking temperature for various dishes.
Safety is another priority in the design of the CTO100 Series. It comes with features such as an automatic shut-off function, which provides peace of mind when cooking unattended, as well as a cool-touch exterior to prevent accidental burns. The removable crumb tray enhances convenience by simplifying the cleanup process, allowing users to maintain a clean cooking space effortlessly.
In terms of aesthetics, the CTO100 Series boasts a modern and stylish design that fits seamlessly into any kitchen decor. Its compact size does not compromise its capabilities, making it a perfect fit for both small apartments and larger homes.
Overall, the Black & Decker CTO100 Series stands out as a reliable and efficient kitchen companion. With its combination of versatile cooking functions, advanced heating technology, and user-friendly features, it is an excellent addition for anyone looking to simplify their cooking experience while enjoying delicious meals at home.