
DCM1400, DCM1400B specifications
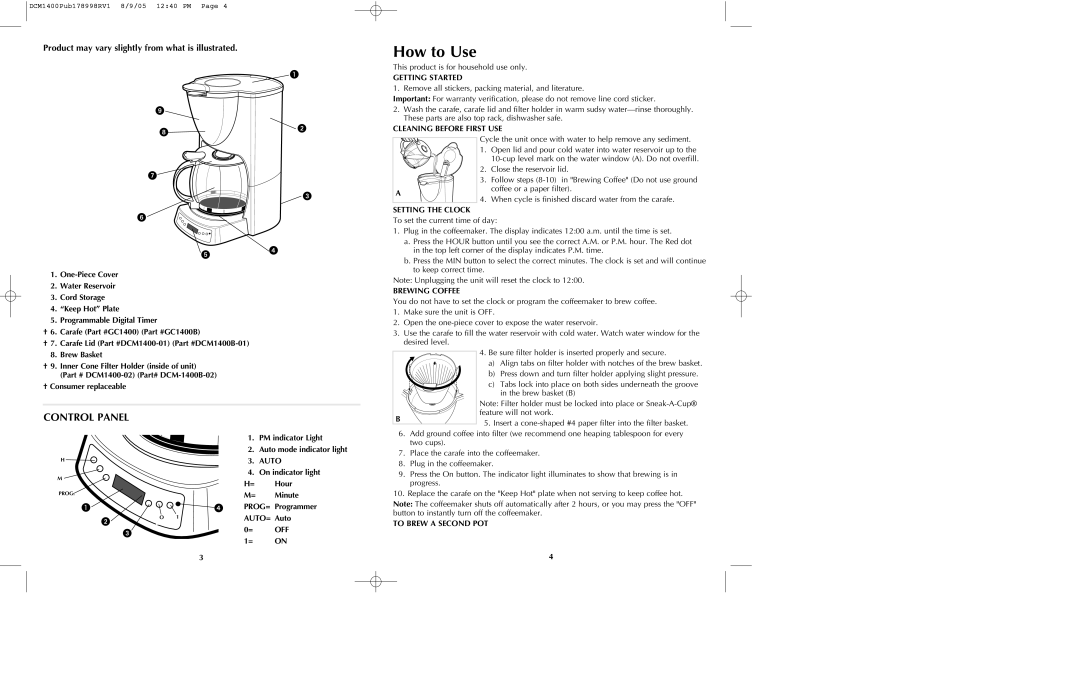
The Black & Decker DCM1400B and DCM1400 coffee makers are designed to deliver a satisfying brewing experience for coffee enthusiasts. These machines combine functionality and user convenience with a modern design, making them an ideal addition to any kitchen.One of the standout features of the DCM1400B and DCM1400 is their capacity. With a 12-cup carafe, these models allow users to brew enough coffee to serve a group, making them perfect for families or social gatherings. The glass carafe is designed with a comfortable handle and a drip-free spout, ensuring easy pouring without mess or spills.
The brewing process is made easy with the simplified operation. Both models come with a programmable clock and timer, providing the convenience of setting the machine to brew coffee at a designated time. This feature is particularly beneficial for morning routines, allowing users to wake up to the inviting aroma of freshly brewed coffee.
Another notable technology is the Brew Pause feature, which permits users to pause the brewing cycle and pour a cup of coffee before the entire pot is finished. This is a practical option for those who can’t wait for the entire brew cycle to complete before getting their caffeine fix.
The DCM1400B and DCM1400 also incorporate a removable filter basket, simplifying the cleaning process significantly. This feature allows for easy disposal of used coffee grounds and facilitates the use of either paper or permanent filters.
Furthermore, these coffee makers are designed with a built-in safety feature that automatically shuts off the machine after a certain period of inactivity. This not only conserves energy but also provides peace of mind, especially for users who may forget to turn off their appliances.
The aesthetic appeal of the DCM1400B is enhanced by its sleek black finish, which easily complements a variety of kitchen styles. This modern coffee maker is not only efficient but also adds a touch of elegance to your countertop.
In summary, the Black & Decker DCM1400B and DCM1400 coffee makers represent an excellent choice for coffee lovers. With their generous capacity, programmable functions, Brew Pause feature, and easy maintenance, they combine practicality with style, ensuring that users can enjoy their favorite brew with minimal hassle.