Safety Warnings and Instructions: Drills
| WARNING: Shock hazard. When drilling or driving into walls, floors or wherever |
| live electrical wires may be encountered, DO NOT TOUCH ANY METAL PARTS OF |
• Do not lock the tool ON when drilling by hand. Refer to Operating | |
| THE TOOL! Hold the tool onlyby the pl stic handle(s) /housingto prevent shock. |
• | On and Off. |
Hold drill firmly with both hands to control the | |
| twisting action of the drill (figure A). If your drill is A |
| equipped with a side handle, always use the side |
| WARNING: Drill may stall (if overloaded or |
| handle. |
| improperly used) causing a twist.Always expect the |
| stall. Grip the drill firmly to control the twisting action |
| and prevent loss of control which could cause |
| personal injury. If a stall does occur, release the |
| trigger immediately and determine the reason for the |
• | stall before |
Always unplug the drill when attaching or removing accessories. Whenattaching | |
| accessories in the drill chuck, it is important to securely tighten the chuck using allthree |
| holes to prevent slippage. When using a keyless chuck, hand tighten firmly. |
MotoBe sure your power supply agrees with nameplate marking. 120 Volts AC only means your drill will operate on standard 60 Hz household power. Do not operate AC tools on DC. A rating of 120 volts AC/DC means that your tool will operate on standard 60 Hz AC or DC power. This information is printed on the nameplate. Lower voltage will cause loss of power and can result in
Assembly | make surethat the tool is | |
| WARNING: To reduce the risk of injury, beforeassembly, | |
| switched off and unplugged. |
|
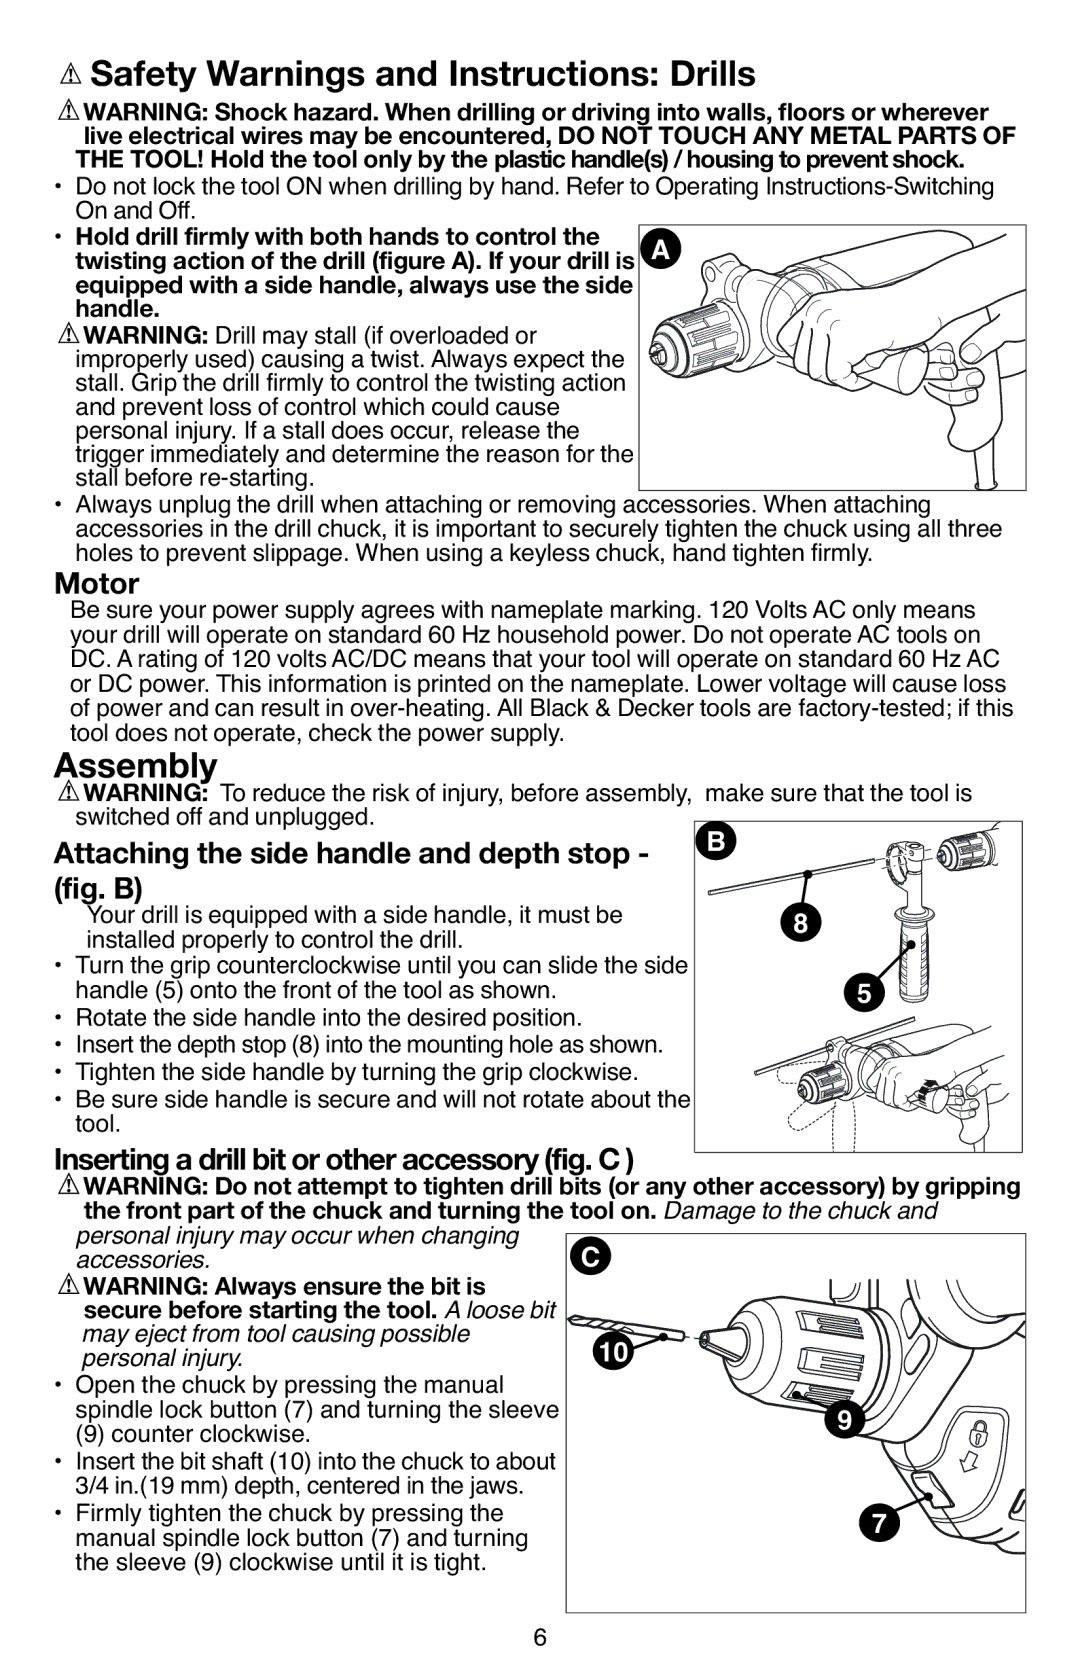
Attaching the side handle and depth stop - | 8 | |
(fig. B) | ||
| Your drill is equipped with a side handle, it must be | |
• | installed properly to control the drill. |
|
Turn the grip counterclockwise until you can slide the side | 5 | |
• | handle (5) onto the front of the tool as shown. | |
Rotate the side handle into the desired position. | ||
• | Insert the depth stop (8) into themounting hole as shown. |
|
• | Tighten the side handle by turning the grip clockwise. |
|
• | Be sure side handle is secure and will not rotate about the |
|
| tool. |
|
Inserting adrillbit orother acessory (fig. C)
| WARNING: Do not attempt to tighten drill bits (or any other accessory) by gripping | |||
| the front part of the chuck a | d turn | the tool on. Damage to the chuck and | |
| personal injury may occur whenchanging |
| C | |
| accessories. |
|
| |
| WARNING: Always ensure the bit is |
|
| |
| secur bef re starting the t | ol. A loose bit |
| |
| may eject from tool causing possible |
| 10 | |
| personal injury. |
|
| |
• Open the chuck by pressing the manual |
|
| ||
| spindle lock button (7) and turning the sleeve | 9 | ||
• | (9) counter clockwise. |
|
| |
Insert the bit shaft (10) into thechuck to about |
| |||
• | 3/4 in.(19 mm) depth, centeredin the jaws. |
|
| |
Firmly tighten the chuck by pressing the |
| 7 | ||
| manual spindle lock button (7) and turning | |||
| the sleeve (9) clockwise until it is tight. | 6 |
| |
|
|
|
| |