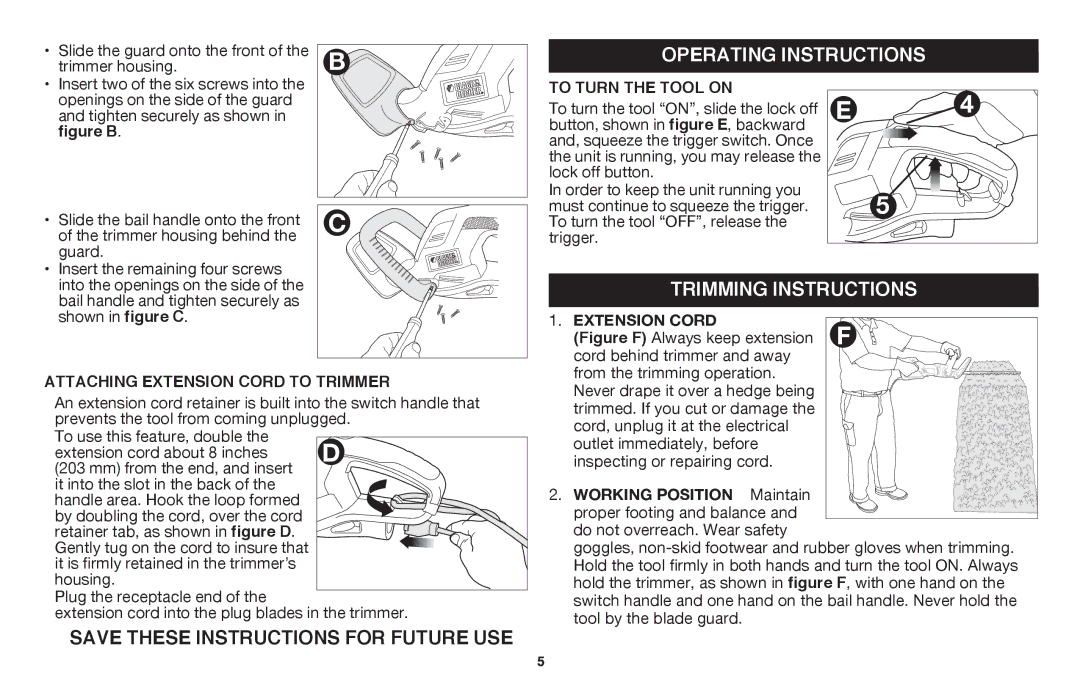
• Slide the guard onto the front of the |
trimmer housing. |
B |
operating instructions
• | Insert two of the six screws into the |
| openings on the side of the guard |
| and tighten securely as shown in |
| figure B. |
• | Slide the bail handle onto the front |
| of the trimmer housing behind the |
• | guard. |
Insert the remaining four screws |
C |
To turn the tool ON
To turn the tool “ON”, slide the lock off button, shown in figure E, backward and, squeeze the trigger switch. Once the unit is running, you may release the lock off button.
In order to keep the unit running you must continue to squeeze the trigger. To turn the tool “OFF”, release the trigger.
E | 4 |
| 5 |
into the openings on the side of the |
bail handle and tighten securely as |
shown in figure C. |
trimming instructions
1. EXTENSION CORD – | F |
(Figure F) Always keep extension | |
cord behind trimmer and away |
|
Attaching Extension Cord To Trimmer
An extension cord retainer is built into the switch handle that prevents the tool from coming unplugged.
To use this feature, double the | D |
extension cord about 8 inches | |
(203 mm) from the end, and insert | |
it into the slot in the back of the |
|
handle area. Hook the loop formed |
|
by doubling the cord, over the cord |
|
retainer tab, as shown in figure D. |
|
Gently tug on the cord to insure that |
|
it is firmly retained in the trimmerʼs |
|
housing. |
|
Plug the receptacle end of the |
|
extension cord into the plug blades in the trimmer. | |
Save these instructions for future use
from the trimming operation. |
Never drape it over a hedge being |
trimmed. If you cut or damage the |
cord, unplug it at the electrical |
outlet immediately, before |
inspecting or repairing cord. |
2. WORKING POSITION – Maintain proper footing and balance and do not overreach. Wear safety
goggles,
5