11.Place a washer inside the cabinet over each of the 4 holes you drilled.

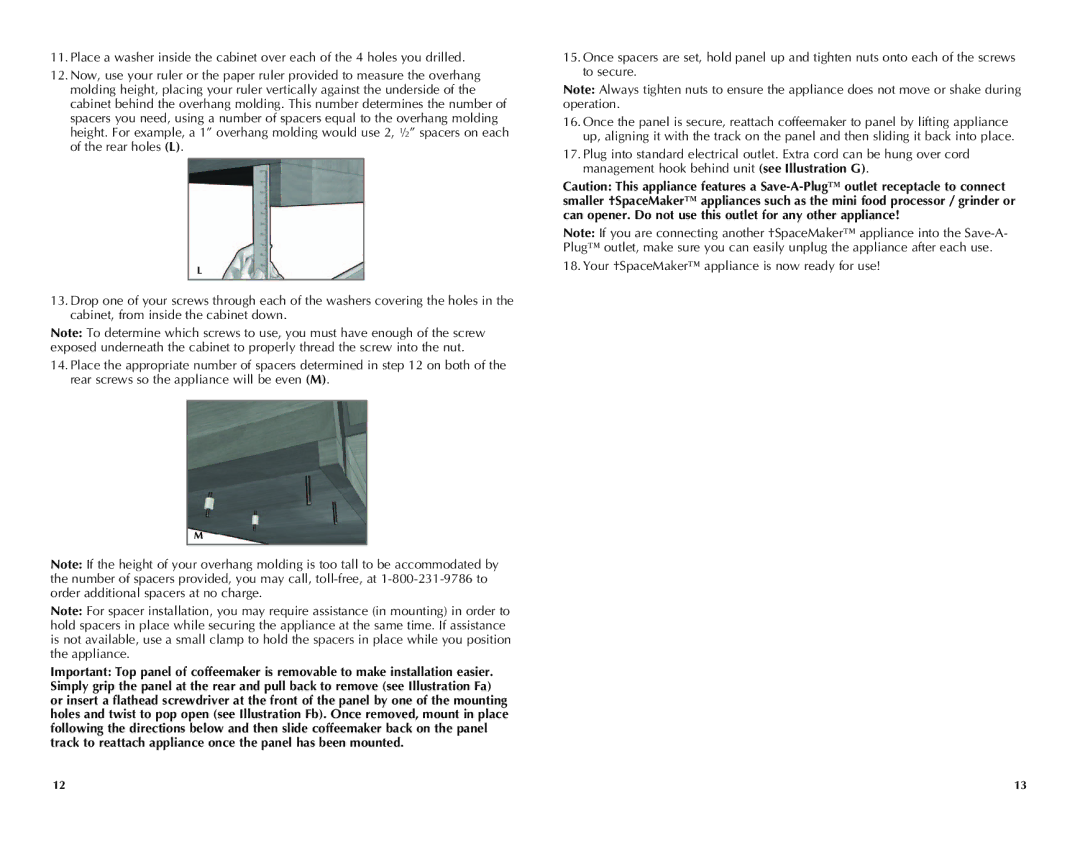
12.Now, use your ruler or the paper ruler provided to measure the overhang molding height, placing your ruler vertically against the underside of the cabinet behind the overhang molding. This number determines the number of spacers you need, using a number of spacers equal to the overhang molding height. For example, a 1” overhang molding would use 2, ½” spacers on each of the rear holes (L).

L

13.Drop one of your screws through each of the washers covering the holes in the cabinet, from inside the cabinet down.

Note: To determine which screws to use, you must have enough of the screw exposed underneath the cabinet to properly thread the screw into the nut.

14.Place the appropriate number of spacers determined in step 12 on both of the rear screws so the appliance will be even (M).

M

Note: If the height of your overhang molding is too tall to be accommodated by the number of spacers provided, you may call, toll-free, at 1-800-231-9786 to order additional spacers at no charge.

Note: For spacer installation, you may require assistance (in mounting) in order to hold spacers in place while securing the appliance at the same time. If assistance is not available, use a small clamp to hold the spacers in place while you position the appliance.

Important: Top panel of coffeemaker is removable to make installation easier. Simply grip the panel at the rear and pull back to remove (see Illustration Fa) or insert a flathead screwdriver at the front of the panel by one of the mounting holes and twist to pop open (see Illustration Fb). Once removed, mount in place following the directions below and then slide coffeemaker back on the panel track to reattach appliance once the panel has been mounted.

15.Once spacers are set, hold panel up and tighten nuts onto each of the screws to secure.

Note: Always tighten nuts to ensure the appliance does not move or shake during operation.

16.Once the panel is secure, reattach coffeemaker to panel by lifting appliance up, aligning it with the track on the panel and then sliding it back into place.

17.Plug into standard electrical outlet. Extra cord can be hung over cord management hook behind unit (see Illustration G).

Caution: This appliance features a Save-A-Plug™ outlet receptacle to connect smaller †SpaceMaker™ appliances such as the mini food processor / grinder or can opener. Do not use this outlet for any other appliance!

Note: If you are connecting another †SpaceMaker™ appliance into the Save-A- Plug™ outlet, make sure you can easily unplug the appliance after each use.

18. Your †SpaceMaker™ appliance is now ready for use!

12

13

Page 7
Image 7
Black & Decker SDC750, SDC740B manual

SDC740B, SDC750, SDC740 specifications

Black & Decker has long been recognized for its commitment to quality and innovation in power tools and home improvement equipment. Among its impressive lineup, the Black & Decker SDC740, SDC750, and SDC740B stand out for their user-friendly features, robust design, and advanced technology, making them ideal for DIY enthusiasts and professionals alike.

The Black & Decker SDC740 is a standout in the cordless drill category, boasting a lightweight and compact design that enhances maneuverability. With a powerful 20V max lithium-ion battery, it provides sustained performance for various tasks. This model features a 1/2-inch keyless chuck, enabling quick and easy bit changes, while the 24-position clutch allows for precise torque adjustment, helping to prevent overdriving screws. The built-in LED work light ensures visibility in dimly lit areas, making it perfect for tight spaces.

Moving on to the SDC750, this model offers additional features that elevate its functionality. Equipped with the same robust 20V max lithium-ion battery, it delivers ample power for both drilling and driving applications. The SDC750 has an advanced 2-speed transmission, giving users the ability to switch between high speed for quickly drilling holes and low speed for more controlled driving. Additionally, it comes with a soft-grip handle that enhances comfort during prolonged use, reducing user fatigue.

The SDC740B variant is the brushless version of the SDC740, which means it offers greater efficiency and a longer lifespan. Brushless motors generate less friction, leading to increased runtime and reduced maintenance requirements. Like its counterparts, the SDC740B features a keyless chuck for easy bit changes and provides excellent torque control through its adjustable clutch settings.

All three models emphasize convenience and ease of use, with ergonomic designs that cater to the comfort of the user. Their versatility allows them to tackle a variety of applications, from assembling furniture to hanging shelves. The inclusion of built-in LED lights ensures that users can operate effectively in various lighting conditions, enhancing their experience and productivity.

In summary, the Black & Decker SDC740, SDC750, and SDC740B combine impressive power, innovative features, and user-centric design. They are perfect options for anyone looking to invest in reliable and efficient cordless drills that can handle a wide range of tasks around the home or job site.