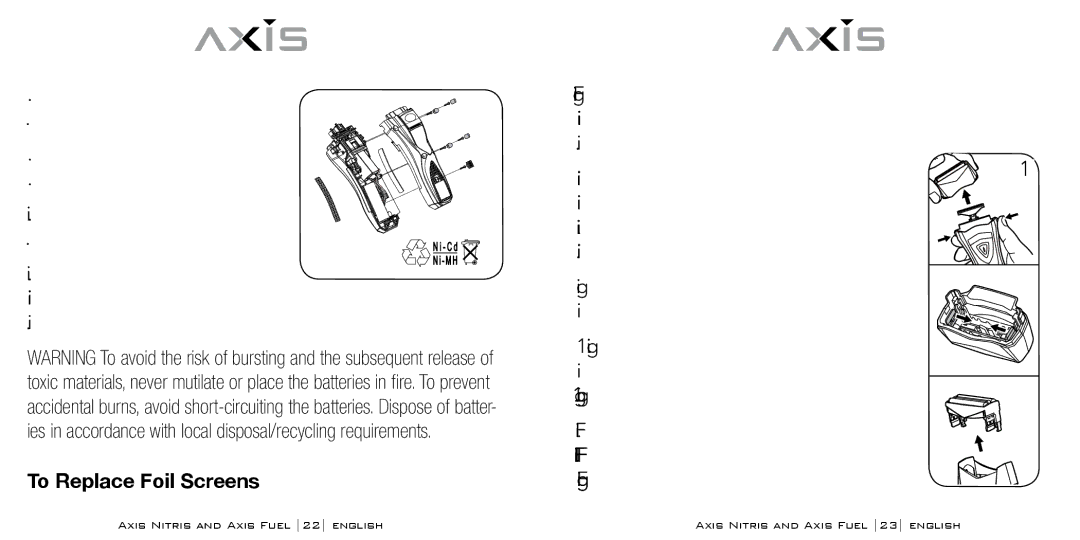
4. Remove 5 screws on the back of shaver.
5. Gently pull the two halves of the shaver body apart.
6. Pull the batteries out from the shaver.
7. Cut the wires that connect the batteries (4 wires for batteries) with nippers.
WARNING! To avoid the risk of bursting and the subsequent release of toxic materials, never mutilate or place the batteries in fire. To prevent accidental burns, avoid
To Replace Foil Screens
IMPORTANT: For the best shaving performance and results, we recom- mend that you replace the shaver’s foil screens every six months and inner cutters at least once a year.
Skin irritation or a deterioration of shave qual- | 1 |
| |
ity typically indicates that your foils need to be |
|
replaced. Replacement intervals will vary with |
|
individual use and hair types. |
|
(Please refer to the “Ordering Replacement Parts” | 2 |
section) |
|
1. Remove the foil screen assembly by pressing |
|
the release buttons on both sides of the shaver | 3 |
and lifting off the assembly off. (fig. 1) | |
2. The Outer Foils are mounted to the Outer |
|
Foil Frame. Release the Foil Frame from the Foil |
|
Frame Base by gently sliding a fingernail between |
|
AXIS NITRIS AND AXIS FUEL 22 ENGLISH | AXIS NITRIS AND AXIS FUEL 23 ENGLISH |
