Section
2
5
Assembly
WARNING
To prevent personal injury or property damage, do not start the engine until all assembly steps are complete and you have read and understand the safety and operating instruc- tions in this manual.
INTRODUCTION
Carefully read these instructions in their entirety before you attempt to assemble or operate your new equipment.
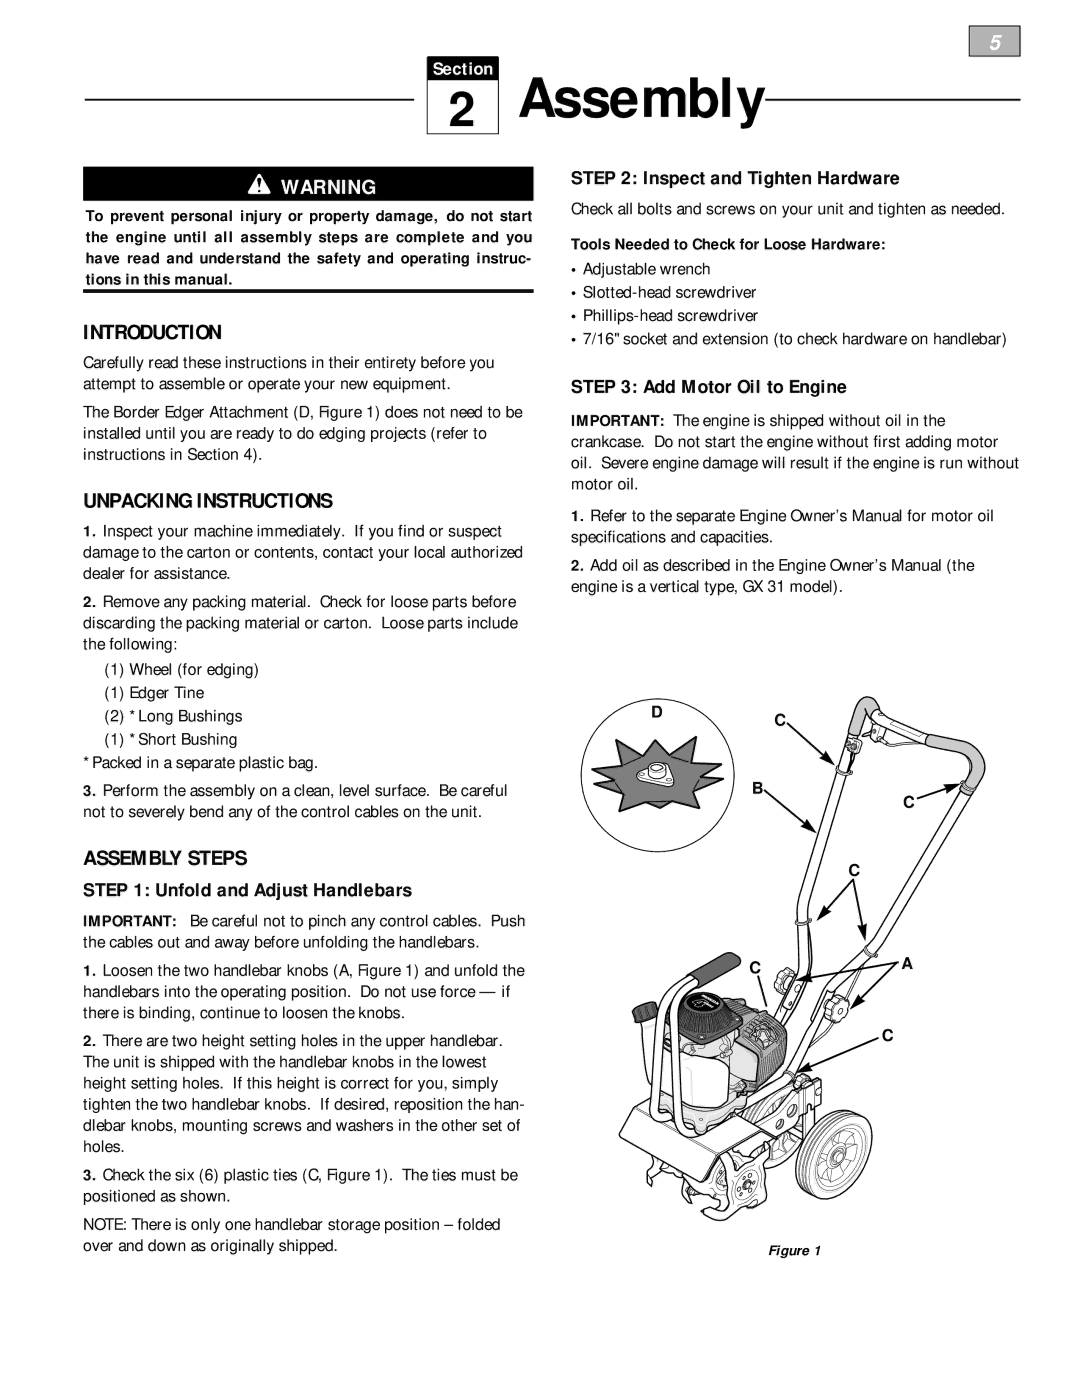
The Border Edger Attachment (D, Figure 1) does not need to be installed until you are ready to do edging projects (refer to instructions in Section 4).
UNPACKING INSTRUCTIONS
1.Inspect your machine immediately. If you find or suspect damage to the carton or contents, contact your local authorized dealer for assistance.
2.Remove any packing material. Check for loose parts before discarding the packing material or carton. Loose parts include the following:
(1)Wheel (for edging)
(1)Edger Tine
(2)*Long Bushings
(1)*Short Bushing
*Packed in a separate plastic bag.
3.Perform the assembly on a clean, level surface. Be careful not to severely bend any of the control cables on the unit.
ASSEMBLY STEPS
STEP 1: Unfold and Adjust Handlebars
IMPORTANT: Be careful not to pinch any control cables. Push the cables out and away before unfolding the handlebars.
1.Loosen the two handlebar knobs (A, Figure 1) and unfold the handlebars into the operating position. Do not use force — if there is binding, continue to loosen the knobs.
2.There are two height setting holes in the upper handlebar. The unit is shipped with the handlebar knobs in the lowest height setting holes. If this height is correct for you, simply tighten the two handlebar knobs. If desired, reposition the han- dlebar knobs, mounting screws and washers in the other set of holes.
3.Check the six (6) plastic ties (C, Figure 1). The ties must be positioned as shown.
NOTE: There is only one handlebar storage position – folded over and down as originally shipped.
STEP 2: Inspect and Tighten Hardware
Check all bolts and screws on your unit and tighten as needed.
Tools Needed to Check for Loose Hardware:
•Adjustable wrench
•
•
•7/16" socket and extension (to check hardware on handlebar)
STEP 3: Add Motor Oil to Engine
IMPORTANT: The engine is shipped without oil in the crankcase. Do not start the engine without first adding motor oil. Severe engine damage will result if the engine is run without motor oil.
1.Refer to the separate Engine Owner’s Manual for motor oil specifications and capacities.
2.Add oil as described in the Engine Owner’s Manual (the engine is a vertical type, GX 31 model).
DC
B
C
C
![]() C
C ![]() A
A
C
Figure 1