8Section 4: Operation
A |
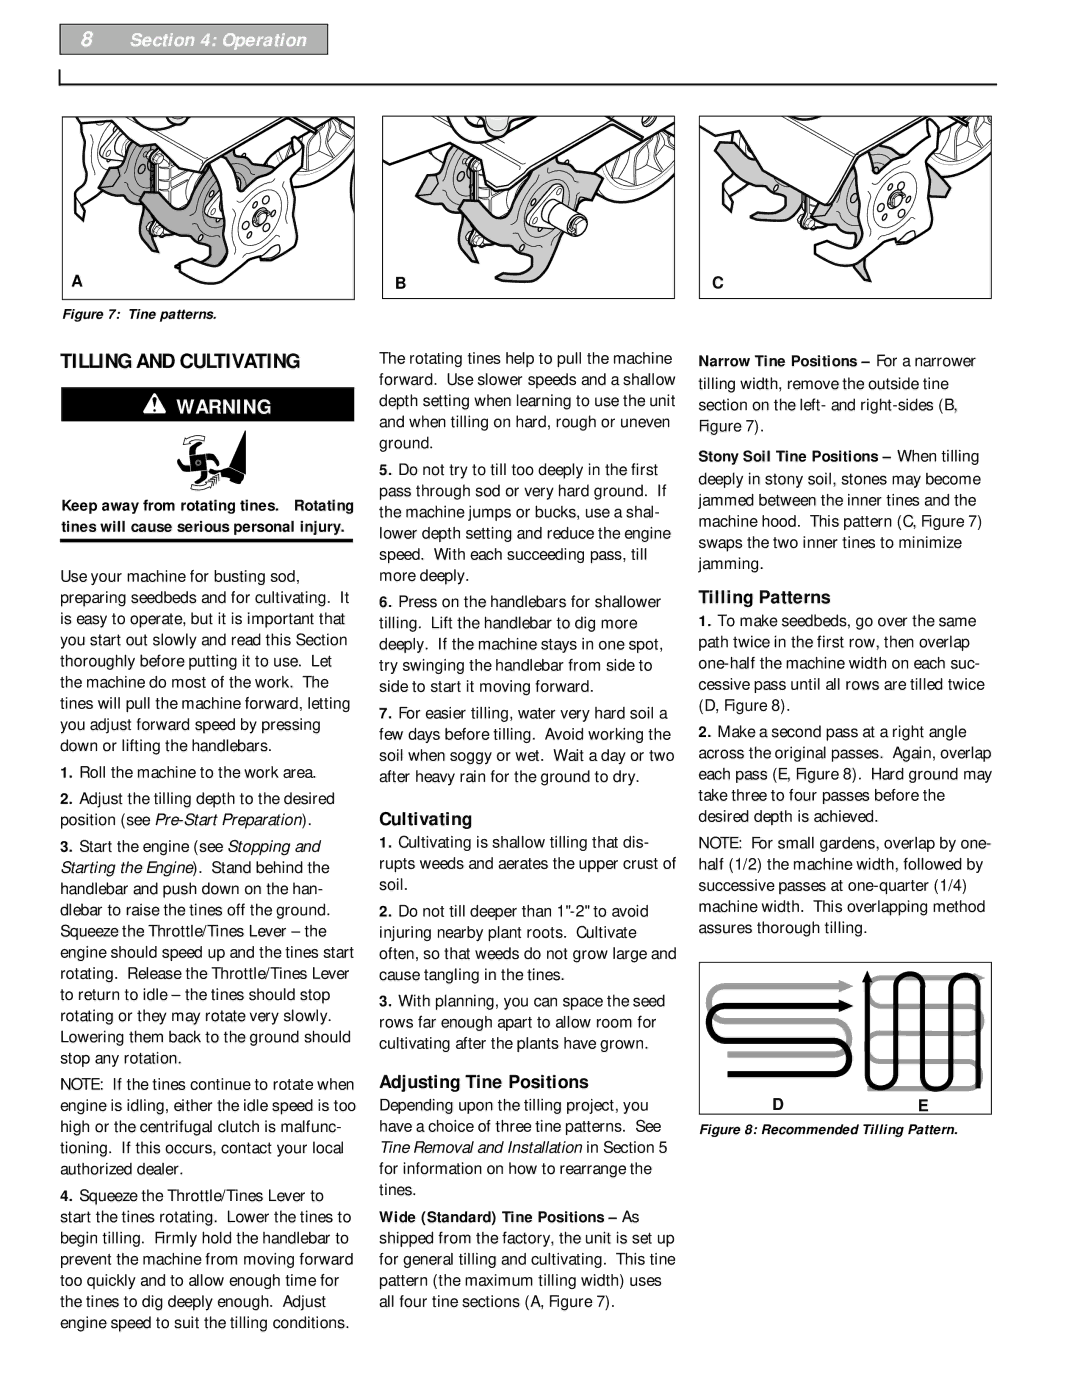
Figure 7: Tine patterns.
B |
C |
TILLING AND CULTIVATING
WARNING
Keep away from rotating tines. Rotating tines will cause serious personal injury.
Use your machine for busting sod, preparing seedbeds and for cultivating. It is easy to operate, but it is important that you start out slowly and read this Section thoroughly before putting it to use. Let the machine do most of the work. The tines will pull the machine forward, letting you adjust forward speed by pressing down or lifting the handlebars.
1.Roll the machine to the work area.
2.Adjust the tilling depth to the desired position (see
3.Start the engine (see Stopping and Starting the Engine). Stand behind the handlebar and push down on the han- dlebar to raise the tines off the ground. Squeeze the Throttle/Tines Lever – the engine should speed up and the tines start rotating. Release the Throttle/Tines Lever to return to idle – the tines should stop rotating or they may rotate very slowly. Lowering them back to the ground should stop any rotation.
NOTE: If the tines continue to rotate when engine is idling, either the idle speed is too high or the centrifugal clutch is malfunc- tioning. If this occurs, contact your local authorized dealer.
4.Squeeze the Throttle/Tines Lever to start the tines rotating. Lower the tines to begin tilling. Firmly hold the handlebar to prevent the machine from moving forward too quickly and to allow enough time for the tines to dig deeply enough. Adjust engine speed to suit the tilling conditions.
The rotating tines help to pull the machine forward. Use slower speeds and a shallow depth setting when learning to use the unit and when tilling on hard, rough or uneven ground.
5.Do not try to till too deeply in the first pass through sod or very hard ground. If the machine jumps or bucks, use a shal- lower depth setting and reduce the engine speed. With each succeeding pass, till more deeply.
6.Press on the handlebars for shallower tilling. Lift the handlebar to dig more deeply. If the machine stays in one spot, try swinging the handlebar from side to side to start it moving forward.
7.For easier tilling, water very hard soil a few days before tilling. Avoid working the soil when soggy or wet. Wait a day or two after heavy rain for the ground to dry.
Cultivating
1.Cultivating is shallow tilling that dis- rupts weeds and aerates the upper crust of soil.
2.Do not till deeper than
3.With planning, you can space the seed rows far enough apart to allow room for cultivating after the plants have grown.
Adjusting Tine Positions
Depending upon the tilling project, you have a choice of three tine patterns. See Tine Removal and Installation in Section 5 for information on how to rearrange the tines.
Wide (Standard) Tine Positions – As shipped from the factory, the unit is set up for general tilling and cultivating. This tine pattern (the maximum tilling width) uses all four tine sections (A, Figure 7).
Narrow Tine Positions – For a narrower tilling width, remove the outside tine section on the left- and
Stony Soil Tine Positions – When tilling deeply in stony soil, stones may become jammed between the inner tines and the machine hood. This pattern (C, Figure 7) swaps the two inner tines to minimize jamming.
Tilling Patterns
1.To make seedbeds, go over the same path twice in the first row, then overlap
2.Make a second pass at a right angle across the original passes. Again, overlap each pass (E, Figure 8). Hard ground may take three to four passes before the desired depth is achieved.
NOTE: For small gardens, overlap by one- half (1/2) the machine width, followed by successive passes at
DE