| en 9 |
|
|
3.) Launch Configuration Manager or
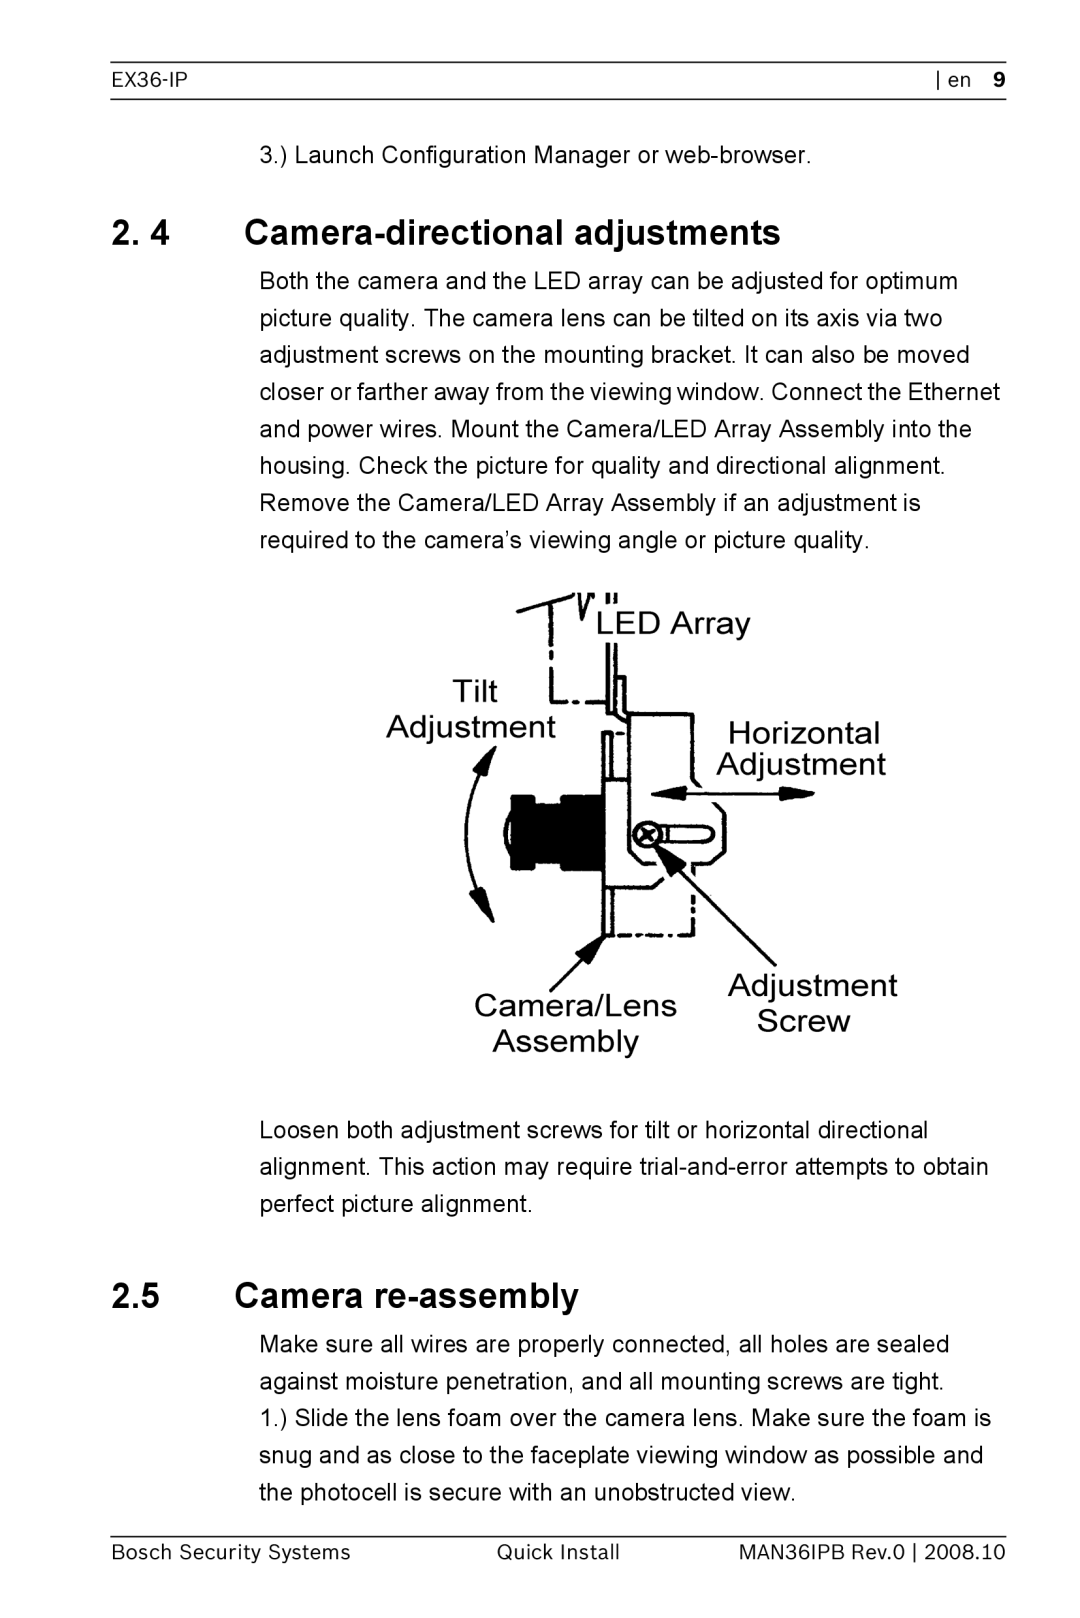
2. 4 Camera-directional adjustments
Both the camera and the LED array can be adjusted for optimum picture quality. The camera lens can be tilted on its axis via two adjustment screws on the mounting bracket. It can also be moved closer or farther away from the viewing window. Connect the Ethernet and power wires. Mount the Camera/LED Array Assembly into the housing. Check the picture for quality and directional alignment. Remove the Camera/LED Array Assembly if an adjustment is required to the camera’s viewing angle or picture quality.
Loosen both adjustment screws for tilt or horizontal directional alignment. This action may require
2.5Camera re-assembly
Make sure all wires are properly connected, all holes are sealed against moisture penetration, and all mounting screws are tight.
1.) Slide the lens foam over the camera lens. Make sure the foam is snug and as close to the faceplate viewing window as possible and the photocell is secure with an unobstructed view.
Bosch Security Systems | Quick Install | MAN36IPB Rev.0 2008.10 |