EN

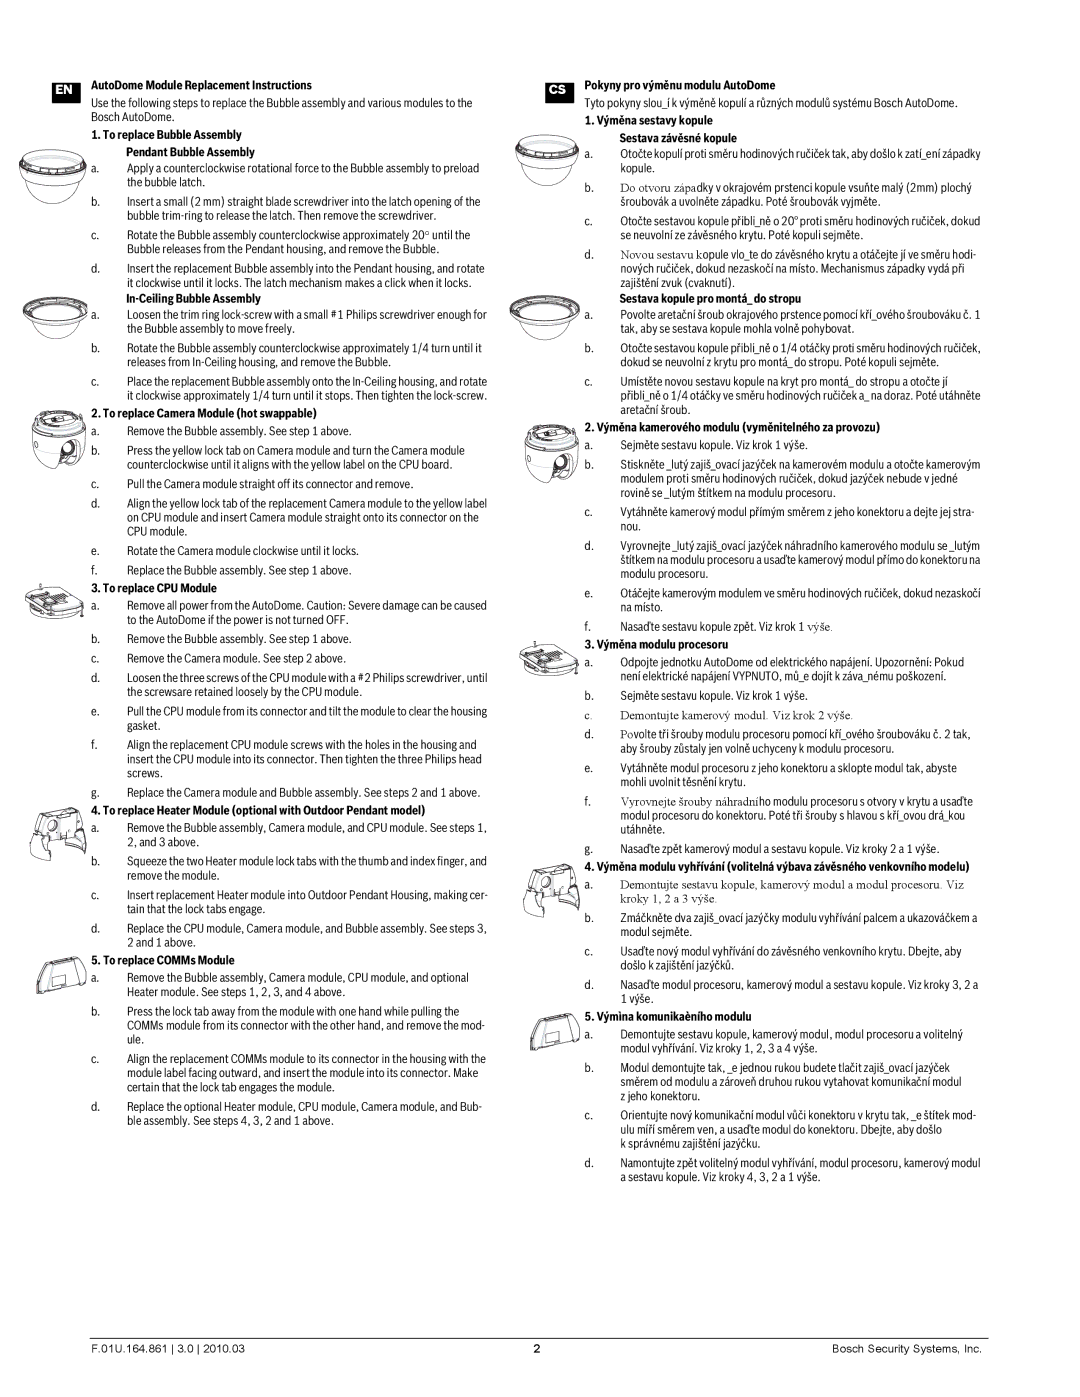
AutoDome Module Replacement Instructions

CS

Pokyny pro výměnu modulu AutoDome


Use the following steps to replace the Bubble assembly and various modules to the Bosch AutoDome.

1. To replace Bubble Assembly Pendant Bubble Assembly

a.Apply a counterclockwise rotational force to the Bubble assembly to preload the bubble latch.

b.Insert a small (2 mm) straight blade screwdriver into the latch opening of the bubble trim-ring to release the latch. Then remove the screwdriver.

c.Rotate the Bubble assembly counterclockwise approximately 20° until the Bubble releases from the Pendant housing, and remove the Bubble.

d.Insert the replacement Bubble assembly into the Pendant housing, and rotate it clockwise until it locks. The latch mechanism makes a click when it locks.

In-Ceiling Bubble Assembly

Tyto pokyny slou_í k výměně kopulí a různých modulů systému Bosch AutoDome.

1. Výměna sestavy kopule Sestava závěsné kopule

a.Otočte kopulí proti směru hodinových ručiček tak, aby došlo k zatí_ení západky kopule.

b.Do otvoru západky v okrajovém prstenci kopule vsuňte malý (2mm) plochý šroubovák a uvolněte západku. Poté šroubovák vyjměte.

c.Otočte sestavou kopule přibli_ně o 20° proti směru hodinových ručiček, dokud se neuvolní ze závěsného krytu. Poté kopuli sejměte.

d.Novou sestavu kopule vlo_te do závěsného krytu a otáčejte jí ve směru hodi- nových ručiček, dokud nezaskočí na místo. Mechanismus západky vydá při zajištění zvuk (cvaknutí).

Sestava kopule pro montá_ do stropu

a.Loosen the trim ring lock-screw with a small #1 Philips screwdriver enough for the Bubble assembly to move freely.

b.Rotate the Bubble assembly counterclockwise approximately 1/4 turn until it releases from In-Ceiling housing, and remove the Bubble.

c.Place the replacement Bubble assembly onto the In-Ceiling housing, and rotate it clockwise approximately 1/4 turn until it stops. Then tighten the lock-screw.

2. To replace Camera Module (hot swappable)

a.Remove the Bubble assembly. See step 1 above.

b.Press the yellow lock tab on Camera module and turn the Camera module counterclockwise until it aligns with the yellow label on the CPU board.

c.Pull the Camera module straight off its connector and remove.

d.Align the yellow lock tab of the replacement Camera module to the yellow label on CPU module and insert Camera module straight onto its connector on the CPU module.

a.Povolte aretační šroub okrajového prstence pomocí kří_ového šroubováku č. 1 tak, aby se sestava kopule mohla volně pohybovat.

b.Otočte sestavou kopule přibli_ně o 1/4 otáčky proti směru hodinových ručiček, dokud se neuvolní z krytu pro montá_ do stropu. Poté kopuli sejměte.

c.Umístěte novou sestavu kopule na kryt pro montá_ do stropu a otočte jí

přibli_ně o 1/4 otáčky ve směru hodinových ručiček a_ na doraz. Poté utáhněte aretační šroub.

2. Výměna kamerového modulu (vyměnitelného za provozu)

a.Sejměte sestavu kopule. Viz krok 1 výše.

b.Stiskněte _lutý zajiš_ovací jazýček na kamerovém modulu a otočte kamerovým modulem proti směru hodinových ručiček, dokud jazýček nebude v jedné rovině se _lutým štítkem na modulu procesoru.

c.Vytáhněte kamerový modul přímým směrem z jeho konektoru a dejte jej stra- nou.

e.Rotate the Camera module clockwise until it locks.

f.Replace the Bubble assembly. See step 1 above.

3. To replace CPU Module

a.Remove all power from the AutoDome. Caution: Severe damage can be caused to the AutoDome if the power is not turned OFF.

b.Remove the Bubble assembly. See step 1 above.

c.Remove the Camera module. See step 2 above.

d.Loosen the three screws of the CPU module with a #2 Philips screwdriver, until the screwsare retained loosely by the CPU module.

e.Pull the CPU module from its connector and tilt the module to clear the housing gasket.

f.Align the replacement CPU module screws with the holes in the housing and insert the CPU module into its connector. Then tighten the three Philips head screws.

g.Replace the Camera module and Bubble assembly. See steps 2 and 1 above.

4. To replace Heater Module (optional with Outdoor Pendant model)

a.Remove the Bubble assembly, Camera module, and CPU module. See steps 1, 2, and 3 above.

b.Squeeze the two Heater module lock tabs with the thumb and index finger, and remove the module.

c.Insert replacement Heater module into Outdoor Pendant Housing, making cer- tain that the lock tabs engage.

d.Replace the CPU module, Camera module, and Bubble assembly. See steps 3, 2 and 1 above.

5. To replace COMMs Module

a.Remove the Bubble assembly, Camera module, CPU module, and optional Heater module. See steps 1, 2, 3, and 4 above.

b.Press the lock tab away from the module with one hand while pulling the COMMs module from its connector with the other hand, and remove the mod- ule.

c.Align the replacement COMMs module to its connector in the housing with the module label facing outward, and insert the module into its connector. Make certain that the lock tab engages the module.

d.Replace the optional Heater module, CPU module, Camera module, and Bub- ble assembly. See steps 4, 3, 2 and 1 above.

d.Vyrovnejte _lutý zajiš_ovací jazýček náhradního kamerového modulu se _lutým štítkem na modulu procesoru a usaďte kamerový modul přímo do konektoru na modulu procesoru.

e.Otáčejte kamerovým modulem ve směru hodinových ručiček, dokud nezaskočí na místo.

f.Nasaďte sestavu kopule zpět. Viz krok 1 výše.

3. Výměna modulu procesoru

a. Odpojte jednotku AutoDome od elektrického napájení. Upozornění: Pokud není elektrické napájení VYPNUTO, mů_e dojít k záva_nému poškození.

b.Sejměte sestavu kopule. Viz krok 1 výše.

c.Demontujte kamerový modul. Viz krok 2 výše.

d.Povolte tři šrouby modulu procesoru pomocí kří_ového šroubováku č. 2 tak, aby šrouby zůstaly jen volně uchyceny k modulu procesoru.

e.Vytáhněte modul procesoru z jeho konektoru a sklopte modul tak, abyste mohli uvolnit těsnění krytu.

f.Vyrovnejte šrouby náhradního modulu procesoru s otvory v krytu a usaďte modul procesoru do konektoru. Poté tři šrouby s hlavou s kří_ovou drá_kou utáhněte.

g.Nasaďte zpět kamerový modul a sestavu kopule. Viz kroky 2 a 1 výše.

4. Výměna modulu vyhřívání (volitelná výbava závěsného venkovního modelu)

a. Demontujte sestavu kopule, kamerový modul a modul procesoru. Viz kroky 1, 2 a 3 výše.

b. Zmáčkněte dva zajiš_ovací jazýčky modulu vyhřívání palcem a ukazováčkem a modul sejměte.

c.Usaďte nový modul vyhřívání do závěsného venkovního krytu. Dbejte, aby došlo k zajištění jazýčků.

d.Nasaďte modul procesoru, kamerový modul a sestavu kopule. Viz kroky 3, 2 a 1 výše.

5. Výmìna komunikaèního modulu

a. Demontujte sestavu kopule, kamerový modul, modul procesoru a volitelný modul vyhřívání. Viz kroky 1, 2, 3 a 4 výše.

b.Modul demontujte tak, _e jednou rukou budete tlačit zajiš_ovací jazýček směrem od modulu a zároveň druhou rukou vytahovat komunikační modul z jeho konektoru.

c.Orientujte nový komunikační modul vůči konektoru v krytu tak, _e štítek mod- ulu míří směrem ven, a usaďte modul do konektoru. Dbejte, aby došlo

k správnému zajištění jazýčku.

d.Namontujte zpět volitelný modul vyhřívání, modul procesoru, kamerový modul a sestavu kopule. Viz kroky 4, 3, 2 a 1 výše.

F.01U.164.861 3.0 2010.03

2

Bosch Security Systems, Inc.

Page 2
Image 2
Bosch Appliances VG4-100 user manual AutoDome Module Replacement Instructions

VG4-100 specifications

The Bosch VG4-100 is a state-of-the-art appliance designed to elevate your culinary experience while maximizing efficiency and convenience in the kitchen. Characterized by its blend of innovative technology and sleek design, the VG4-100 is an ideal choice for anyone looking to enhance their cooking capabilities.

One of the standout features of the Bosch VG4-100 is its powerful ventilation system. With a high-performance blower, this appliance effectively removes smoke, steam, and odors from the kitchen, ensuring a fresh cooking environment. Its adjustable fan speeds allow you to tailor the airflow depending on the cooking activity, whether simmering a delicate sauce or searing meat at high temperatures. The specially designed baffle filters capture grease and particulates, ensuring optimal performance while being easy to clean.

In addition to its ventilation capabilities, the Bosch VG4-100 boasts a range of modern technologies that make cooking more enjoyable and efficient. The appliance is equipped with an integrated LED lighting system that brightly illuminates your cooking surface. This not only enhances visibility while cooking but also adds a stylish touch to the kitchen atmosphere.

The Bosch VG4-100 is designed with user-friendliness in mind. Its intuitive controls feature a digital display that makes it simple to adjust settings and monitor performance. Whether you're a seasoned chef or a novice cook, the appliance is set up to cater to your needs with ease.

Durability and quality craftsmanship are hallmarks of the Bosch brand, and the VG4-100 is no exception. Constructed with high-grade materials, the appliance is built to withstand the rigors of daily use while maintaining a sophisticated appearance. Its stainless steel finish is resistant to stains and fingerprints, ensuring that it continues to look sleek and modern over time.

Moreover, the Bosch VG4-100 is designed with energy efficiency in mind. It meets Energy Star standards, which means it not only reduces environmental impact but also helps save on utility bills. This commitment to sustainability aligns with the increasing consumer demand for eco-friendly appliances.

In summary, the Bosch VG4-100 combines powerful ventilation, advanced technologies, user-friendly controls, and impeccable quality in a sleek design. Whether you are preparing a simple meal or an elaborate feast, this appliance stands ready to meet your culinary demands while enhancing the overall kitchen experience. Investing in the Bosch VG4-100 means embracing a new standard of cooking efficiency and satisfaction.