BM 2610925945
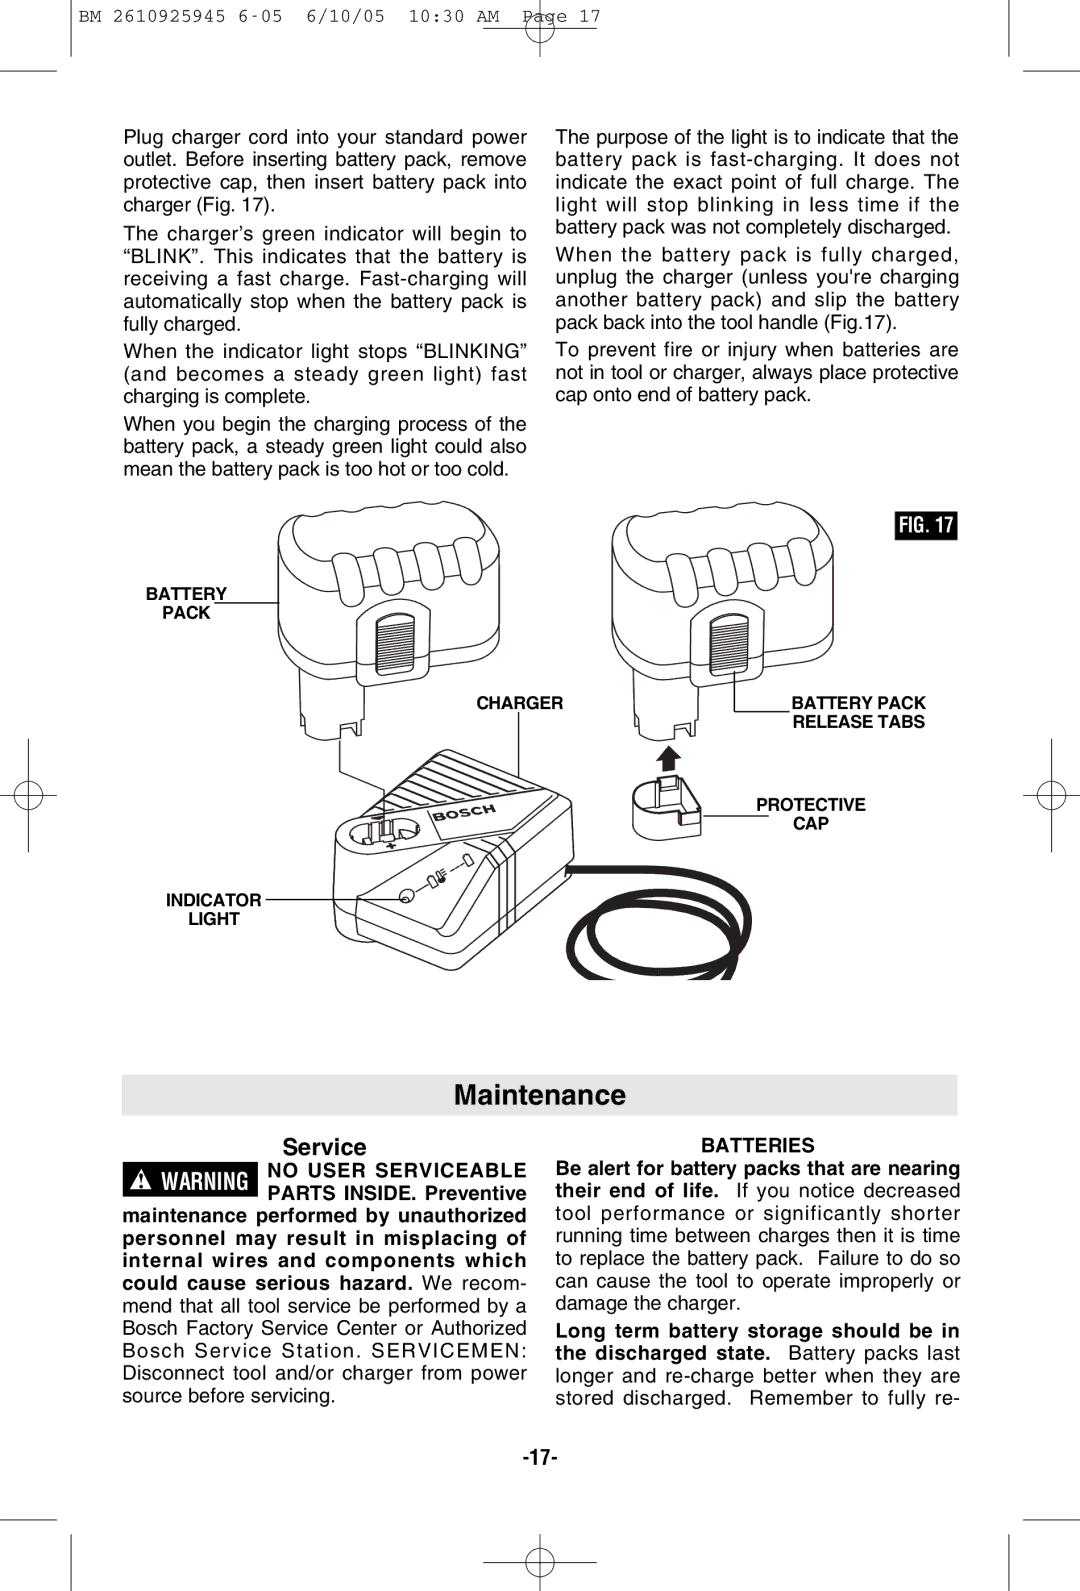
Plug charger cord into your standard power outlet. Before inserting battery pack, remove protective cap, then insert battery pack into charger (Fig. 17).
The charger’s green indicator will begin to “BLINK”. This indicates that the battery is receiving a fast charge.
When the indicator light stops “BLINKING” (and becomes a steady green light) fast charging is complete.
When you begin the charging process of the battery pack, a steady green light could also mean the battery pack is too hot or too cold.
The purpose of the light is to indicate that the battery pack is
When the battery pack is fully charged, unplug the charger (unless you're charging another battery pack) and slip the battery pack back into the tool handle (Fig.17).
To prevent fire or injury when batteries are not in tool or charger, always place protective cap onto end of battery pack.
BATTERY
PACK
CHARGER
INDICATOR
LIGHT
FIG. 17
BATTERY PACK
RELEASE TABS
PROTECTIVE
CAP
Maintenance
Service
!WARNING NO USER SERVICEABLE PARTS INSIDE. Preventive
maintenance performed by unauthorized personnel may result in misplacing of internal wires and components which could cause serious hazard. We recom- mend that all tool service be performed by a Bosch Factory Service Center or Authorized Bosch Service Station. SERVICEMEN: Disconnect tool and/or charger from power source before servicing.
BATTERIES
Be alert for battery packs that are nearing their end of life. If you notice decreased tool performance or significantly shorter running time between charges then it is time to replace the battery pack. Failure to do so can cause the tool to operate improperly or damage the charger.
Long term battery storage should be in the discharged state. Battery packs last longer and
