BM 1609929J65 01-11:BM 1609929J65 01-11 1/20/11 10:41 AM Page 13
WIRE BRUSH ASSEMBLy
Before assembling wire brush to this tool, disconnect from the power source. Attach hand guard (Fig. 1). Wire brushes are equipped with their own threaded hub, simply thread on to spindle. Be sure to seat against shoulder before turning tool “ON”.
TO REMOVE: Reverse procedure.
WIRE WHEEL ASSEMBLy
Before assembling wire wheel to this tool, disconnect from the power source. Attach type 27 guard (Fig. 2). Wire wheeels are equipped with their own threaded hub, simply thread on to spindle. Be sure to seat against shoulder before turning tool “ON”.
TO REMOVE: Reverse procedure.
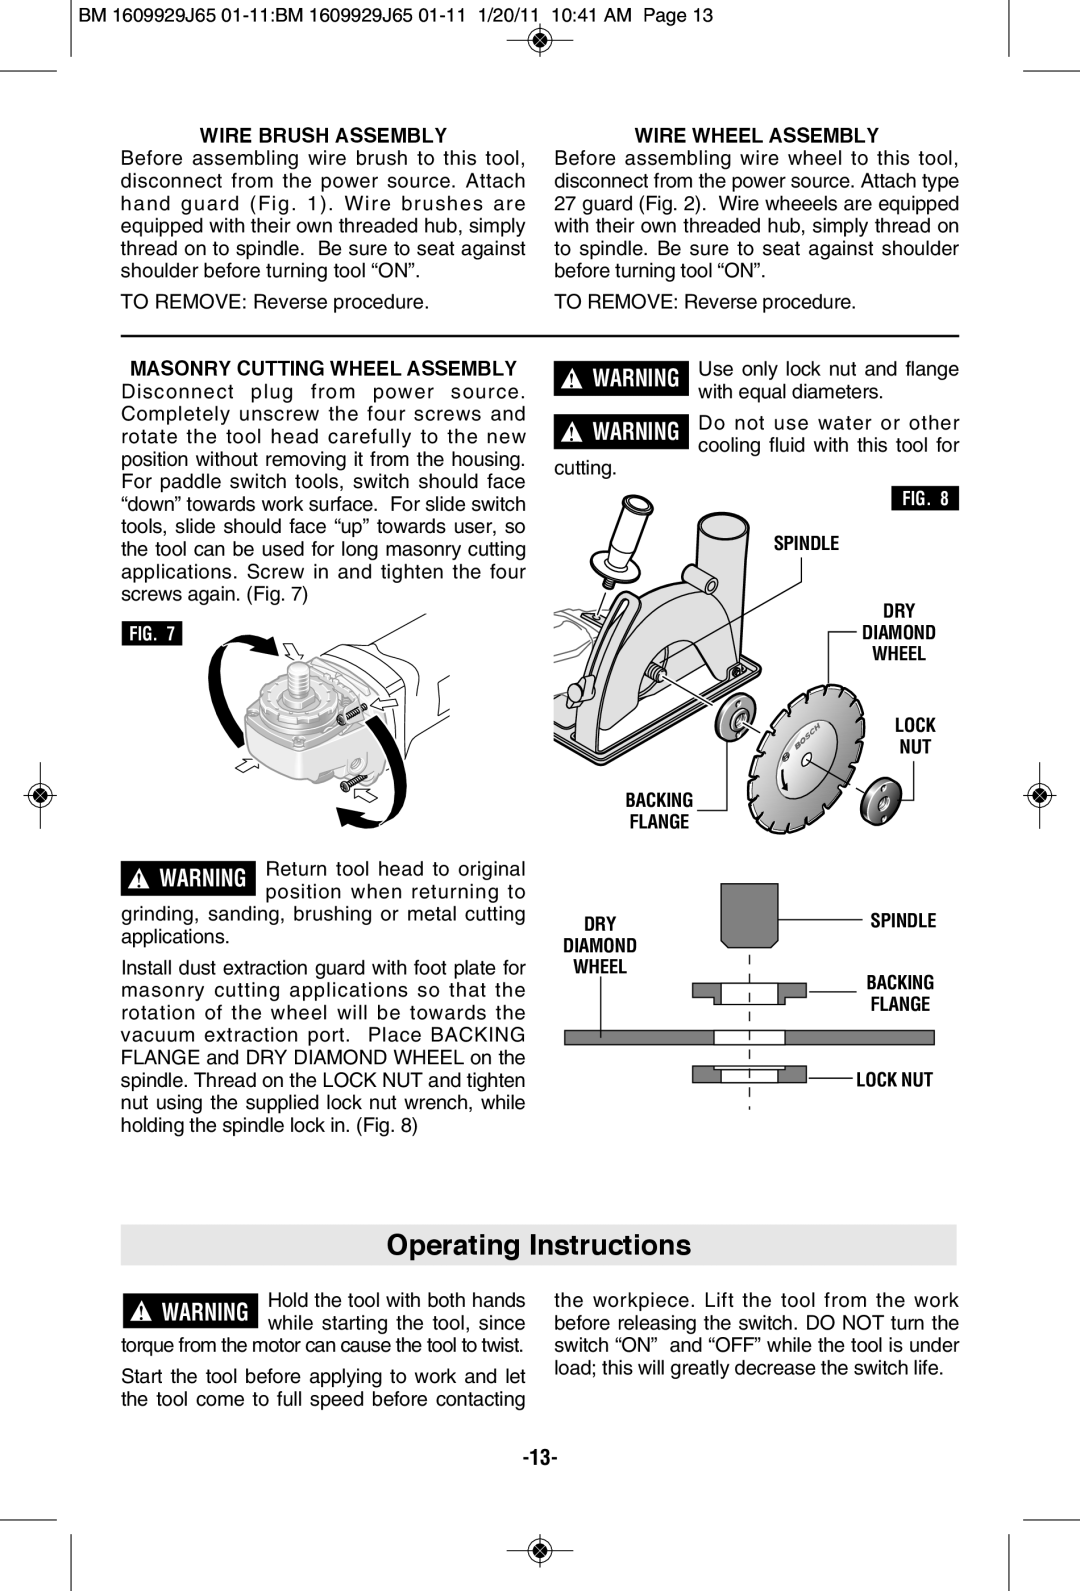
MASONRy CUTTING WHEEL ASSEMBLy Disconnect plug from power source. Completely unscrew the four screws and rotate the tool head carefully to the new position without removing it from the housing. For paddle switch tools, switch should face “down” towards work surface. For slide switch tools, slide should face “up” towards user, so the tool can be used for long masonry cutting applications. Screw in and tighten the four screws again. (Fig. 7)
FIG. 7
!WARNING
!WARNING
cutting.
BACKING
FLANGE
Use only lock nut and flange with equal diameters.
Do not use water or other cooling fluid with this tool for
FIG. 8
SPINDLE
DRY
DIAMOND
WHEEL
LOCK
NUT
!WARNING Return tool head to original position when returning to
grinding, sanding, brushing or metal cutting applications.
Install dust extraction guard with foot plate for masonry cutting applications so that the rotation of the wheel will be towards the vacuum extraction port. Place BACKING FLANGE and DRY DIAMOND WHEEL on the spindle. Thread on the LOCK NUT and tighten nut using the supplied lock nut wrench, while holding the spindle lock in. (Fig. 8)
DRY |
|
|
|
|
|
| SPINDLE | |
|
|
|
|
|
| |||
DIAMOND |
|
|
|
|
|
|
| |
WHEEL |
|
|
|
|
|
| BACKING | |
|
|
|
|
|
|
|
| |
|
|
|
|
| ||||
|
|
|
|
|
|
|
| FLANGE |
|
|
|
|
| ||||
|
|
|
|
|
|
|
|
|
|
|
|
|
|
|
|
|
|
|
|
|
|
|
| LOCK NUT | ||
|
|
|
|
|
| |||
|
|
|
|
|
| |||
Operating Instructions
Hold the tool with both hands ! WARNING while starting the tool, since
torque from the motor can cause the tool to twist.
Start the tool before applying to work and let the tool come to full speed before contacting
the workpiece. Lift the tool from the work before releasing the switch. DO NOT turn the switch “ON” and “OFF” while the tool is under load; this will greatly decrease the switch life.
