
151 SE specifications
The Bose 151 SE speakers are an exceptional choice for outdoor audio enthusiasts looking for high-quality sound without compromising on durability. Designed specifically for outdoor use, these speakers offer a robust construction that can withstand the elements, making them a popular option for patios, gardens, and pool areas.One of the standout features of the Bose 151 SE is its patented 2-way design, which incorporates a high-performance 4.5-inch full-range driver and a 5.25-inch woofer. This combination delivers a well-balanced sound signature, ensuring that both highs and lows are rendered with clarity and depth. The integrated environmental EQ allows users to enjoy a richer and more immersive audio experience, compensating for outdoor acoustics, while maintaining fidelity in sound reproduction.
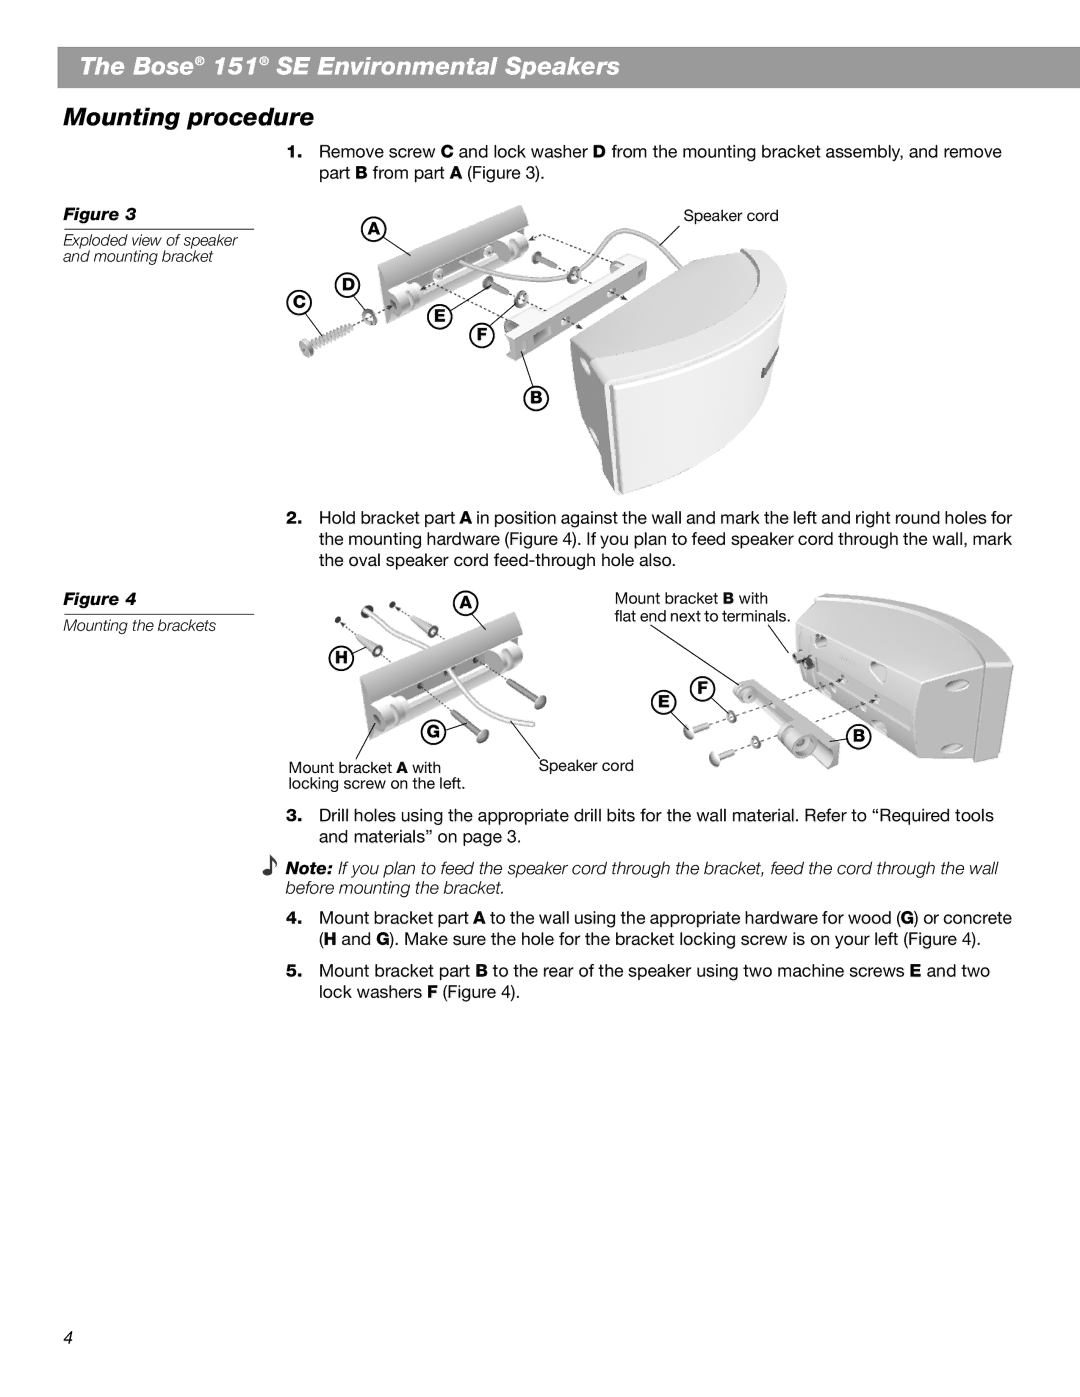
These speakers feature a stylish, weather-resistant enclosure that not only blends seamlessly with outdoor decor but also protects the internal components from moisture and UV damage. This durability is coupled with a versatile design that allows for easy installation in various settings, thanks to the adjustable brackets that enable flexible mounting options. You can position the Bose 151 SE speakers horizontally or vertically, catering to your specific space requirements.
Bose's innovative Articulated Array speaker design is also present in the 151 SE, which strategically positions the drivers to produce an expansive sound field. This technology enhances the overall listening experience by dispersing sound evenly across a larger area, eliminating the need for multiple speakers in smaller outdoor spaces.
In terms of connectivity, the Bose 151 SE is designed for simplicity. These speakers can be connected to any standard amplifier or receiver, allowing for compatibility with a wide range of audio systems. Whether you're hosting a garden party or enjoying a quiet evening under the stars, the effortless integration makes setting up your outdoor audio system a breeze.
Overall, the Bose 151 SE speakers are synonymous with quality and performance. With a combination of durable construction, advanced driver technology, and a versatile design, these speakers stand out as an excellent investment for anyone looking to enhance their outdoor audio experience. The Bose brand continues to set the standard for sound innovation, ensuring that music lovers can enjoy their favorite tunes in any setting.