All Installations
1.Strip
2.Connect the wire to the speaker.
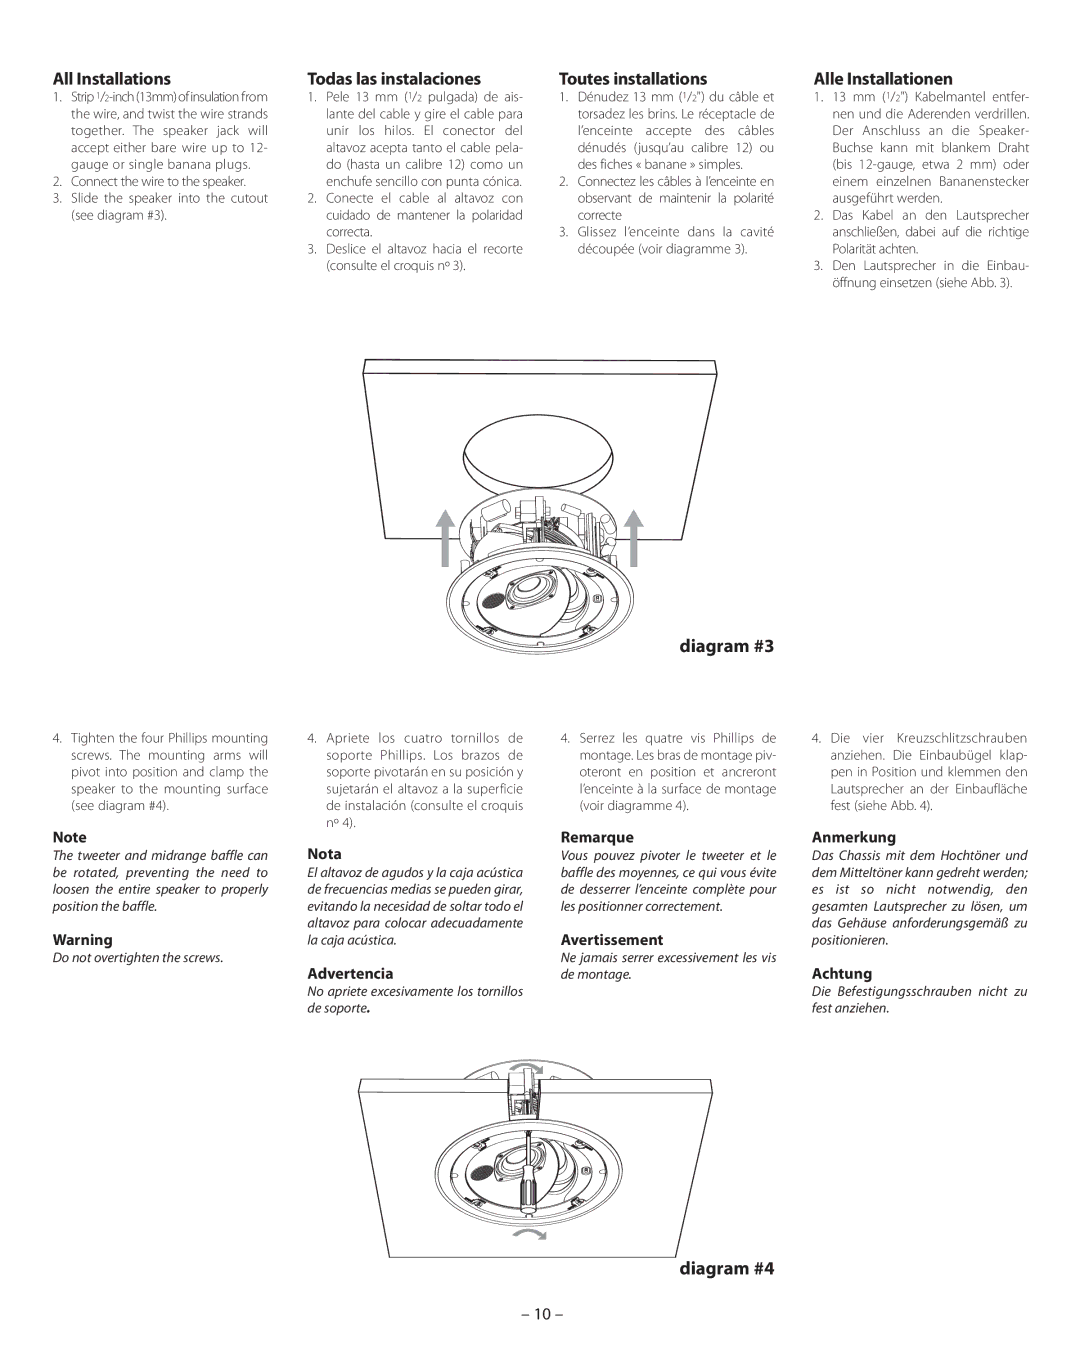
3.Slide the speaker into the cutout (see diagram #3).
Todas las instalaciones
1.Pele 13 mm (1/2 pulgada) de ais- lante del cable y gire el cable para unir los hilos. El conector del altavoz acepta tanto el cable pela- do (hasta un calibre 12) como un enchufe sencillo con punta cónica.
2.Conecte el cable al altavoz con cuidado de mantener la polaridad correcta.
3.Deslice el altavoz hacia el recorte (consulte el croquis nº 3).
Toutes installations
1.Dénudez 13 mm (1/2") du câble et torsadez les brins. Le réceptacle de l’enceinte accepte des câbles dénudés (jusqu’au calibre 12) ou des fiches « banane » simples.
2.Connectez les câbles à l’enceinte en observant de maintenir la polarité correcte
3.Glissez l’enceinte dans la cavité découpée (voir diagramme 3).
Alle Installationen
1.13 mm (1/2") Kabelmantel entfer- nen und die Aderenden verdrillen. Der Anschluss an die Speaker- Buchse kann mit blankem Draht (bis
2.Das Kabel an den Lautsprecher anschließen, dabei auf die richtige Polarität achten.
3.Den Lautsprecher in die Einbau- öffnung einsetzen (siehe Abb. 3).
diagram #3
4.Tighten the four Phillips mounting screws. The mounting arms will pivot into position and clamp the speaker to the mounting surface (see diagram #4).
Note
The tweeter and midrange baffle can be rotated, preventing the need to loosen the entire speaker to properly position the baffle.
Warning
Do not overtighten the screws.
4.Apriete los cuatro tornillos de soporte Phillips. Los brazos de soporte pivotarán en su posición y sujetarán el altavoz a la superficie de instalación (consulte el croquis nº 4).
Nota
El altavoz de agudos y la caja acústica de frecuencias medias se pueden girar, evitando la necesidad de soltar todo el altavoz para colocar adecuadamente la caja acústica.
Advertencia
No apriete excesivamente los tornillos de soporte.
4.Serrez les quatre vis Phillips de montage. Les bras de montage piv- oteront en position et ancreront l’enceinte à la surface de montage (voir diagramme 4).
Remarque
Vous pouvez pivoter le tweeter et le baffle des moyennes, ce qui vous évite de desserrer l’enceinte complète pour les positionner correctement.
Avertissement
Ne jamais serrer excessivement les vis de montage.
4.Die vier Kreuzschlitzschrauben anziehen. Die Einbaubügel klap- pen in Position und klemmen den Lautsprecher an der Einbaufläche fest (siehe Abb. 4).
Anmerkung
Das Chassis mit dem Hochtöner und dem Mitteltöner kann gedreht werden; es ist so nicht notwendig, den gesamten Lautsprecher zu lösen, um das Gehäuse anforderungsgemäß zu positionieren.
Achtung
Die Befestigungsschrauben nicht zu fest anziehen.
diagram #4
– 10 –