
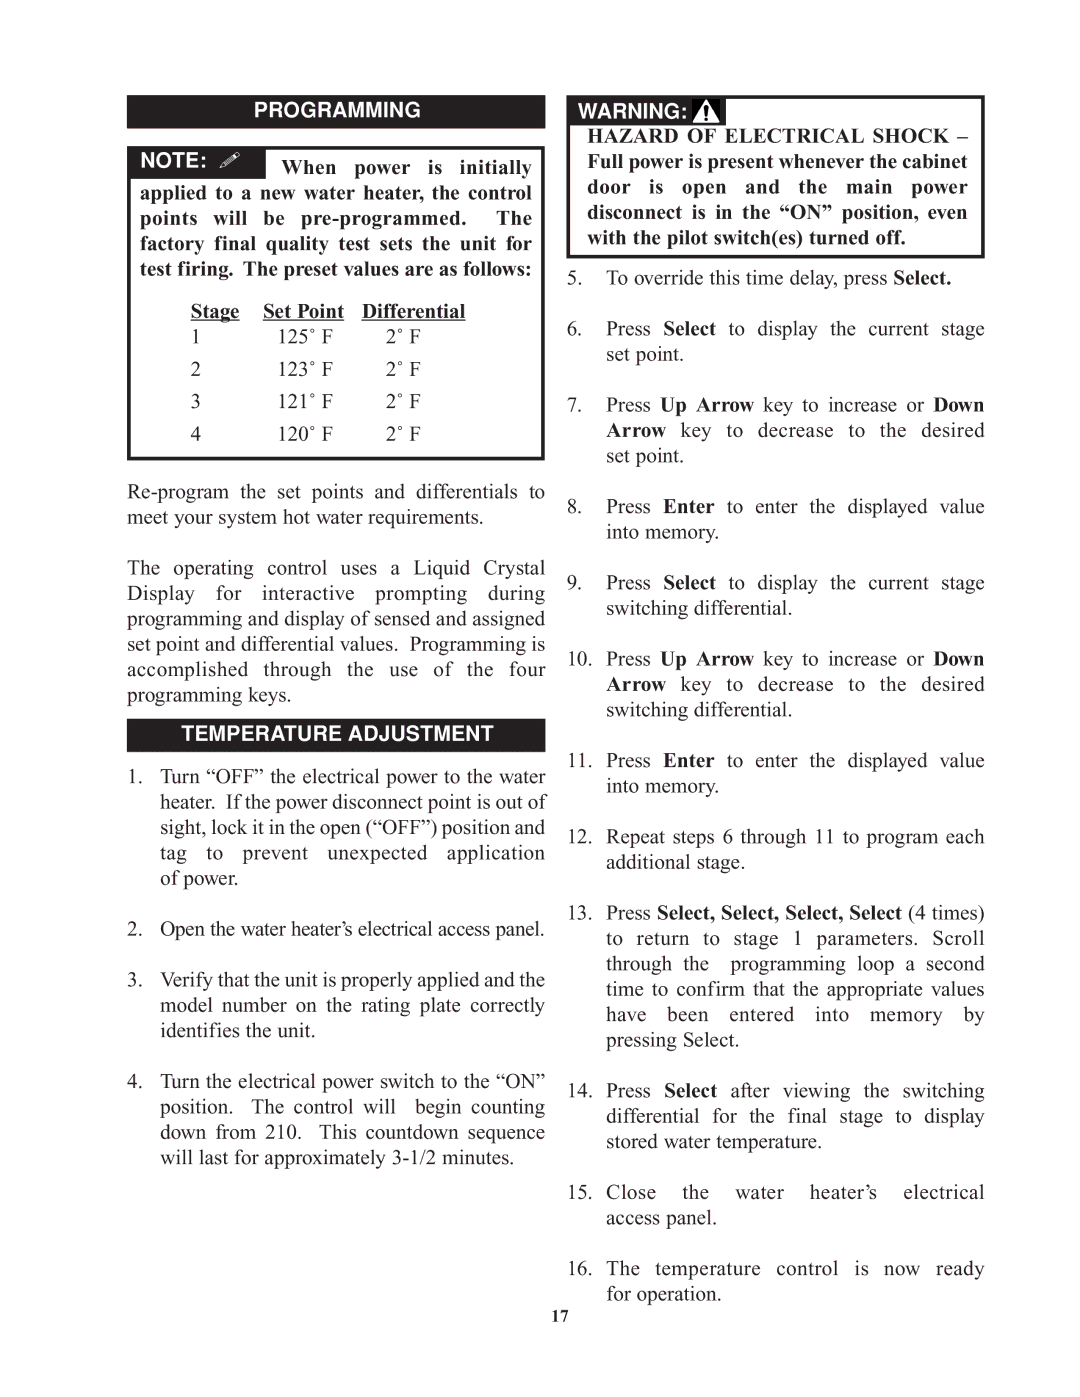
9kW, 900kW, Commercial Electric Water Heaters specifications
Bradford-White Corporation has established itself as a leader in the water heating industry, providing a diverse range of innovative and efficient water heating solutions. Among its prominent offerings are the 900kW and 9kW Commercial Electric Water Heaters. These models have been designed for a variety of commercial applications, ensuring reliability, performance, and energy efficiency.The 900kW Commercial Electric Water Heater is specifically engineered for large-scale applications that require significant hot water outputs. This powerhouse can effectively support high-demand environments such as hotels, restaurants, and industrial facilities. One of its standout features is its high-efficiency design, which maximizes hot water production while minimizing operational costs. The heater employs advanced technology to increase thermal efficiency, which in turn reduces energy consumption and lowers utility bills.
This model also features a robust heating element configuration that ensures rapid recovery rates. With multiple heating elements strategically placed within the tank, the 900kW unit can maintain consistent water temperatures even during peak usage hours. Additionally, it is equipped with advanced controls that facilitate precise temperature management, further enhancing user convenience and system performance.
On the other side, the 9kW Commercial Electric Water Heater is ideal for smaller businesses or applications where space and hot water demand are more constrained. This model is compact yet powerful, capable of efficiently delivering hot water for various tasks such as handwashing, cleaning, and food preparation. Its compact design allows for flexible installation options, making it suitable for tight spaces without compromising performance.
Both models incorporate corrosion-resistant tank materials and durable insulation to ensure longevity and reliable operation over time. The integrated safety features, including high-temperature limit switches and automatic shut-off mechanisms, provide users with peace of mind regarding operational safety.
Furthermore, Bradford-White prioritizes sustainability in its product lines. Both the 900kW and 9kW Commercial Electric Water Heaters comply with stringent efficiency regulations, making them eco-friendly options for businesses looking to reduce their carbon footprint.
In summary, Bradford-White’s 900kW and 9kW Commercial Electric Water Heaters represent the perfect fusion of performance, efficiency, and reliability, catering to diverse commercial needs while promoting sustainability and cost-effectiveness in water heating solutions.