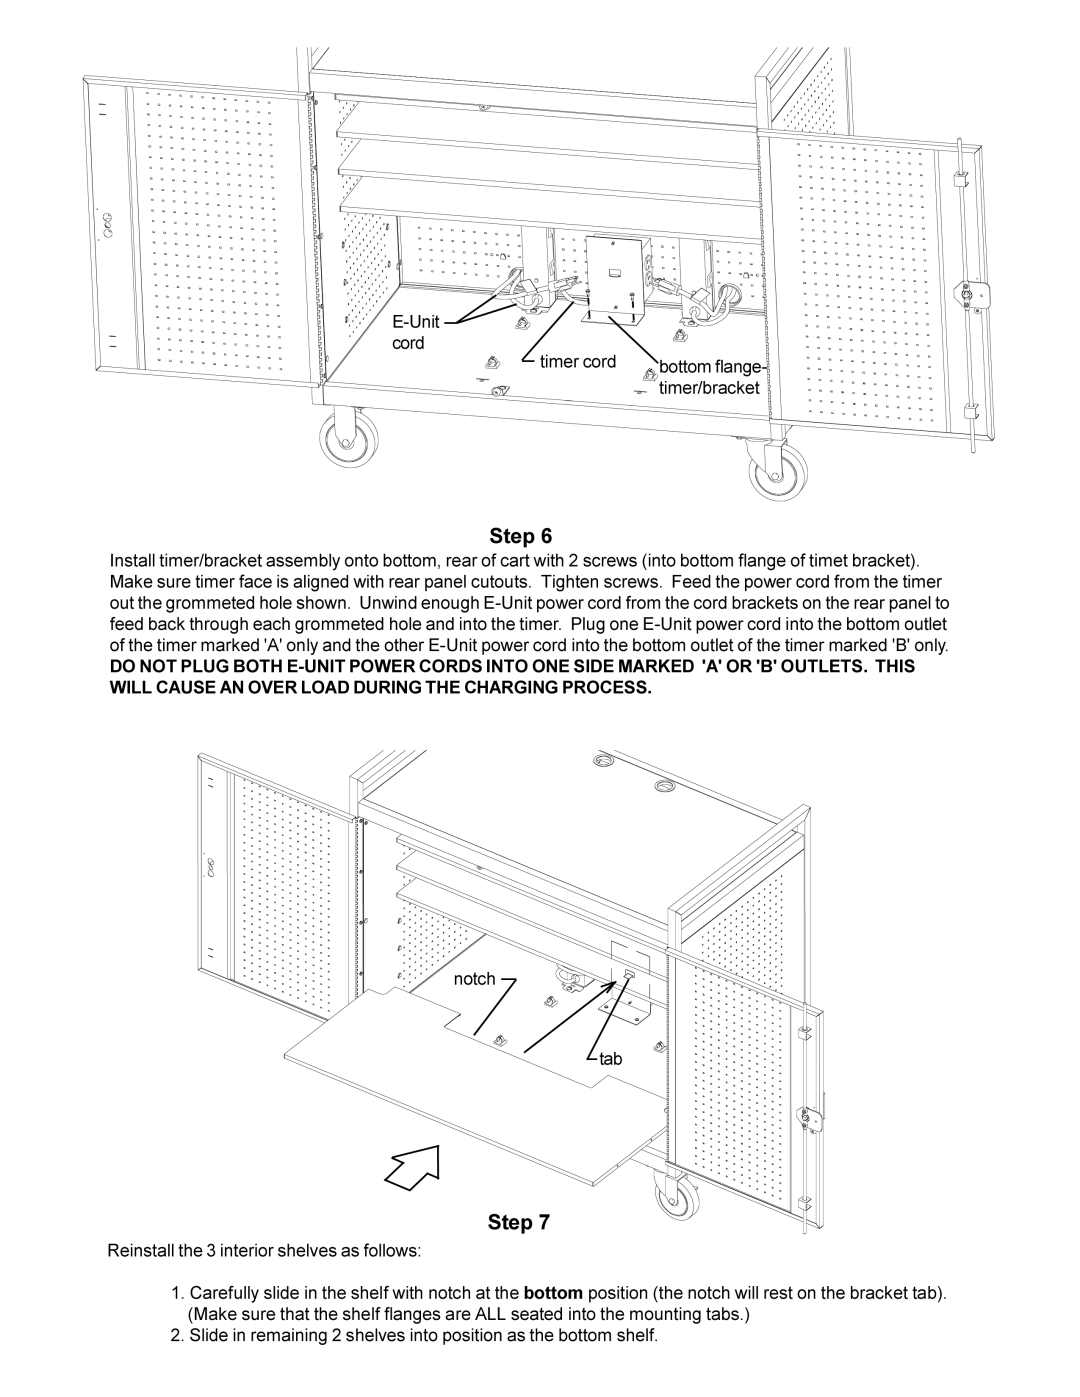
E-Unit
cord
timer cord | bottom flange- |
| |
| timer/bracket |
Step 6
Install timer/bracket assembly onto bottom, rear of cart with 2 screws (into bottom flange of timet bracket). Make sure timer face is aligned with rear panel cutouts. Tighten screws. Feed the power cord from the timer out the grommeted hole shown. Unwind enough
DO NOT PLUG BOTH
notch
tab
Step 7
Reinstall the 3 interior shelves as follows:
1.Carefully slide in the shelf with notch at the bottom position (the notch will rest on the bracket tab). (Make sure that the shelf flanges are ALL seated into the mounting tabs.)
2.Slide in remaining 2 shelves into position as the bottom shelf.