
BTA820XL specifications
The Breville BTA820XL is a sophisticated and stylish toaster that has captured the attention of home cooks and toast enthusiasts alike. This model, known as the "Die-Cast 2-Slice Smart Toaster," distinguished itself not only through its elegant design but also through its innovative features that enhance the toasting experience.One of the standout characteristics of the BTA820XL is its "A Bit More" button. This clever feature allows users to give their toast an extra lift without needing to reset the entire toasting cycle. This is particularly handy for those who prefer their toast slightly darker or if you’re dealing with uneven slices of bread.
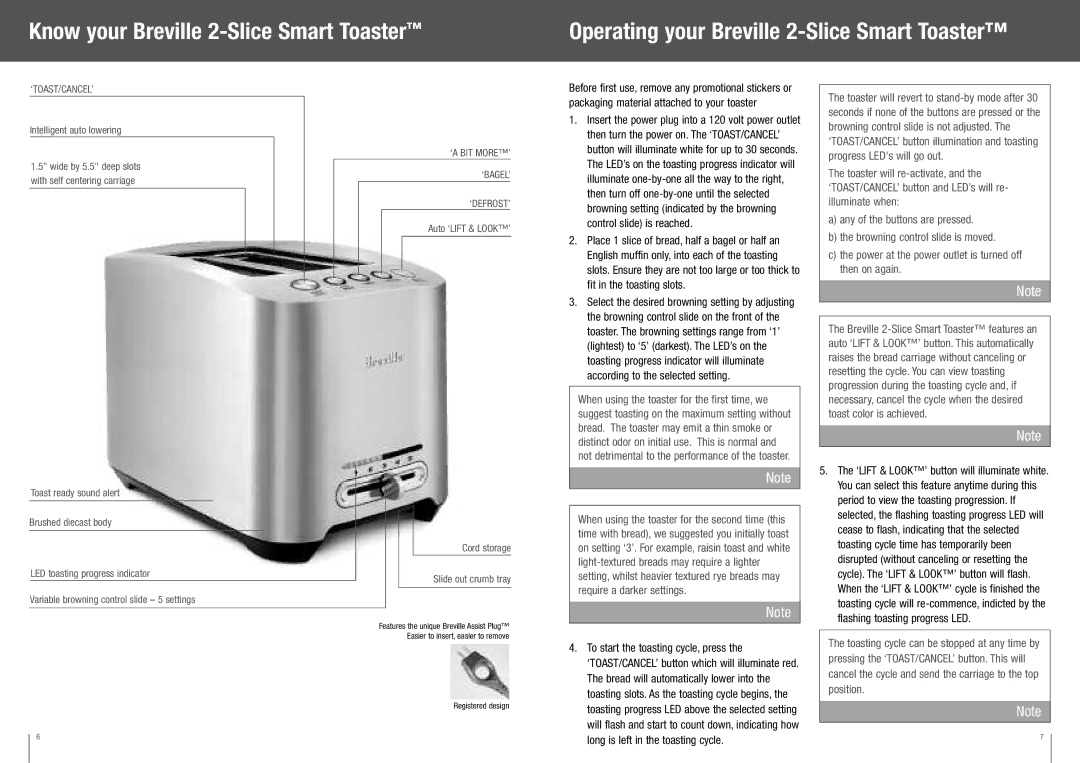
Another notable feature is the "Lift and Look" function. This technology allows you to elevate the toast mid-cycle to check on its progress without interrupting the toasting process. This means you can achieve the perfect level of crunch without the guesswork, an essential quality for those who seek the ideal slice every time.
The BTA820XL also boasts a wide slot design, which accommodates artisanal bread, bagels, and thicker slices of various baked goods with ease. The slots feature a self-centering design, ensuring that the bread is evenly heated and browned on both sides, resulting in a uniformly toasted slice.
In terms of customization, this toaster offers multiple browning settings that cater to different preferences, allowing you to achieve the desired level of toastiness from light to dark. Additionally, the toaster features a high-lift lever that makes retrieving small items effortless, ensuring no more fishing around in the appliance for that elusive piece of bread.
Safety is not overlooked with the BTA820XL. It includes a removable crumb tray, making clean-up straightforward, and a durable non-slip base that ensures stability during toasting. The die-cast stainless steel body not only looks sleek but is also designed for durability, promising to withstand daily use while maintaining its visual appeal.
Overall, the Breville BTA820XL combines refined aesthetics with advanced toasting technologies, making it a valuable addition to any kitchen countertop. Its thoughtful features and user-friendly design embody Breville’s commitment to quality and innovation, giving you the perfect toast time after time. Whether you're a casual toast lover or a kitchen aficionado, this smart toaster is sure to elevate your breakfast game.