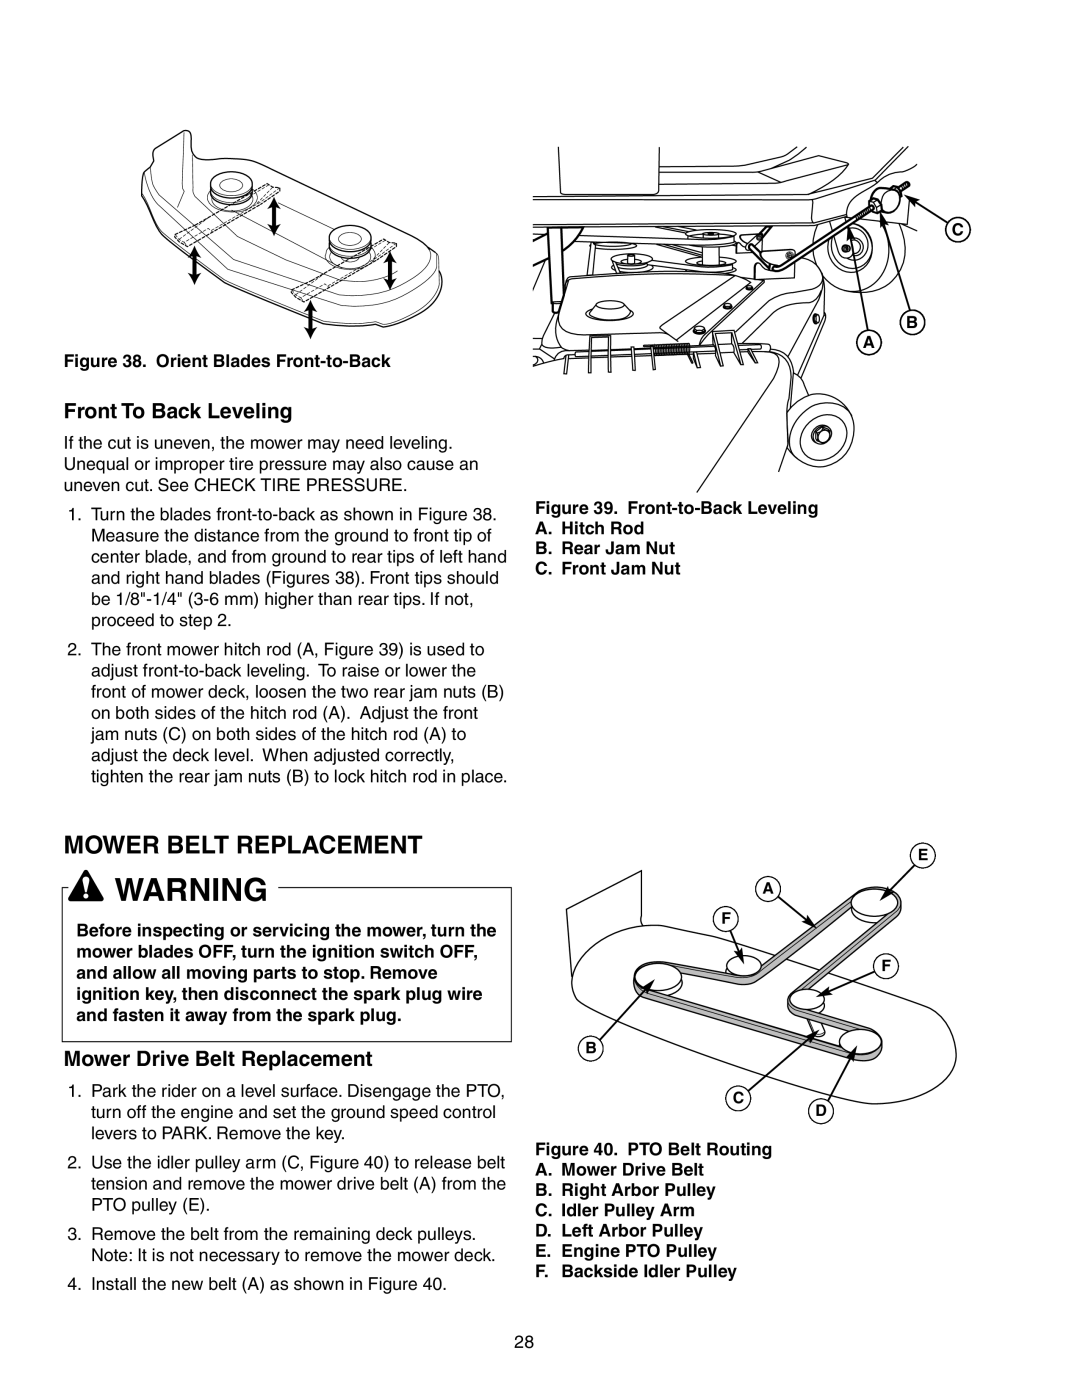
Figure 38. Orient Blades Front-to-Back
Front To Back Leveling
If the cut is uneven, the mower may need leveling. Unequal or improper tire pressure may also cause an uneven cut. See CHECK TIRE PRESSURE.
1.Turn the blades
2.The front mower hitch rod (A, Figure 39) is used to adjust
C
B
A
Figure 39. Front-to-Back Leveling
A.Hitch Rod
B.Rear Jam Nut
C.Front Jam Nut
MOWER BELT REPLACEMENT
E
![]() WARNING
WARNING
Before inspecting or servicing the mower, turn the mower blades OFF, turn the ignition switch OFF, and allow all moving parts to stop. Remove ignition key, then disconnect the spark plug wire and fasten it away from the spark plug.
Mower Drive Belt Replacement
1.Park the rider on a level surface. Disengage the PTO, turn off the engine and set the ground speed control levers to PARK. Remove the key.
2.Use the idler pulley arm (C, Figure 40) to release belt tension and remove the mower drive belt (A) from the PTO pulley (E).
3.Remove the belt from the remaining deck pulleys. Note: It is not necessary to remove the mower deck.
4.Install the new belt (A) as shown in Figure 40.
A
F
F
B
C
D
Figure 40. PTO Belt Routing
A.Mower Drive Belt
B.Right Arbor Pulley
C.Idler Pulley Arm
D.Left Arbor Pulley
E.Engine PTO Pulley
F.Backside Idler Pulley
28
