ASSEMBLY
NOTE: It may be necessary to move the handle supports from side to side in order to align the handle so it will slide over the handle supports.
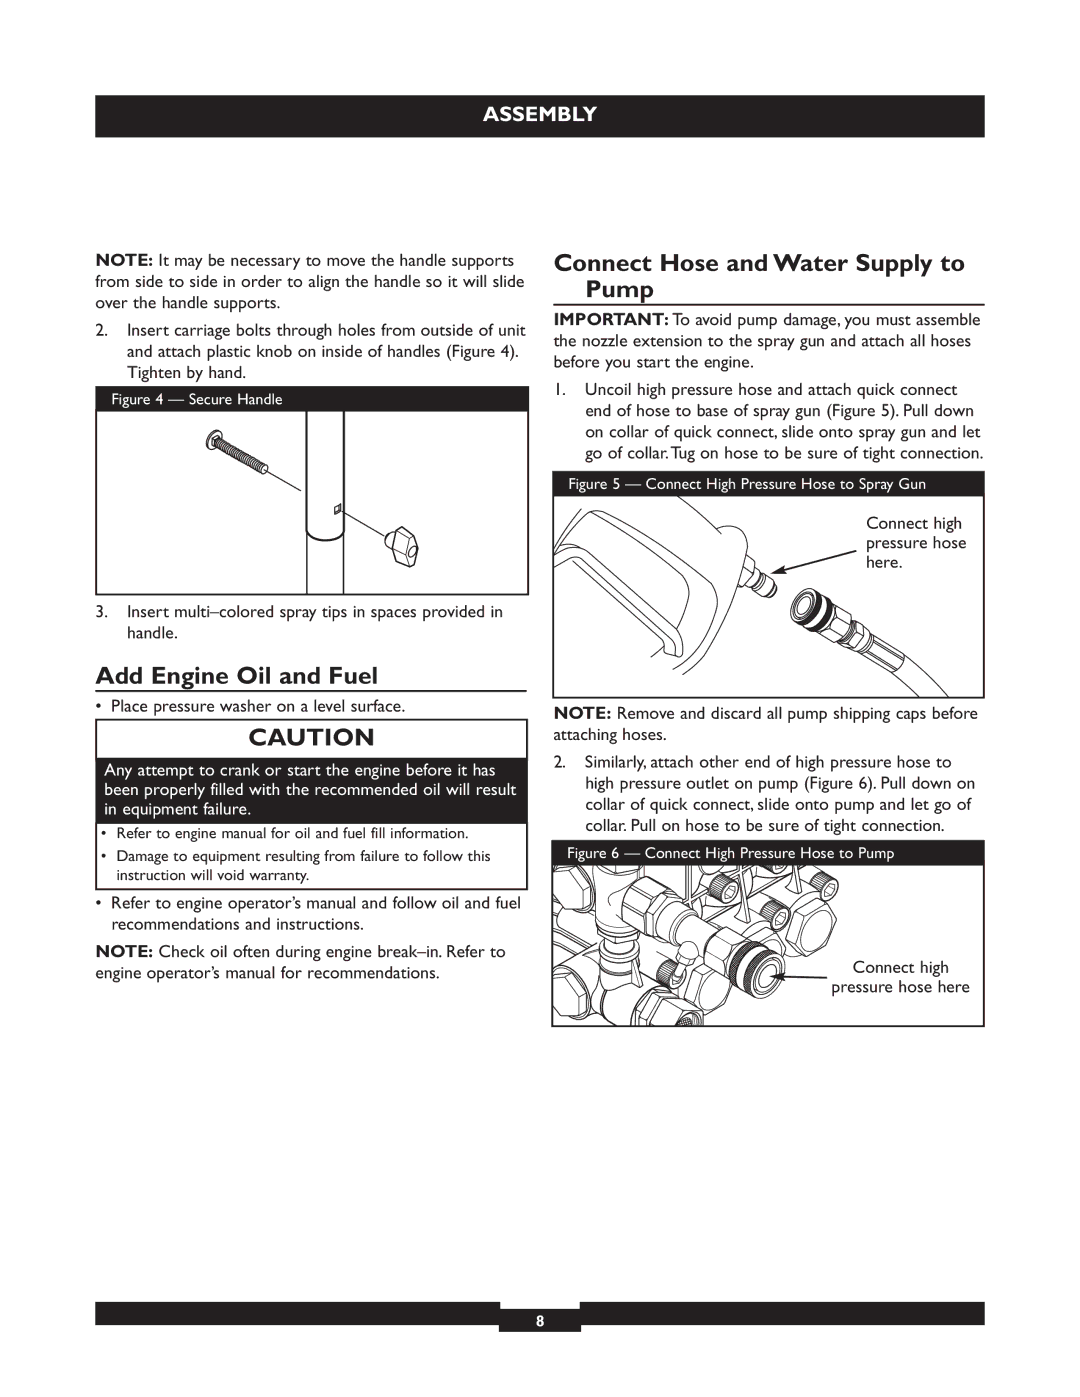
2.Insert carriage bolts through holes from outside of unit and attach plastic knob on inside of handles (Figure 4). Tighten by hand.
Figure 4 — Secure Handle
3.Insert
Add Engine Oil and Fuel
• Place pressure washer on a level surface.
CAUTION
Any attempt to crank or start the engine before it has been properly filled with the recommended oil will result in equipment failure.
•Refer to engine manual for oil and fuel fill information.
•Damage to equipment resulting from failure to follow this instruction will void warranty.
•Refer to engine operator’s manual and follow oil and fuel recommendations and instructions.
NOTE: Check oil often during engine
Connect Hose and Water Supply to Pump
IMPORTANT: To avoid pump damage, you must assemble the nozzle extension to the spray gun and attach all hoses before you start the engine.
1.Uncoil high pressure hose and attach quick connect end of hose to base of spray gun (Figure 5). Pull down on collar of quick connect, slide onto spray gun and let go of collar.Tug on hose to be sure of tight connection.
Figure 5 — Connect High Pressure Hose to Spray Gun
Connect high |
pressure hose |
here. |
NOTE: Remove and discard all pump shipping caps before attaching hoses.
2.Similarly, attach other end of high pressure hose to high pressure outlet on pump (Figure 6). Pull down on collar of quick connect, slide onto pump and let go of collar. Pull on hose to be sure of tight connection.
Figure 6 — Connect High Pressure Hose to Pump
Connect high
pressure hose here
8