INSTALLATION

For a 15kW Home Generator System:

4.Remove cap from LP inlet on T-valve.

5.Remove fuel line from NG inlet.

6.Place cap from LP inlet onto NG inlet.

7.From oil fill access area, pull fuel line out of top hole and route it through bottom hole.

IMPORTANT: Failure to route fuel line through bottom hole may cause the fuel line to kink. When tightening fuel hose fittings make certain the fuel hose does not twist or kink. If the fuel line kinks, the generator may start but will not operate properly.

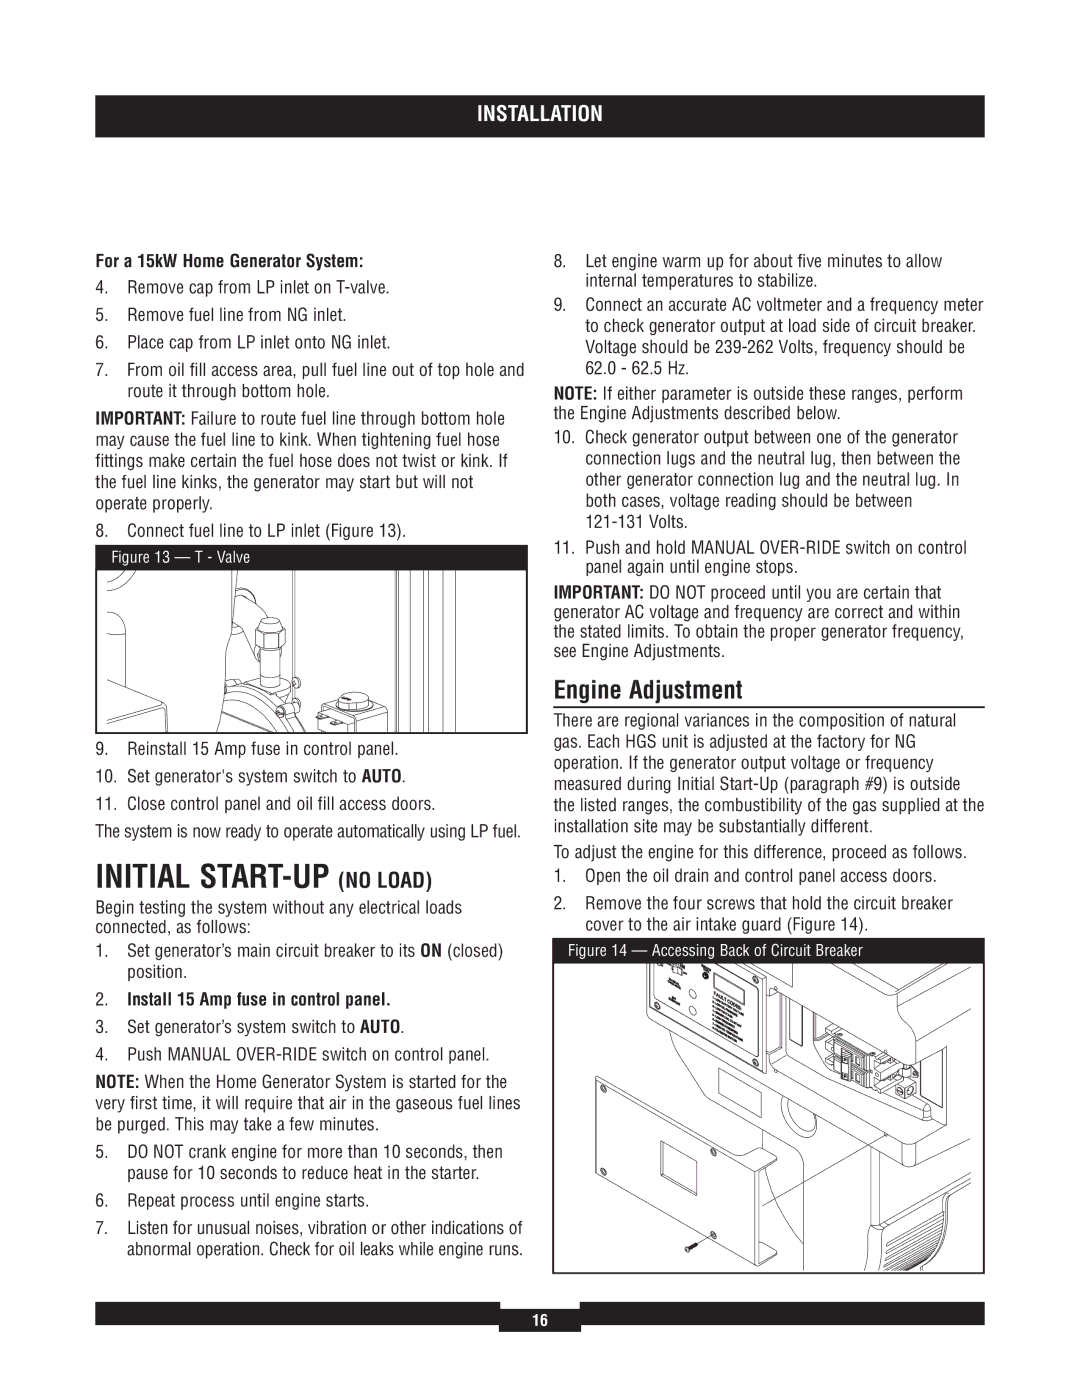
8.Connect fuel line to LP inlet (Figure 13).

Figure 13 — T - Valve

9.Reinstall 15 Amp fuse in control panel.

10.Set generator's system switch to AUTO.

11.Close control panel and oil fill access doors.

The system is now ready to operate automatically using LP fuel.

INITIAL START-UP (NO LOAD)

Begin testing the system without any electrical loads connected, as follows:

1.Set generator’s main circuit breaker to its ON (closed) position.

2.Install 15 Amp fuse in control panel.

3.Set generator’s system switch to AUTO.

4.Push MANUAL OVER-RIDE switch on control panel.

NOTE: When the Home Generator System is started for the very first time, it will require that air in the gaseous fuel lines be purged. This may take a few minutes.

5.DO NOT crank engine for more than 10 seconds, then pause for 10 seconds to reduce heat in the starter.

6.Repeat process until engine starts.

7.Listen for unusual noises, vibration or other indications of abnormal operation. Check for oil leaks while engine runs.

8.Let engine warm up for about five minutes to allow internal temperatures to stabilize.

9.Connect an accurate AC voltmeter and a frequency meter to check generator output at load side of circuit breaker. Voltage should be 239-262 Volts, frequency should be 62.0 - 62.5 Hz.

NOTE: If either parameter is outside these ranges, perform the Engine Adjustments described below.

10.Check generator output between one of the generator connection lugs and the neutral lug, then between the other generator connection lug and the neutral lug. In both cases, voltage reading should be between 121-131 Volts.

11.Push and hold MANUAL OVER-RIDE switch on control panel again until engine stops.

IMPORTANT: DO NOT proceed until you are certain that generator AC voltage and frequency are correct and within the stated limits. To obtain the proper generator frequency, see Engine Adjustments.

Engine Adjustment

There are regional variances in the composition of natural gas. Each HGS unit is adjusted at the factory for NG operation. If the generator output voltage or frequency measured during Initial Start-Up (paragraph #9) is outside the listed ranges, the combustibility of the gas supplied at the installation site may be substantially different.

To adjust the engine for this difference, proceed as follows.

1.Open the oil drain and control panel access doors.

2.Remove the four screws that hold the circuit breaker cover to the air intake guard (Figure 14).

Figure 14 — Accessing Back of Circuit Breaker

16

Page 16
Image 16
Briggs & Stratton 40213, 40229, 40210, 40234 Initial START-UP no Load, Engine Adjustment, For a 15kW Home Generator System

40229, 40204, 40213, 40234, 40210 specifications

Briggs & Stratton is a recognized leader in the small engine market, catering to both homeowners and professionals with a wide range of reliable engines. The models 40210, 40234, 40213, 40204, and 40229 are notable entries in this lineup, each designed to deliver power, efficiency, and durability for various applications.

The Briggs & Stratton 40210 is often appreciated for its compact size and robust performance in lawn care equipment. It features a 140cc engine with an overhead valve design that enhances fuel efficiency and reduces emissions. This model supports easy starting with its dependable pull-start system and is well-suited for pushing mowers and other light-duty machines.

In contrast, the 40234 model stands out with its 190cc engine, which provides an excellent power-to-weight ratio. This engine is engineered to tackle medium-duty tasks, making it ideal for residential lawn trimming and garden maintenance. The 40234 incorporates advanced features like a ReadyStart technology that eliminates the need for priming, allowing for a hassle-free starting experience in various weather conditions.

The Briggs & Stratton 40213 shares similarities with the 40234 but enhances user interaction and maintenance with a more user-friendly design. It employs a 163cc engine that combines optimal power with low vibration, ensuring smooth operation. This model is particularly favored for its extended runtime, enabling users to complete their lawn care jobs without frequent interruptions.

For those seeking a slightly less powerful option, the 40204 is an excellent choice. Featuring a reliable 125cc engine, it is designed for lighter applications. This model is particularly notable for its lightweight build, making it highly maneuverable and easy to handle for novice users and homeowners alike.

Lastly, the 40229 offers a balance between power and practicality, housing an 11.5 gross torque engine rated for robust tasks. This engine is crafted with innovative technologies that promote fuel efficiency while minimizing noise output, making it a favorite among environmentally conscious users. It also integrates user-friendly features, such as an easy-access air filter, which simplifies maintenance.

Across these models, Briggs & Stratton ensures high-quality construction and usability, with features like dual air filtration systems and durable components that withstand rigorous use. Each engine encapsulates the brand's commitment to innovation, performance, and reliability, catering to the diverse needs of consumers in the landscaping and outdoor maintenance sectors. Whether for small residential tasks or larger projects, these engines are designed to empower users with the performance they need to get the job done efficiently.