Blade Care
WARNING: When removing the cutting blade for sharpening or replacement, protect your hands with a pair of heavy gloves or use a heavy rag
to hold the blade.
Periodically inspect the blade adapter for cracks, especially if you strike a foreign object. Replace when necessary. Follow the steps below for blade service.
1.Disconnect spark plug wire from spark plug. Turn mower on its side making sure that the air filter and the carburetor are up.
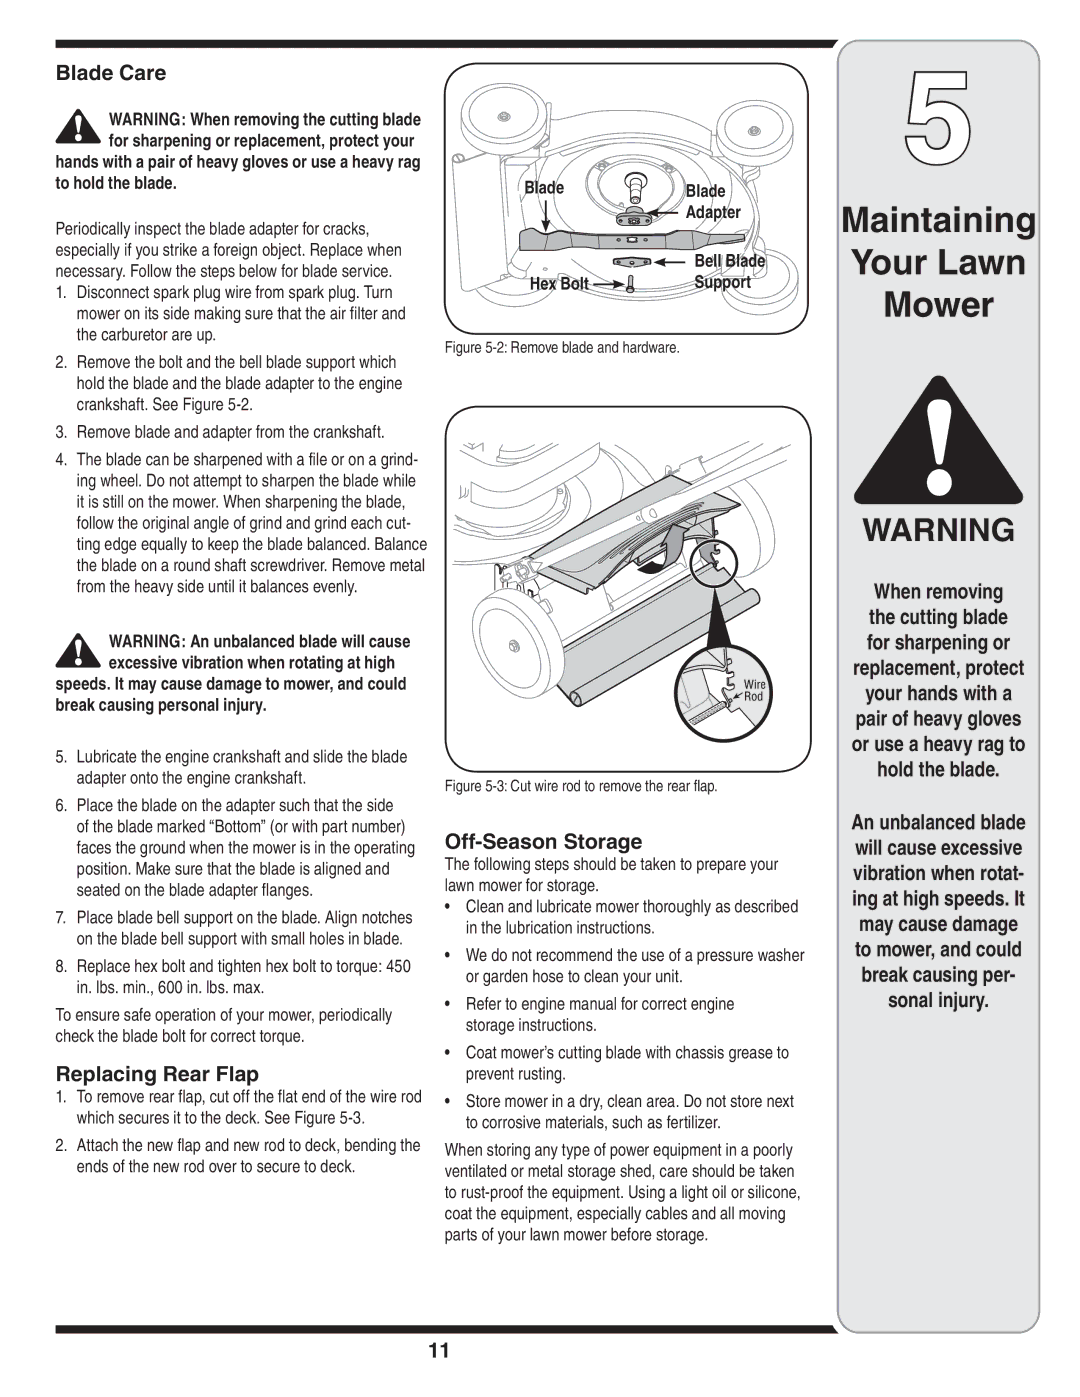
2.Remove the bolt and the bell blade support which hold the blade and the blade adapter to the engine crankshaft. See Figure
3.Remove blade and adapter from the crankshaft.
4.The blade can be sharpened with a file or on a grind- ing wheel. Do not attempt to sharpen the blade while it is still on the mower. When sharpening the blade, follow the original angle of grind and grind each cut- ting edge equally to keep the blade balanced. Balance the blade on a round shaft screwdriver. Remove metal from the heavy side until it balances evenly.
Blade | Blade |
| Adapter |
| Bell Blade |
Hex Bolt | Support |
Figure 5-2: Remove blade and hardware.
5
Maintaining
Your Lawn
Mower
WARNING
When removing the cutting blade
WARNING: An unbalanced blade will cause excessive vibration when rotating at high
speeds. It may cause damage to mower, and could break causing personal injury.
5.Lubricate the engine crankshaft and slide the blade adapter onto the engine crankshaft.
6.Place the blade on the adapter such that the side of the blade marked “Bottom” (or with part number) faces the ground when the mower is in the operating position. Make sure that the blade is aligned and seated on the blade adapter flanges.
7.Place blade bell support on the blade. Align notches on the blade bell support with small holes in blade.
8.Replace hex bolt and tighten hex bolt to torque: 450 in. lbs. min., 600 in. lbs. max.
To ensure safe operation of your mower, periodically check the blade bolt for correct torque.
Replacing Rear Flap
1.To remove rear flap, cut off the flat end of the wire rod which secures it to the deck. See Figure
2.Attach the new flap and new rod to deck, bending the ends of the new rod over to secure to deck.
Figure 5-3: Cut wire rod to remove the rear flap.
Off-Season Storage
The following steps should be taken to prepare your lawn mower for storage.
•Clean and lubricate mower thoroughly as described in the lubrication instructions.
•We do not recommend the use of a pressure washer or garden hose to clean your unit.
•Refer to engine manual for correct engine storage instructions.
•Coat mower’s cutting blade with chassis grease to prevent rusting.
•Store mower in a dry, clean area. Do not store next to corrosive materials, such as fertilizer.
When storing any type of power equipment in a poorly ventilated or metal storage shed, care should be taken to
for sharpening or
replacement, protect
your hands with a
pair of heavy gloves or use a heavy rag to hold the blade.
An unbalanced blade will cause excessive vibration when rotat- ing at high speeds. It may cause damage to mower, and could break causing per-
sonal injury.
11