Step 14
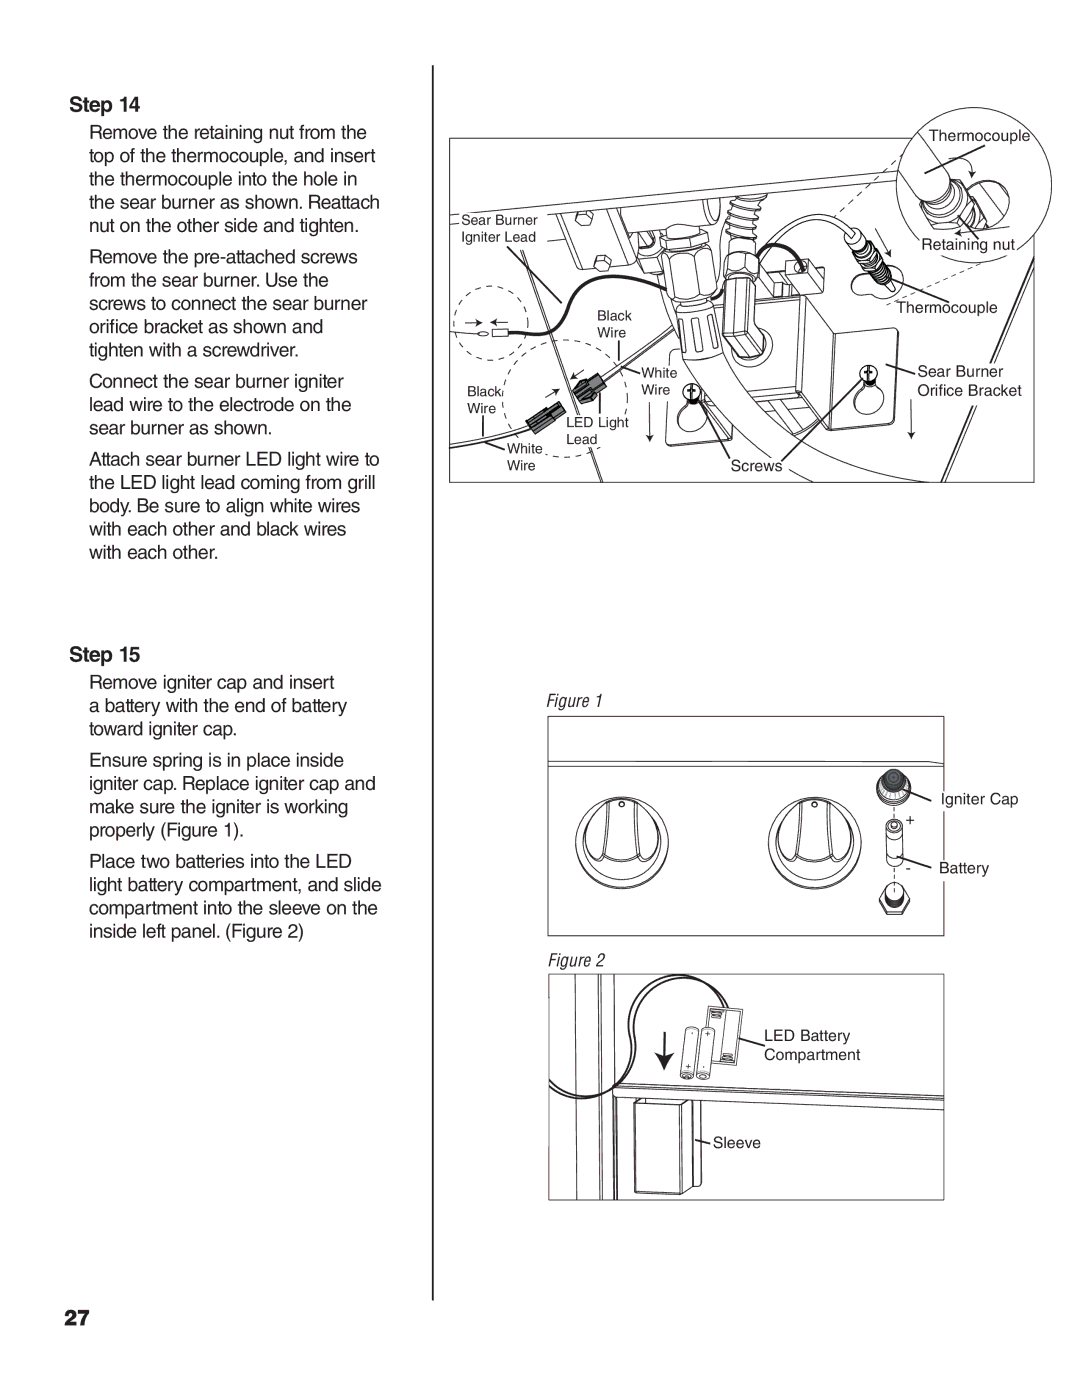
Remove the retaining nut from the top of the thermocouple, and insert the thermocouple into the hole in the sear burner as shown. Reattach nut on the other side and tighten.
Remove the
Connect the sear burner igniter lead wire to the electrode on the sear burner as shown.
Attach sear burner LED light wire to the LED light lead coming from grill body. Be sure to align white wires with each other and black wires with each other.
Step 15
Remove igniter cap and insert a battery with the end of battery toward igniter cap.
Ensure spring is in place inside igniter cap. Replace igniter cap and make sure the igniter is working properly (Figure 1).
Place two batteries into the LED light battery compartment, and slide compartment into the sleeve on the inside left panel. (Figure 2)
Thermocouple
Sear Burner |
|
|
Igniter Lead |
| Retaining nut |
|
| |
| Black | Thermocouple |
|
| |
| Wire |
|
| White | Sear Burner |
Black | Wire | Orifi ce Bracket |
Wire | LED Light |
|
|
| |
White | Lead |
|
| Screws | |
Wire |
|
Figure 1
Igniter Cap
![]() +
+
- Battery
Figure 2
- | + | LED Battery |
+ | - | Compartment |
| ||
| Sleeve |
|
27