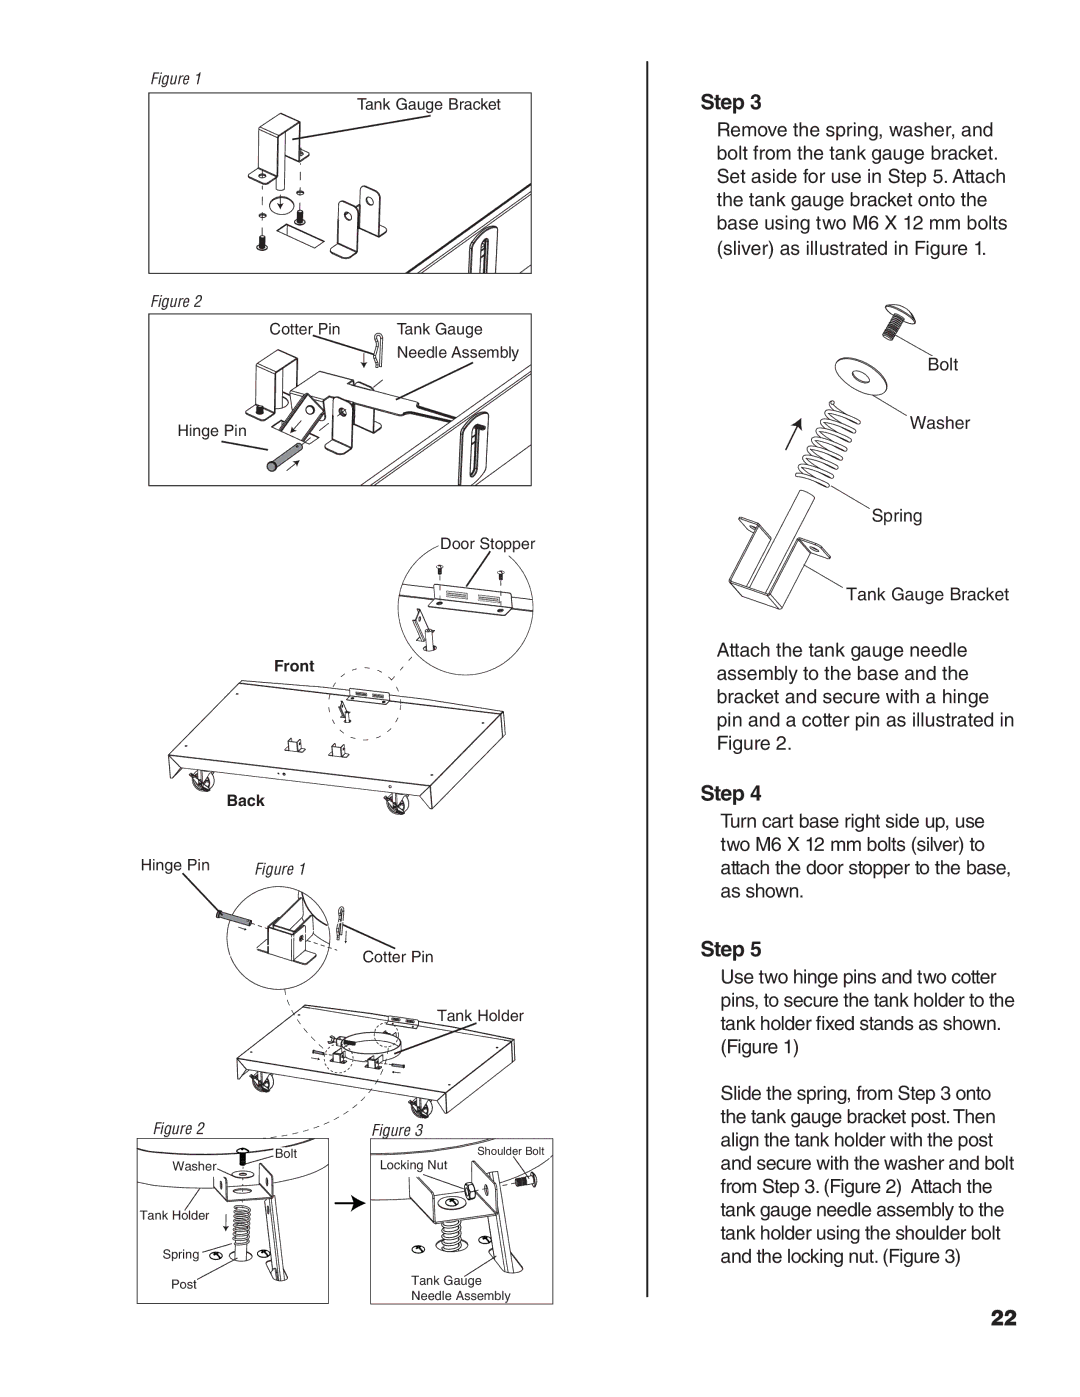
Figure 1
Tank Gauge Bracket
Figure 2
Cotter Pin | Tank Gauge |
| Needle Assembly |
Hinge Pin
Door Stopper
Front
Back
Hinge Pin | Figure 1 |
Cotter Pin
Tank Holder
Step 3
Remove the spring, washer, and bolt from the tank gauge bracket. Set aside for use in Step 5. Attach the tank gauge bracket onto the base using two M6 X 12 mm bolts (sliver) as illustrated in Figure 1.
Bolt
Washer
Spring
Tank Gauge Bracket
Attach the tank gauge needle assembly to the base and the bracket and secure with a hinge pin and a cotter pin as illustrated in Figure 2.
Step 4
Turn cart base right side up, use two M6 X 12 mm bolts (silver) to attach the door stopper to the base, as shown.
Step 5
Use two hinge pins and two cotter pins, to secure the tank holder to the tank holder fixed stands as shown. (Figure 1)
Figure 2
Bolt
Washer
Tank Holder
Spring
Post
Figure 3
Shoulder Bolt |
Locking Nut |
Tank Gauge |
Needle Assembly |
Slide the spring, from Step 3 onto the tank gauge bracket post. Then align the tank holder with the post and secure with the washer and bolt from Step 3. (Figure 2) Attach the tank gauge needle assembly to the tank holder using the shoulder bolt and the locking nut. (Figure 3)
22