GAS LEAK TESTING:
1.Create a mixture of 50% water and 50% liquid dishwashing soap.
2.To turn on the fuel supply, turn the cylinder valve knob one turn counterclockwise.
3.Apply the soap water mixture to the following:
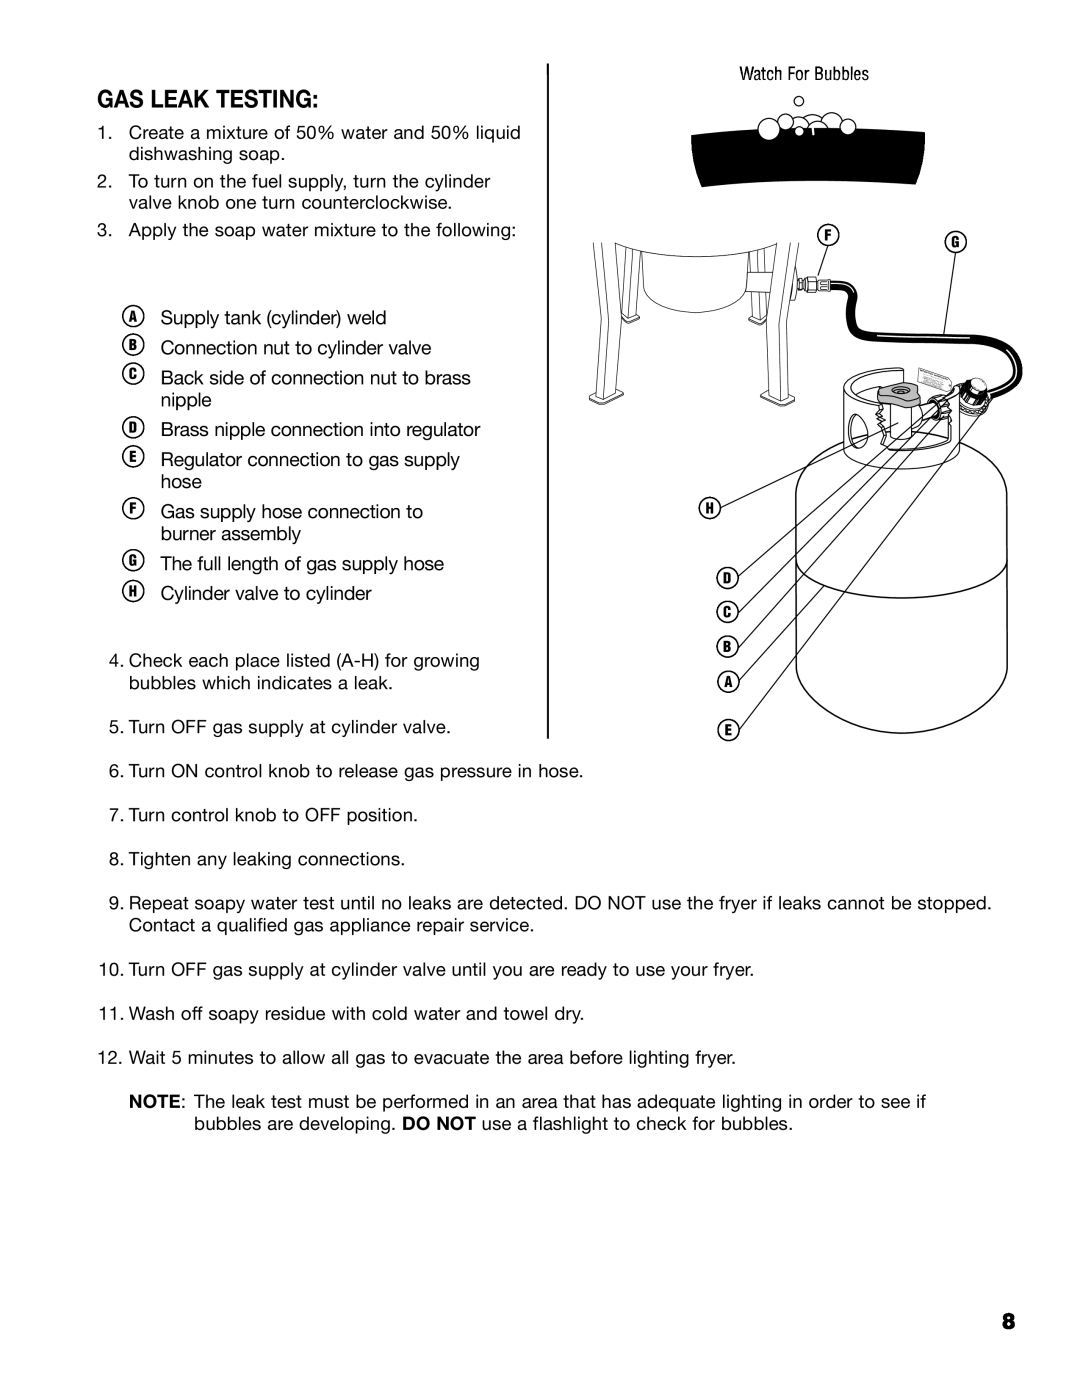
A Supply tank (cylinder) weld
BConnection nut to cylinder valve
CBack side of connection nut to brass
nipple
DBrass nipple connection into regulator
ERegulator connection to gas supply hose
FGas supply hose connection to burner assembly
GThe full length of gas supply hose
HCylinder valve to cylinder
4.Check each place listed
5.Turn OFF gas supply at cylinder valve.
6.Turn ON control knob to release gas pressure in hose.
7.Turn control knob to OFF position.
8.Tighten any leaking connections.
Watch For Bubbles
FG
IMPORTANT
FLUATCSMTUOINARENGNNTAKVRDG.AOJUALULVSSSEEVOTAOTMSAFEGUNLHNEVAINSELNT.DRPFOO.EOGDRFAFSARD
NLY.
H
D
C
B
A
E
9.Repeat soapy water test until no leaks are detected. DO NOT use the fryer if leaks cannot be stopped. Contact a qualified gas appliance repair service.
10.Turn OFF gas supply at cylinder valve until you are ready to use your fryer.
11.Wash off soapy residue with cold water and towel dry.
12.Wait 5 minutes to allow all gas to evacuate the area before lighting fryer.
NOTE: The leak test must be performed in an area that has adequate lighting in order to see if bubbles are developing. DO NOT use a flashlight to check for bubbles.
8