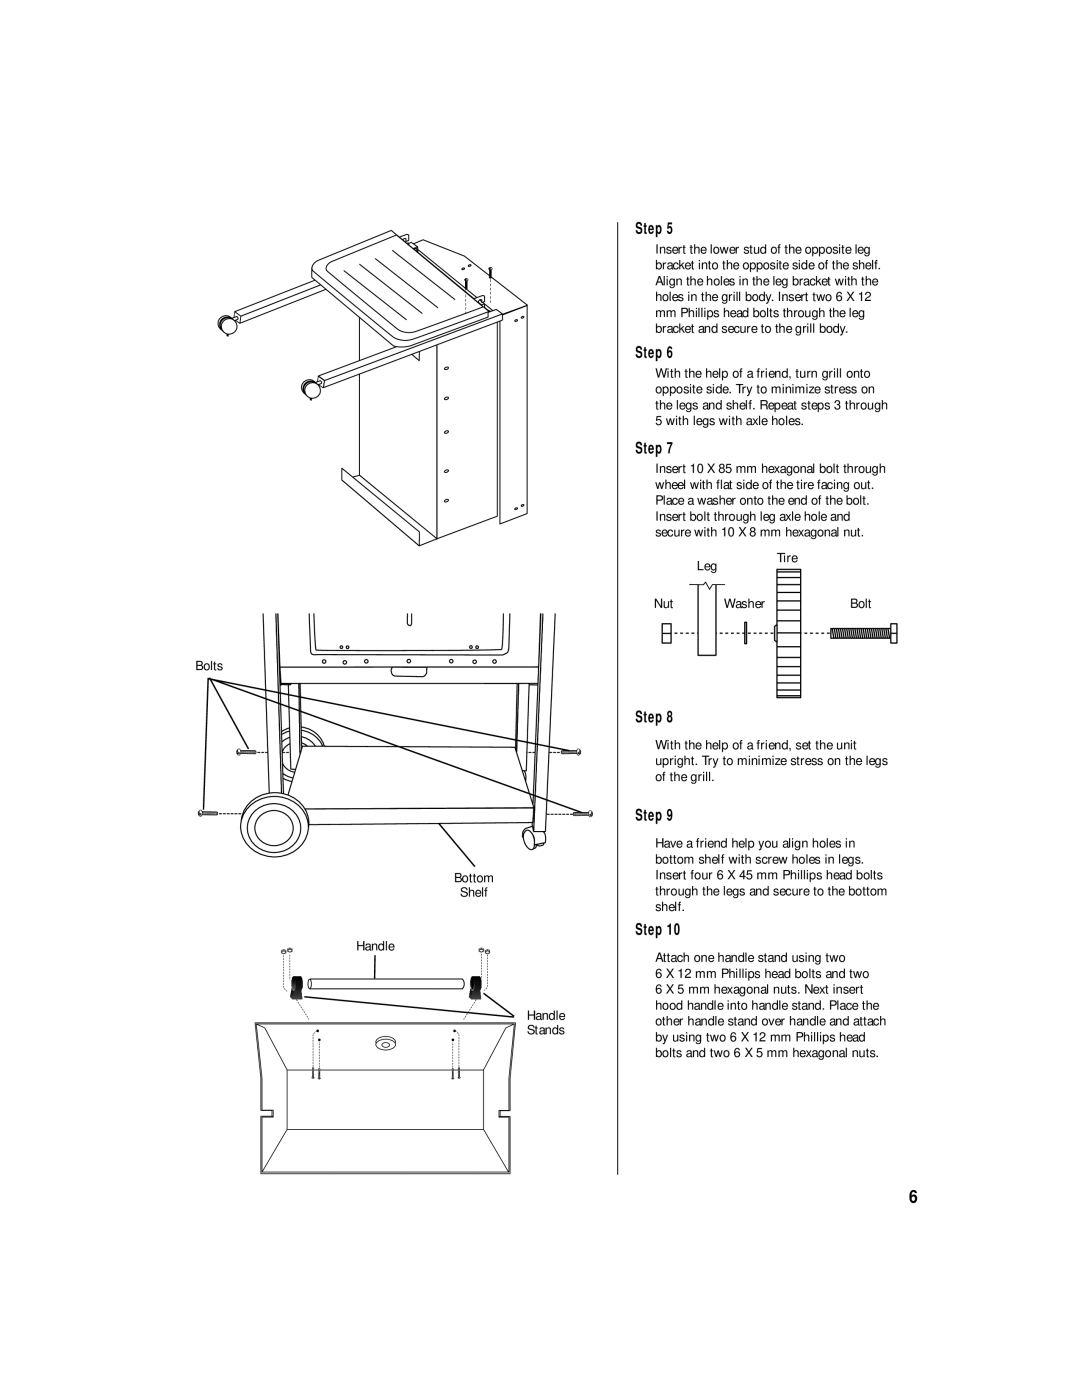
Step 5
Insert the lower stud of the opposite leg bracket into the opposite side of the shelf. Align the holes in the leg bracket with the holes in the grill body. Insert two 6 X 12
mmPhillips head bolts through the leg bracket and secure to the grill body.
Step 6
With the help of a friend, turn grill onto opposite side. Try to minimize stress on the legs and shelf. Repeat steps 3 through 5 with legs with axle holes.
Step 7
Insert 10 X 85 mm hexagonal bolt through wheel with flat side of the tire facing out. Place a washer onto the end of the bolt. Insert bolt through leg axle hole and secure with 10 X 8 mm hexagonal nut.
Leg
Tire
Bolts
Bottom
Shelf
Handle
Handle
Stands
Nut | Washer | Bolt |
Step 8
With the help of a friend, set the unit upright. Try to minimize stress on the legs of the grill.
Step 9
Have a friend help you align holes in bottom shelf with screw holes in legs. Insert four 6 X 45 mm Phillips head bolts through the legs and secure to the bottom shelf.
Step 10
Attach one handle stand using two
6 X 12 mm Phillips head bolts and two
6 X 5 mm hexagonal nuts. Next insert hood handle into handle stand. Place the other handle stand over handle and attach by using two 6 X 12 mm Phillips head bolts and two 6 X 5 mm hexagonal nuts.
6
