1. SELECT BLOWER OPTION AND INSTALL DUCTWORK
Either an interior or exterior blower or
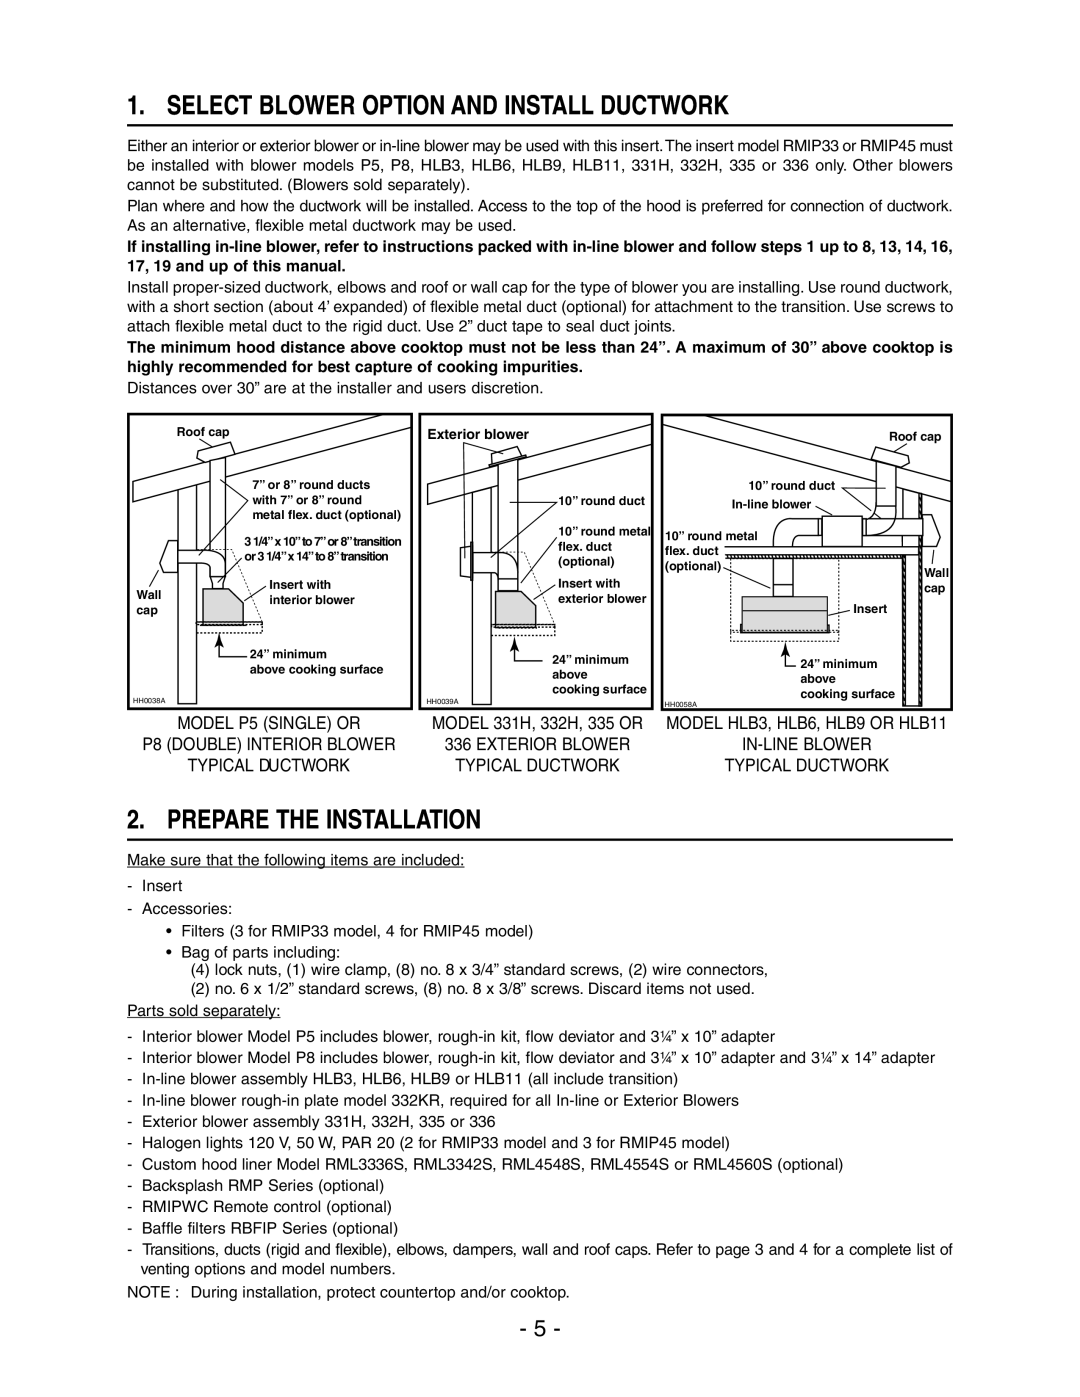
Plan where and how the ductwork will be installed. Access to the top of the hood is preferred for connection of ductwork. As an alternative, flexible metal ductwork may be used.
If installing
Install
The minimum hood distance above cooktop must not be less than 24”. A maximum of 30” above cooktop is highly recommended for best capture of cooking impurities.
Distances over 30” are at the installer and users discretion.
Wall cap
HH0038A
Roof cap
7” or 8” round ducts with 7” or 8” round metal flex. duct (optional)
31/4”x 10”to 7”or 8”transition or 3 1/4”x 14”to 8”transition
Insert with interior blower
![]() 24” minimum
24” minimum
above cooking surface
Exterior blower
10” round duct
10” round metal flex. duct (optional)
Insert with exterior blower
24” minimum above cooking surface
HH0039A
Roof cap
10” round duct
10” round metal ![]()
![]()
![]()
![]() flex.
flex.![]() duct
duct![]()
![]()
(optional)
Wall cap
![]() Insert
Insert
![]() 24” minimum above cooking surface
24” minimum above cooking surface
HH0058A
MODEL P5 (SINGLE) OR | MODEL 331H, 332H, 335 OR | MODEL HLB3, HLB6, HLB9 OR HLB11 |
P8 (DOUBLE) INTERIOR BLOWER | 336 EXTERIOR BLOWER | |
TYPICAL DUCTWORK | TYPICAL DUCTWORK | TYPICAL DUCTWORK |
2. PREPARE THE INSTALLATION
Make sure that the following items are included:
-Insert
-Accessories:
•Filters (3 for RMIP33 model, 4 for RMIP45 model)
•Bag of parts including:
(4)lock nuts, (1) wire clamp, (8) no. 8 x 3/4” standard screws, (2) wire connectors,
(2)no. 6 x 1/2” standard screws, (8) no. 8 x 3/8” screws. Discard items not used. Parts sold separately:
-Interior blower Model P5 includes blower,
-Interior blower Model P8 includes blower,
-
-
-Exterior blower assembly 331H, 332H, 335 or 336
-Halogen lights 120 V, 50 W, PAR 20 (2 for RMIP33 model and 3 for RMIP45 model)
-Custom hood liner Model RML3336S, RML3342S, RML4548S, RML4554S or RML4560S (optional)
-Backsplash RMP Series (optional)
-RMIPWC Remote control (optional)
-Baffle filters RBFIP Series (optional)
-Transitions, ducts (rigid and flexible), elbows, dampers, wall and roof caps. Refer to page 3 and 4 for a complete list of venting options and model numbers.
NOTE : During installation, protect countertop and/or cooktop.
- 5 -