
XL-5070, XL-5061, XL-5060, XL-5071, XL5050 specifications
The Brother XL series of sewing machines, including models XL-5051, XL-5050, XL-5071, XL-5060, and XL-5061, are crafted for both novice and experienced sewists seeking versatility and user-friendly features. These models are well-regarded for their reliability, ease of use, and a range of functionalities that cater to various sewing projects.One of the standout features across these models is the array of built-in stitches. Each model typically boasts around 50 unique stitch options, including utility stitches, decorative patterns, and quilting stitches. This diverse selection allows users to tackle a plethora of sewing tasks, from making garments to crafting home décor items.
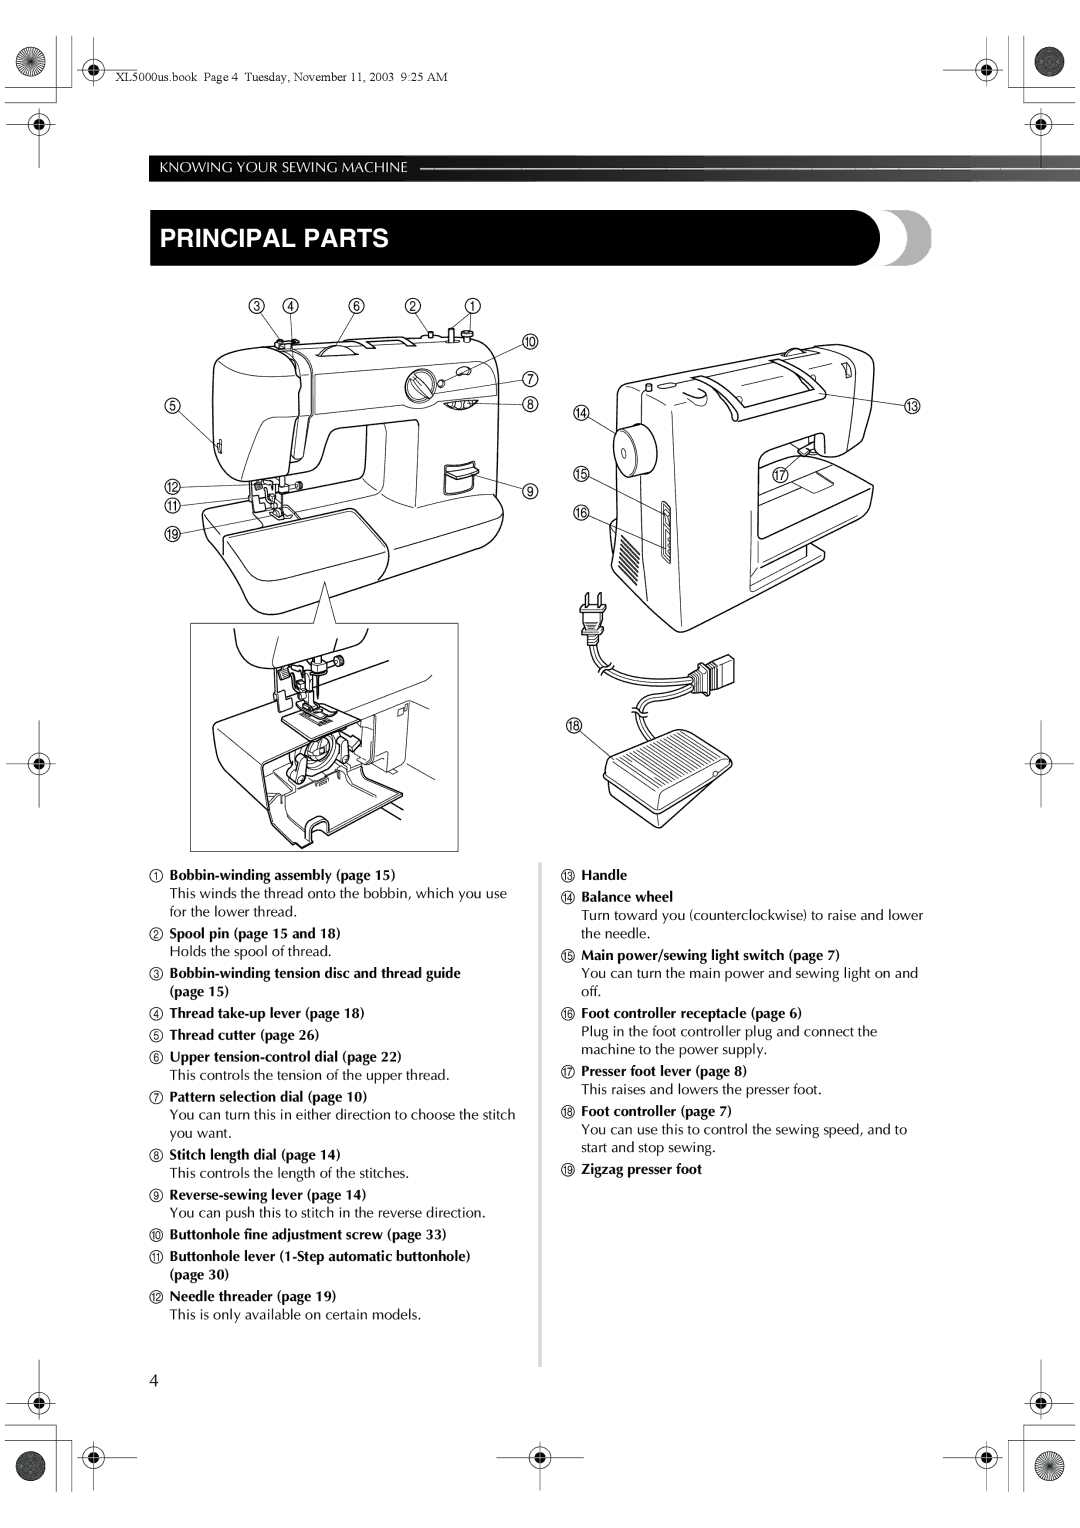
The Brother XL machines are equipped with an automatic needle threader, which simplifies the process of threading the needle, saving time and reducing frustration. This is particularly beneficial for beginners who may find manual threading challenging. Additionally, the machines offer a free arm option, which makes it easy to sew cuffs, collars, and other hard-to-reach areas.
Another significant technology found in the XL series is the adjustable stitch width and length settings. This feature gives users creative control over their projects, allowing them to customize stitches for different fabrics and styles. The machines also accommodate various fabric types, from lightweight cotton to heavier denim, making them highly versatile.
In terms of design, the Brother XL models are user-friendly, featuring straightforward dials and controls that simplify the sewing process. The LED lights illuminate the sewing area, ensuring that users can see their work clearly, even in low-light conditions.
Sewing speed is another key characteristic of these machines. They typically operate at a considerable speed, allowing for efficient completion of projects. Coupled with a sturdy build quality, the Brother XL series provides a smooth sewing experience.
Finally, these machines include convenient accessories such as multiple presser feet, a seam ripper, and a user manual, enhancing their overall value. With their combination of technology, features, and ease of use, the Brother XL-5051, XL-5050, XL-5071, XL-5060, and XL-5061 are excellent choices for anyone looking to explore the world of sewing while enjoying reliable performance.