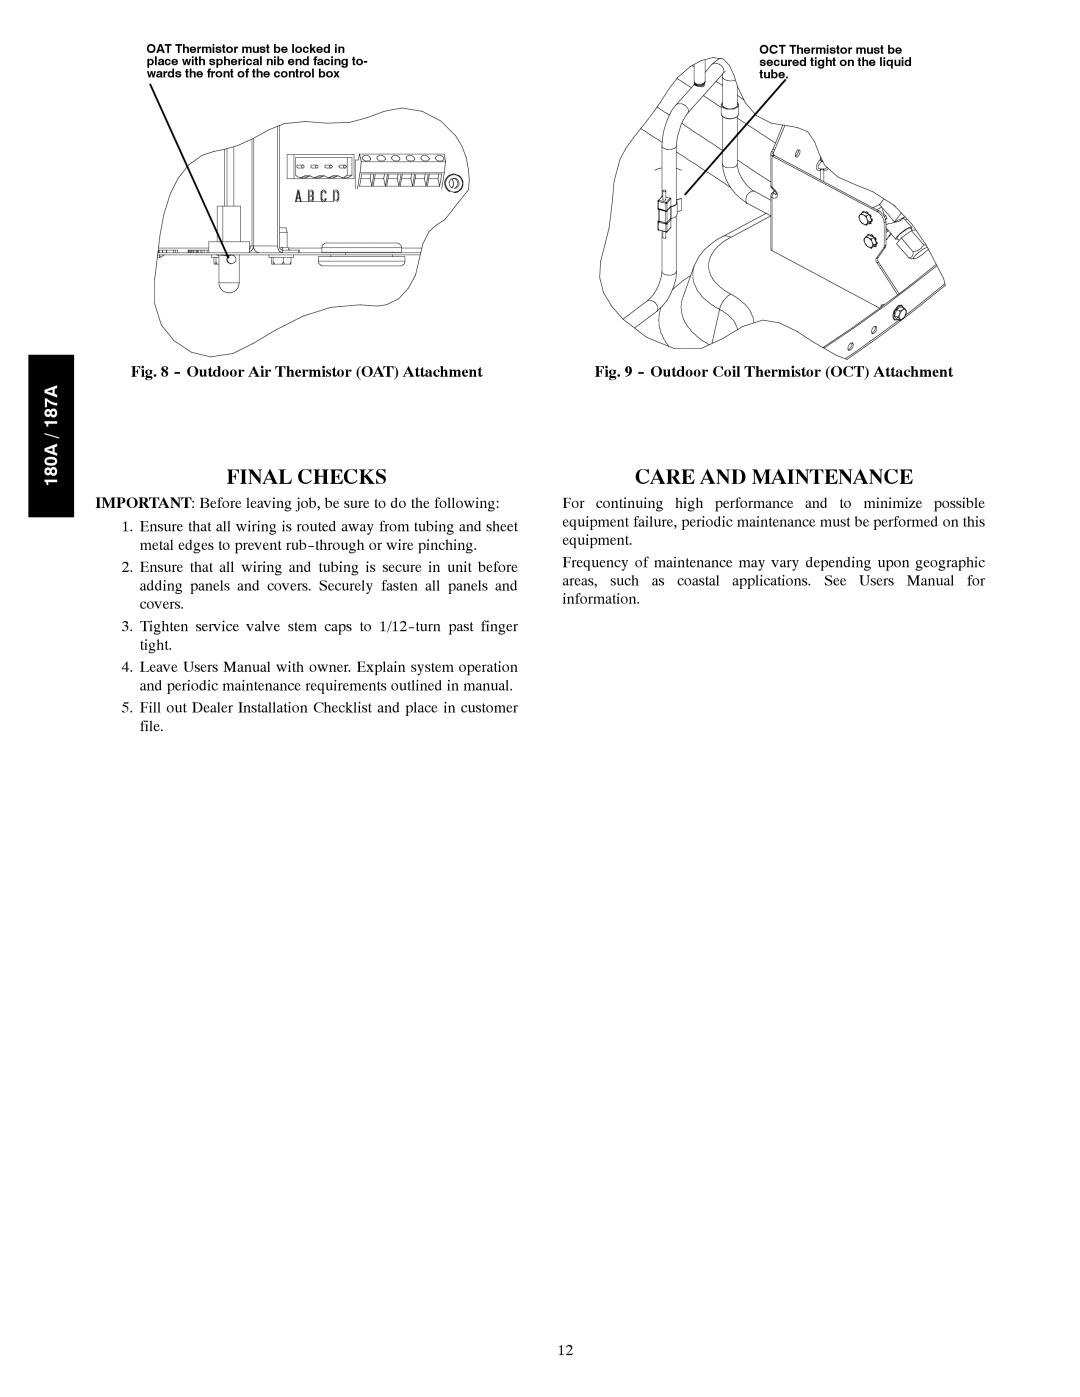
OAT Thermistor must be locked in place with spherical nib end facing to- wards the front of the control box
OCT Thermistor must be secured tight on the liquid tube.
180A / 187A
Fig. 8 - Outdoor Air Thermistor (OAT) Attachment
FINAL CHECKS
IMPORTANT: Before leaving job, be sure to do the following:
1.Ensure that all wiring is routed away from tubing and sheet metal edges to prevent
2.Ensure that all wiring and tubing is secure in unit before adding panels and covers. Securely fasten all panels and covers.
3.Tighten service valve stem caps to
4.Leave Users Manual with owner. Explain system operation and periodic maintenance requirements outlined in manual.
5.Fill out Dealer Installation Checklist and place in customer file.
Fig. 9 - Outdoor Coil Thermistor (OCT) Attachment
CARE AND MAINTENANCE
For continuing high performance and to minimize possible equipment failure, periodic maintenance must be performed on this equipment.
Frequency of maintenance may vary depending upon geographic areas, such as coastal applications. See Users Manual for information.
12